


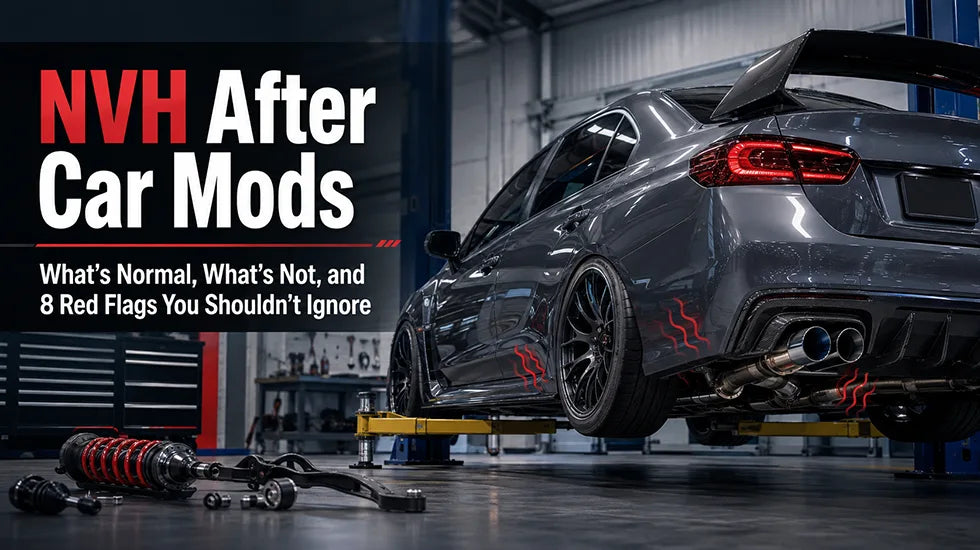
You finish the install, lower the car, and take the first drive. The exhaust has more bark. Fine. The suspension feels tighter. Expected. Then you notice a buzz through the seat at 2,000 rpm, a dull boom on the highway, or a sharp knock when the right-front wheel crosses a broken section of pavement.
Now the fun part stops for a minute.
Is that simply the new personality of a modified car, or did something go wrong during the install?
That is the problem with NVH after car mods. More sound, vibration, and road feedback can absolutely come with performance parts. But “aftermarket parts are louder and stiffer” is not a diagnosis. An exhaust pipe touching a crossmember does not become acceptable because the muffler is stainless steel. A coilover that repeatedly slams through its available travel is not automatically “race-car feel.”
The trick is learning to separate intentional feedback from mechanical distress. Listen to what changed. Figure out exactly when it happens. Find where you feel it. Then see whether the symptom stays stable or gets worse.
Quick Answer: When Is NVH After a Modification Normal?
- Usually acceptable: A deeper exhaust note, a narrow band of mild highway resonance, more road texture through the chassis, or a firmer response over bumps that stays predictable and stable.
- Inspect the installation: New metallic rattles, repeated clunks, strong vibration through the floor or pedals, obvious exhaust contact, loose hardware, or suspension impacts that feel like the chassis is being struck.
- Use the trigger: A symptom tied to engine rpm tells you something different from one tied only to road speed, steering input, or suspension movement.
- Watch progression: A new characteristic that stays consistent is less concerning than a vibration or noise that becomes noticeably stronger over the next few drives.
- Do not diagnose by volume alone: Loud can be intentional. Loose, rubbing, grinding, leaking, or progressively worsening behavior is not.
What Does NVH After Car Mods Actually Mean?
NVH stands for Noise, Vibration, and Harshness. They often arrive together, which is why drivers lump everything into one sentence: “The car feels rougher now.” That description is understandable, but it is terrible for diagnosis.
Break the complaint apart.
Noise, Vibration, and Harshness Are Not the Same Thing
Noise is what you hear. Exhaust tone, drone, rasp, ticking, rattling, clunking, tire roar, spring noise—those all live primarily in the audible world.
Vibration is what you physically feel. It might come through the steering wheel, seat base, shifter, pedals, floorpan, mirror, or even a door panel that suddenly starts buzzing.
Harshness is a little harder to pin down because it describes the character of the impact. A factory suspension might cross an expansion joint with a rounded thump. A much firmer setup may turn the same event into a short, sharp hit. That sharper response is what people often describe when talking about harshness after coilovers.

Technician’s rule: Before you ask, “Is this too much NVH?” ask, “Is this noise, vibration, harshness—or a combination of the three?” The answer changes where you start looking.
Why Performance Parts Change What You Hear and Feel
A factory vehicle is full of compromise. Rubber isolators, compliant bushings, large mufflers, resonators, soft mounting points, generous suspension travel, and conservative spring and damper calibration all help keep the cabin civil.
Performance modifications can alter some of those filters.
Performance exhaust headers can change exhaust pulse character and how much mechanical sound you hear near the engine. Cat-back exhaust systems can change overall volume and resonance farther downstream. Turbo applications using performance downpipe options can change the sound coming from the front section of the exhaust.
The intake side is similar. Cold air intake kits can make induction and turbocharger sound much easier to hear even when they are not creating a chassis vibration.
Then there is suspension. Replacing soft factory components with adjustable coilover suspension can make road texture and body movement more obvious to the driver.
None of that means more NVH equals more performance. A pipe hitting the body is still a pipe hitting the body. A loose end link does not improve turn-in. Extra feedback only makes sense when it comes from the intended behavior of the part.
Factory vs Modified: What Usually Changes NVH?
| Area | Factory Setup | After Modification | What You May Notice | What Is Not Explained by the Upgrade Alone |
|---|---|---|---|---|
| Exhaust muffling | Designed around factory sound targets | Flow path, muffler volume, resonator layout, and tubing can differ | More volume, deeper tone, stronger cold-start sound | Metal-on-metal rattle or pipe contact |
| Exhaust isolation | Factory hanger and clearance strategy | Pipe position, hanger preload, or hanger stiffness can change | A little more low-frequency feedback | Strong floor vibration caused by physical contact |
| Spring and damper calibration | Usually biased toward broad comfort and load conditions | Application-specific spring rates and damping calibration | Less body motion and more road texture | Repeated topping, bottoming, or a loose-component clunk |
| Ride height | Factory suspension geometry and travel | Lower ride height can change available travel and geometry | Sharper response and lower body position | Tire/body contact or violent impacts on ordinary bumps |
| Cabin sound | Strong emphasis on isolation | More engine, intake, exhaust, tire, or suspension feedback may pass through | A more mechanical driving experience | A new grinding, scraping, or repetitive knocking sound |
The exact spring rate, damper force, exhaust diameter, hanger stiffness, ride height, and clearance depend on the vehicle and parts being installed. That is why a universal statement such as “coilovers should feel 30% stiffer” or “an aftermarket exhaust should vibrate this much” is useless.
There is a better test: character, trigger, location, progression.
Normal vs Abnormal NVH After Modifications: Quick Reference
| What You Notice | Often Acceptable | Recheck the Install |
|---|---|---|
| Louder exhaust | Tone changes predictably with rpm and throttle | Sharp metallic buzz, tapping, or rattle |
| Highway drone | Appears in a narrow rpm/load range and disappears outside it | Whole floor shakes or a pipe strikes the chassis |
| Firmer ride | More texture and faster body control | Violent impact on normal road joints or repeated bottoming |
| Suspension sound | Some additional mechanical noise depending on the mounting design | One-corner clunk, grinding, or loose knocking sound |
| Steering feedback | Road texture becomes easier to feel | New shaking, pulling, wandering, or unstable behavior |
| New symptom after install | Stable, repeatable, and linked to a predictable condition | Gets noticeably worse with each drive |
Noise After Car Mods: What’s Normal and What Isn’t?
A Louder Exhaust Note Is Not the Same as a Rattle
Start simple. If you install a less restrictive exhaust system and it sounds deeper when you open the throttle, that is not surprising.
A metallic rattle is different.
Rattles usually have edges to them. They buzz, chatter, tap, or ring. They may appear during cold start, on deceleration, over bumps, or in one small rpm window. That behavior makes me think about contact and movement before I think about muffler volume.
Look at heat shields. Look at clamps. Check brackets, tunnel braces, rear valances, hanger rods, and the clearance around the pipes. A shiny witness mark on a black-coated brace can tell you more than ten minutes of standing behind the car revving it.

Drone and Resonance Usually Have a Narrow Trigger
Drone is the low-frequency pressure you hear and sometimes feel when the exhaust system strongly excites the cabin at a particular engine speed and load. A car can sound excellent at 3,500 rpm under acceleration but become tiring at 1,900 rpm in top gear with light throttle.
That narrow operating window matters.
If a boom appears between roughly 1,800 and 2,200 rpm in your particular driving scenario, then fades when you downshift and move the engine outside that range, resonance becomes a more useful line of investigation than “something is loose.” The numbers are only an example; every engine, exhaust length, transmission ratio, cabin, and muffler combination behaves differently.
If the same rpm range produces a sharp metallic vibration instead of a smooth low-frequency boom, get underneath the car and start checking clearances.
A Tick Can Be an Exhaust Leak, Not “Performance Sound”
Headers and front exhaust work add another noise that gets misdiagnosed constantly: ticking.
A small leak near a flange can make a sharp pulse that follows engine speed. Do not automatically blame the valvetrain just because the sound comes from the engine bay. Look for soot trails, disturbed gaskets, loose fasteners, and other physical leak signs.
If you are already chasing suspicious residue around a connection, this guide on black soot around an exhaust flange explains how to separate an active leak pattern from ordinary installation grime.
Vibration After Exhaust Install: Normal Feedback or a Fitment Problem?
Vibration after exhaust install gets messy because the exhaust is a long structure hanging underneath another long structure—the vehicle body. Move one joint a few degrees near the front and the rear of the system can move much farther than you expect.
Do not start by buying another muffler. Start by reproducing the vibration.
Start With When the Vibration Happens
- At idle: Note whether the vibration happens immediately from a cold start or only after the car warms up.
- While parked and revving: See whether the symptom can be reproduced without road speed.
- Under load: Note whether it appears only when the engine twists against its mounts during acceleration.
- At one rpm band: Record the approximate range rather than saying “around cruising speed.”
- At one road speed: Compare different gears at the same speed so engine rpm changes while road speed stays similar.
This little test can save an hour of crawling around underneath the wrong end of the car.
RPM-Related Vibration Is Different From Road-Speed Vibration
Here is a simple garage test.
Suppose the car shakes at 65 mph in sixth gear with the engine near 2,000 rpm. Drop a gear safely and hold roughly the same road speed. If the vibration moves or disappears as engine rpm changes, the engine/exhaust/drivetrain side deserves more attention.
If it stays tied closely to 65 mph even though engine rpm changes significantly, wheels, tires, hubs, axles, driveshaft components, and other road-speed-related sources move higher on the list.
That is not a magic formula. It is a way to stop guessing.
Check Exhaust Clearance Before Blaming the Muffler
The exhaust should have room to move on its hangers without banging into surrounding parts.
Inspect the areas where packaging gets tight:
- Crossmembers and tunnel braces
- Heat shields
- Rear subframe areas
- Axles and suspension links
- Fuel-tank shielding
- Bumper and valance openings around the tips
- Oxygen-sensor wiring near hot or moving parts

Do not judge clearance with the system hanging from a jack. Support the exhaust only enough to remove excess weight while adjusting it. Then remove the support and see where the system actually wants to sit.
If your rear section is visually crooked as well as vibrating, work through this cat-back exhaust alignment guide. Hanger preload and upstream joint rotation can move more of the system than the tailpipe alone suggests.
Why an Exhaust Can Fit Cold and Vibrate After a Drive
Metal grows as it heats. The entire exhaust does not expand neatly in one direction, either. Flanges, bends, slip joints, hangers, and the way each section is constrained decide where that movement ends up.
That means an area with visible clearance in the garage can become much tighter after the exhaust reaches operating temperature.
If the vibration shows up only after 15 or 20 minutes of driving, let the system cool and look for fresh contact marks. Do not put your hands around hot tubing trying to prove a theory.
A new exhaust may also produce odor during its early heat cycles. If smell or smoke is part of what made you stop and inspect the car, the burning smell after exhaust installation guide explains which heat-cycle symptoms deserve more attention.
Hangers and Clamp Position Matter More Than They Look
Here is a beginner mistake I see in installation logic all the time: one tip finally looks straight, so the nearest clamp gets hammered tight. Then the installer fights every other joint around that locked position.
Bad move.
An exhaust should sit naturally before final tightening. Rubber isolators should support it, not drag a badly positioned pipe into alignment. If one hanger is stretched hard toward the front and another is twisted sideways, the system is carrying preload before the engine even starts.
Loosen the adjustable connections enough to release that stress. Align from the first movable joint toward the rear. Keep adequate engagement at slip joints. Then tighten progressively using the torque requirements for the hardware being installed.
Shop-Floor Case: Diagnose the Trigger Before the Part
When I explain post-install vibration diagnosis, I use a case like this because it catches people out. Picture a V8 street car that develops a buzz through the seat and center console after exhaust work. The driver blames the mufflers immediately.
The first useful clue is that the car is almost quiet at idle. Bring the engine slowly through roughly 1,800–2,100 rpm while parked, though, and the buzz appears. Hold the same engine speed under light road load and it gets stronger.
I would not start replacing exhaust components at that point. I would reproduce the rpm, then inspect the front-to-middle section for contact. In this representative diagnosis, the real problem is a small clearance issue near a brace. Engine movement under load closes the remaining gap, the pipe touches the structure, and the chassis becomes a giant speaker.
Move the pipe back into a neutral position, restore clearance, secure the system correctly, and the metallic buzz disappears while the deeper exhaust tone remains.
That is why I diagnose the trigger before I diagnose the part.
Harshness After Coilovers: Expected Trade-Off or Bad Setup?
The other side of this conversation is suspension. Harshness after coilovers is expected to some degree when the new setup uses firmer spring and damping characteristics, less compliant mounting hardware, a lower ride height, or some combination of those changes.
But there is a huge difference between a car feeling more tied down and a car feeling like somebody welded the suspension solid.
A Firmer Ride Is Expected; A Violent Ride Is Not Automatically Normal
A performance-oriented suspension can make an expansion joint easier to feel. Body roll may happen faster and stop sooner. Pitch under braking may be reduced. Road texture can come through the steering wheel and seat more clearly.
That is different from a suspension that crashes over every ordinary bump.
If the car repeatedly hits with a sharp bang, skips sideways on broken pavement, or feels as if one corner has almost no compliance, do not accept “coilovers ride rough” as the final answer.

Spring Rate, Damping, and Isolation Change Different Parts of the Ride
Spring rate affects how much force is required to compress the spring through a given amount of travel.
Damping controls the speed of suspension movement. Too little control can feel floaty or bouncy. Too much damping for the road and setup can make the wheel reluctant to move quickly enough over short, sharp inputs.
Isolation determines how much high-frequency vibration gets filtered before it reaches the body. A change in top-mount or bushing design can make the suspension sound more mechanical even if wheel control improves.
One knob does not fix all three.
Too Little Bump Travel Can Feel Like an Extremely Stiff Spring
This is where lowered cars get themselves into trouble.
A car can have perfectly reasonable springs and still ride terribly if the operating ride height leaves inadequate usable bump travel. The suspension moves, hits the end of its available range or engages the bump stop aggressively, and the driver feels one ugly impact.
That impact often gets blamed on “stiff springs.”
Check the ride height against the suspension design. Look for tire-to-body contact. Inspect bump-stop condition and available movement. Make sure no suspension link is contacting another component through its travel.
Lower is not automatically better. Once usable geometry and travel disappear, you are trading suspension function for parking-lot stance.
Preload and Ride Height Are Not the Same Adjustment on Every Coilover
Here is another place where internet advice gets dangerous.
Somebody posts, “Back off the preload and it will ride softer,” and ten people copy the setting without checking how their particular coilover is built.
Do not do that.
Coilover architectures differ. On some designs, spring preload and ride-height adjustment are handled separately. Other designs use a different relationship between the spring perch, body length, and available travel. Follow the setup procedure for the actual suspension you installed instead of treating every threaded shock body as the same product.
If you are trying to decide whether an early ride-height change is normal settling or a setup problem, read the coilover settling and ride-height guide before changing multiple adjustments at once.
A Clunk After Coilover Installation Is Different From Harshness
Harshness is the character of the impact. A clunk is an event.
One solid knock from the right-front corner every time you enter a driveway should make you inspect that corner, not debate spring rates for another week.
Check areas such as:
- Upper mounting hardware
- Top nuts and mounting plates
- Spring seating
- Adjustment collars
- Sway-bar end links
- Brake-line and ABS-wire routing
- Nearby chassis and wheel/tire clearance
- Fasteners disturbed during installation
Use the correct tightening procedure for the vehicle and suspension hardware. “I hit it with the impact until it stopped moving” is not a torque specification.
Use the Trigger to Find the Source: RPM, Speed, Steering, or Bumps
This is the diagnostic matrix I wish more people used before ordering replacement parts.

| Trigger | Where I Would Start Looking | Useful Next Test |
|---|---|---|
| Same engine rpm while parked | Engine/exhaust-related source | Reproduce the rpm safely and inspect for exhaust movement/contact |
| Only during acceleration | Engine movement, exhaust movement, drivetrain load | Compare light throttle with heavier load at similar rpm |
| Follows road speed | Wheel/tire, hub, axle, driveshaft, road-speed-related components | Change gears while holding similar road speed where safe |
| Only over bumps | Suspension travel, mounts, end links, clearances | Compare left-wheel, right-wheel, and both-wheel impacts |
| While steering | Top mount, bearing, spring movement, link or tire clearance | Listen at low speed while changing steering angle |
| Only after warming up | Heat-related exhaust movement or clearance | Inspect for witness marks after the system cools |
| One corner only | Localized suspension, wheel, or brake area | Inspect that corner before changing whole-car settings |
Correlation is not proof. This table tells you where to start. It does not let you condemn a wheel bearing, damper, exhaust, or engine mount from the driver’s seat.
A 10-Minute NVH Check After Installing Exhaust or Coilovers
Step 1: Compare It With the Car Before the Modification
Was the symptom absolutely new? Or did the new part simply make an old vibration easier to hear?
That distinction matters more than people think.
Step 2: Reproduce the Trigger
Write down the condition:
- Cold or hot
- Engine rpm
- Road speed
- Gear
- Light or heavy throttle
- Straight or turning
- Smooth road or bump
“It vibrates sometimes” gives you nothing. “It buzzes through the passenger floor at 1,900–2,100 rpm after warming up” gives you a starting point.
Step 3: Inspect the Area You Just Worked On
If the car was quiet yesterday and the exhaust was replaced today, inspect the exhaust before assuming the differential suddenly failed.
If you changed the front suspension, inspect everything disturbed during that work before adjusting rear damping.
Start with the obvious. Then widen the search.
Step 4: Check Fasteners Correctly
Check fasteners against the service information and installation requirements for the hardware involved.
Do not turn every bolt another quarter turn “just in case.” Some assemblies require specific procedures, vehicle load conditions, locking hardware, or torque values. More torque is not automatically more secure.
Step 5: Look for Contact Marks
Fresh contact leaves clues:
- Bright polished metal
- Rubbed paint or coating
- A shiny patch on a heat shield
- Fresh scrape marks
- Powder or debris around a contact point
- Rubber isolators pulled noticeably off-center
Those physical marks are worth more than guessing from sound alone.
Step 6: Test Cold and Warm
This matters especially with exhaust complaints. If the symptom changes with temperature, record that fact rather than treating the hot and cold conditions as the same problem.
Step 7: Change One Variable at a Time
This is where people ruin their own diagnosis.
They lower the car another half-inch, turn every damper six clicks, change tire pressure, loosen a collar, and realign the exhaust—all before the next test drive.
Now the symptom changed. Great. Which adjustment fixed it?
No idea.
Change one meaningful variable. Test. Record the result. Then move on.
8 Red Flags I Would Not Dismiss as “Normal Modded-Car NVH”
- New metal-on-metal clunking after suspension or exhaust work.
- Grinding or scraping that follows wheel rotation, steering, or suspension movement.
- Exhaust contact with the body, brace, axle, or suspension.
- A vibration that becomes noticeably stronger over a short period.
- A loose or shifting exhaust or suspension component.
- Severe new steering-wheel shake that was not present before the modification.
- Repeated suspension bottoming or topping behavior during ordinary street driving.
- New pulling, wandering, instability, or steering behavior changes after suspension work.
If the vehicle becomes difficult to control, a component is visibly loose, or metal parts are grinding or striking each other, stop treating the symptom as a comfort complaint and inspect the mechanical problem first.
How to Reduce NVH Without Undoing the Modification
For Exhaust Systems: Fix Contact Before Chasing Drone
If the problem is a rattle, correct the physical problem first.
Realign the system. Remove hanger preload. Restore safe clearance. Check clamps and connections. Make sure the tips are not transferring vibration into the bumper.
If the exhaust is correctly supported and clear of surrounding parts but produces an objectionable low-frequency boom at steady cruise, then you are dealing with a different problem. Muffler and resonator layout, pipe dimensions, engine operating range, cabin acoustics, and system design all influence drone.
Sound-deadening material can reduce what reaches the cabin. It cannot fix an exhaust tube beating against a brace underneath the car.
For Coilovers: Return to a Known Baseline
When the ride feels wrong after suspension work, stop making random adjustments.
Return adjustable dampers to the recommended baseline for the specific kit when one is provided. Confirm ride height. Check spring seating and adjustment collars. Inspect mounting hardware and surrounding clearance. Then make measured changes from there.
If ride height changed enough to alter alignment, have the vehicle aligned for its intended use.
And do not chase comfort by blindly changing spring preload unless the suspension design and instructions tell you that adjustment is appropriate.
Fix the Source Before Adding Isolation
This is one of those rules that sounds obvious until you watch somebody cover a trunk floor in sound-deadening material while the muffler is touching the rear subframe.
Diagnosis first. Isolation second.
If the mechanical system is correct and the remaining noise is simply more than you want in a daily driver, then you can decide whether additional isolation, a different exhaust configuration, different suspension settings, or a different part better fits the way you use the car.
Is More NVH Always the Price of Better Performance?
No.
A louder car is not automatically faster. A harsher car is not automatically better in a corner. And a steering wheel that buzzes at cruise is not proof that the chassis is now “more connected.”
The goal depends on the build.
A weekend car can tolerate compromises that would drive you crazy during a 45-minute commute. A track-focused setup may prioritize response and control over isolation. A daily-driven street car still has to deal with potholes, freeway expansion joints, parking ramps, passengers, and hours of steady-state cruising.
I look for balance:
- Feedback without fatigue
- Control without constant impact
- Exhaust tone without unbearable cruise drone
- Lower ride height without throwing away usable suspension travel
- Mechanical connection without loose-part noise
A well-sorted modified car should feel intentional. You should be able to explain why it sounds and feels different.
“It started making a horrible noise after I touched it, but modified cars are like that” is not an explanation.
Frequently Asked Questions About NVH After Car Mods
Q1: What does NVH mean in a car?
A1: NVH stands for Noise, Vibration, and Harshness. Noise is mainly what you hear, vibration is mechanical movement you can feel through parts such as the seat or steering wheel, and harshness describes how sharp or unpleasant an impact or response feels.
Q2: Is more NVH normal after modifying a car?
A2: Some additional NVH can be normal after exhaust, intake, suspension, mount, tire, or other performance changes. It should still be predictable and consistent with the modification. New grinding, contact, loose-component noise, severe shaking, or rapidly worsening symptoms deserve inspection.
Q3: Why does my car vibrate after an exhaust install?
A3: Vibration after an exhaust install can come from resonance, pipe-to-body contact, hanger preload, joint alignment, heat-related movement, or another vibration source that became noticeable at the same time. First determine whether the vibration follows engine rpm, road speed, load, or temperature.
Q4: Is vibration after an exhaust install normal?
A4: Mild additional low-frequency feedback can occur with some exhaust configurations. Strong vibration through the floor, a metallic buzz, visible pipe contact, or a symptom that keeps becoming worse should not be dismissed as normal.
Q5: Why does my aftermarket exhaust vibrate at a certain RPM?
A5: A narrow rpm range can excite an exhaust or cabin resonance, but the same range can also increase exhaust movement enough to reveal a tight clearance. If the sound is a smooth low-frequency boom, resonance is more likely; if it is a metallic buzz or knock, inspect for contact.
Q6: Is exhaust drone the same thing as exhaust vibration?
A6: No. Exhaust drone is mainly an acoustic problem, usually experienced as a strong low-frequency cabin boom at a particular rpm and load. Vibration is physical movement you can feel. Resonance can make both occur at the same time.
Q7: Can an exhaust touching a heat shield cause a rattle or vibration?
A7: Yes. Even light contact can transmit vibration into a thin heat shield or body panel and create a surprisingly loud buzz. Inspect for fresh witness marks and check the clearance with the exhaust sitting naturally on its hangers.
Q8: Why did my coilovers make my car ride so harsh?
A8: Harshness can be influenced by spring rate, damping, reduced suspension travel, ride height, tire setup, top-mount isolation, and road conditions. If the car repeatedly crashes over normal bumps, inspect setup and available travel instead of assuming every harsh impact is normal.
Q9: Are coilovers supposed to make the ride bumpy?
A9: A performance-oriented coilover setup can feel firmer and transmit more road texture than the factory suspension. It should not automatically feel uncontrolled, violently bouncy, or as if the suspension is repeatedly hitting a hard stop.
Q10: Why do my coilovers clunk after installation?
A10: A new clunk can come from mounting hardware, top-mount components, spring seating, adjustment collars, sway-bar end links, nearby contact, or another part disturbed during the installation. A repeated one-corner clunk deserves a physical inspection.
Q11: Do new coilovers need time to settle?
A11: Some change in ride height can occur after installation as the suspension is cycled and components seat. Settling should not be used to explain loose hardware, grinding, severe clunks, tire contact, or a suspension that behaves unpredictably.
Q12: Can incorrect coilover preload cause ride problems?
A12: An incorrect setup can create problems, but preload works differently across coilover designs. Do not copy a universal preload adjustment from another vehicle or kit. Follow the setup method for the suspension installed on the car.
Q13: Can coilover damping be set too stiff?
A13: Yes. An unsuitable damping setting can make the suspension react poorly to short, sharp road inputs. Start from the recommended baseline for the specific coilover when available and make small, measured changes rather than moving directly to an extreme setting.
Q14: Do I need an alignment after installing coilovers?
A14: Ride-height and suspension-geometry changes can alter alignment. After installing coilovers or making a meaningful ride-height change, check alignment and set it for the vehicle’s intended street or performance use.
Q15: How can I tell exhaust vibration from wheel or driveline vibration?
A15: Compare engine rpm with road speed. A vibration that can be reproduced at the same engine rpm while the vehicle is stationary points you toward an engine or exhaust-related source. A vibration that follows road speed despite a gear change deserves inspection of road-speed-related components.
Q16: Should I stop driving if a new vibration appears after a modification?
A16: A mild, stable change in feedback can be inspected methodically. Stop treating it as normal NVH if the vibration is severe or rapidly worsening, a component is visibly loose, metal parts are grinding or contacting, or steering and vehicle control have changed.
The Best Modified Cars Feel Intentional, Not Broken
There is nothing wrong with accepting some extra sound, road texture, and mechanical feedback when you modify a car. For a lot of us, that extra connection is part of the reason we started changing things in the first place.
Just do not let that enthusiasm lower your mechanical standards.
When dealing with NVH after car mods, remember four things: character, trigger, location, progression.
Listen to the character of the symptom. Find the condition that triggers it. Work out where it enters the car. Then watch whether it remains stable or becomes worse.
If the new behavior is predictable, stable, and consistent with the hardware you installed, it may simply be part of the car’s new character.
If it knocks, rubs, grinds, shifts, gets rapidly worse, or makes the vehicle harder to control, get the car back in the air and find out why.

Steven Chen
Automotive Performance Specialist | Engine & Exhaust Systems
Steven focuses on practical engine performance, exhaust fitment, and real-world upgrade paths for classic and modern enthusiast vehicles. He reviews small-block Ford, LS, truck, and street/strip applications with one goal in mind: helping builders choose parts that actually work together. His philosophy: "Good power starts with the right combination, not the biggest part."











