


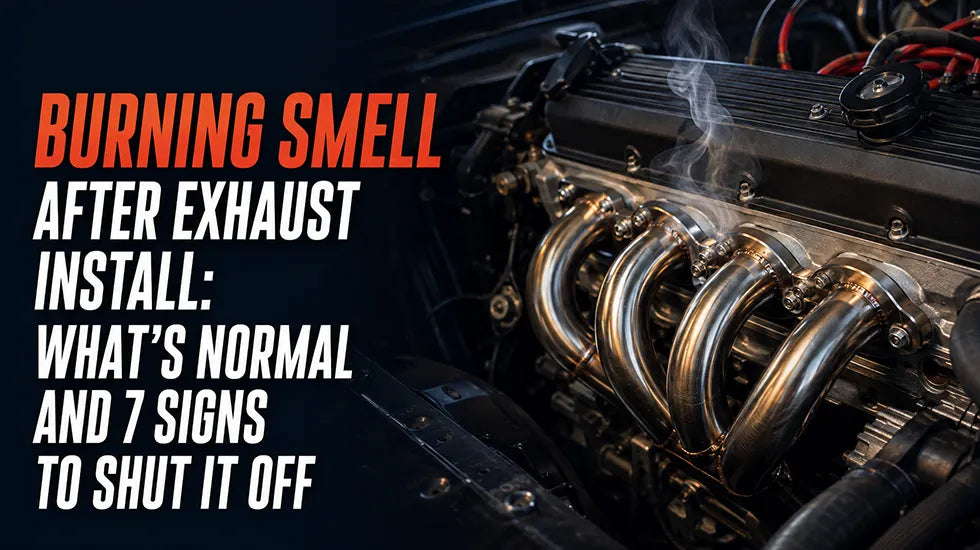
You finish the last clamp, lower the car, and turn the key. Ten seconds later, a thin ribbon of smoke curls out of the engine bay. Then the smell hits—hot oil, chemicals, maybe something that reminds you of melting plastic.
Your first thought is not horsepower. It is, “Did I just set my car on fire?”
Here is the honest answer: a burning smell after exhaust install can be a normal part of the first heat cycle. Manufacturing oil, corrosion protection, fingerprints, penetrating fluid, and fresh coatings can all smoke when the metal gets hot. But that does not mean every smoky header deserves the usual internet answer: “Just let it burn off.”
Smoke that grows thicker, returns from one exact spot, smells like plastic, or appears with dripping fluid needs immediate attention. The location and behavior of the smoke matter far more than how dramatic it looks during the first few seconds.
Quick Answer
- Usually normal: A light oily or chemical odor, accompanied by thin smoke spread across a new pipe, that becomes weaker within the first few heat cycles.
- Inspect before driving: Smoke repeatedly rising from one tube, one flange, the rear of a valve cover, or an area near an O2 sensor wire.
- Shut the engine off: Smoke getting thicker, fresh fluid dripping onto the exhaust, melting plastic, an electrical odor, visible flame, misfires, warning lights, or fumes entering the cabin.
- Do not use mileage alone: Normal residue burns away progressively. A real leak or heat-contact problem usually returns every time the exhaust gets hot.
Why a New Exhaust Can Smell or Smoke on First Startup
New exhaust parts may look clean when they come out of the box, but clean-looking metal is not necessarily residue-free metal. Tubes are cut, bent, welded, polished, coated, packed, and handled before they ever reach your garage.
Once exhaust gas starts heating those parts, anything left on the surface begins to cook. Headers react especially quickly because their primary tubes sit close to the exhaust ports and heat up much faster than the rear muffler section.
Manufacturing Oil and Corrosion Protection
Metalworking oil is commonly used during cutting and tube-forming operations. Bare steel parts may also receive a light corrosion inhibitor before shipping. Neither layer needs to be visibly wet to produce an odor during the first heat cycle.
This type of burn-off usually creates thin, pale smoke over a relatively broad area. It should be strongest during the first startup, weaker after the system cools, and weaker again during the next heat cycle.
A large number of people asking why their new headers smell are simply experiencing this process. The key is that the smoke fades. It should not keep rebuilding from one wet point after the rest of the tube has stopped smoking.
Fingerprints, Grease, and Installation Residue
Headers do not have to be dripping with oil to smell. Dirty gloves, greasy palms, a workbench covered in old lubricant, or a rag previously used around the engine can leave a film on the tubes.
Then there are the chemicals used during removal. PB Blaster, Liquid Wrench, WD-40, brake cleaner residue, and excess anti-seize can land on the new exhaust. The first time the system reaches temperature, that overspray has to go somewhere. It becomes odor and smoke.
Technician’s Note: Do not spray more cleaner onto a hot or smoking header. Shut the engine down, allow the entire system to cool, and clean it only with a product approved for the finish. A glowing-hot primary tube can ignite vapor from a flammable aerosol.
Paint, Ceramic Coating, and Muffler Packing
Some header coatings release an odor while completing their first heat cycles. Painted steel headers can smoke as the coating cures, and low-quality shipping paint may discolor or flake once it sees real exhaust temperature. Ceramic-coated parts may still smoke if handling residue was left on the surface.
Farther downstream, a new muffler or resonator may give off a different hot smell as internal packing material settles. Header wrap can also smoke during its first heat cycle, particularly if it was installed wet or treated with a coating.
Follow the curing directions supplied with the part. “New coating” is not a universal excuse for unlimited smoke.
Burning Smell After Exhaust Install: Normal Burn-Off or a Real Problem?
Forget the temptation to diagnose this with your nose alone. Odors are subjective. One owner calls it burning oil; the next calls the exact same odor hot paint.
Use four clues together: where it starts, what it smells like, whether it is fading, and what was moved during installation.

1. Find Where the Smoke Actually Starts
Stand clear and observe the system from above or beside the vehicle. Never crawl under a running car supported only by a jack, and never reach into the engine bay to trace smoke around hot headers.
- Thin smoke across several new tubes: More consistent with manufacturing or handling residue.
- Smoke from one header primary: Look above that tube for oil, coolant, wiring, or insulation contact.
- Smoke near a flange: Check for a fluid leak, gasket problem, or residue trapped around the fasteners.
- Smoke below a valve cover corner: Suspect oil seeping onto the header.
- Smoke around an O2 sensor harness: Shut it off and inspect the wire routing after the system cools.
- Smoke exiting the tailpipe: Diagnose it separately from smoke rising off the outside of the exhaust.
Hot air moves smoke upward and rearward. The spot where you see the cloud is not always the spot where the problem began. Trace it against the airflow after the vehicle has cooled.
2. Separate the Odors
| Odor or Symptom | Likely Source | What to Check |
|---|---|---|
| Light oily or chemical smell | Machining oil, corrosion inhibitor, penetrating fluid, or coating | Confirm that smoke is broad, light, and decreasing |
| Strong cooked-oil smell | Engine oil spilled or leaking onto a hot pipe | Valve covers, oil filter, dipstick tube, oil cap, and areas above the smoke |
| Sweet odor with steam | Coolant leak or spilled coolant | Hoses, clamps, reservoir level, and nearby fittings |
| Burning rubber or plastic | Wire loom, spark plug boot, hose, splash shield, or hanger touching the exhaust | Heat clearance and signs of softening, blistering, or shiny melted material |
| Sharp electrical odor | Overheated wire insulation, shorted wiring, or a starter cable near a header | Shut down immediately; inspect wiring only after cooling |
| Raw exhaust in the cabin | Upstream flange, gasket, collector, slip joint, or O2 bung leak | Soot, ticking, loose fasteners, gasket alignment, and joint sealing |
3. Watch the Trend, Not Just the First Cloud
Normal residue is finite. Once it burns away, the smoke should decrease.
That gives you a useful rule: fading smoke suggests residue; rebuilding smoke suggests a continuing source. If the same area smokes every time the engine reaches temperature, something may be dripping onto it or resting against it.
Do not keep extending the idle time because someone online said their headers smoked for a week. They may have driven ten minutes during that week. They may also have ignored a valve cover leak for seven days.
4. Remember What You Moved During the Installation
A header installation rarely involves only the header. O2 sensors get unplugged. Spark plug wires get pushed aside. Heat shields are removed or bent. Starter wiring may be loosened. Underbody panels sometimes hang down while a mid-pipe is positioned.
Before the first road test, inspect:
- O2 sensor connectors and harness routing
- Spark plug wires and boots
- Starter cable and nearby power wiring
- Transmission cooler and fluid lines
- Brake and fuel lines
- Heat shields and underbody insulation
- Rubber exhaust hangers
- Plastic splash shields and bumper trim
OEM Manifolds vs. Aftermarket Headers: Why the Heat Feels Different
A factory cast-iron manifold and a set of tubular headers both carry hot exhaust gas, but they do not release heat into the engine bay in exactly the same way. Tubular primaries offer much more exposed surface area. Depending on material, wall thickness, coating, airflow, engine load, and air-fuel ratio, nearby components may see a different heat environment after the swap.
| Characteristic | Factory Cast Manifold | Aftermarket Tubular Headers | Why It Matters After Installation |
|---|---|---|---|
| Construction | Thick cast iron with compact runners | Thinner individual steel or stainless tubes | Headers respond quickly to exhaust temperature and expose more hot surface area |
| Typical surface temperature | Varies heavily by shielding, load, and measurement point | Often around 300–600°F at idle and 500–900°F in street driving; hard use may exceed 900°F | Residue can smoke quickly, while nearby plastic and wiring need real clearance |
| Factory shielding | Usually designed with model-specific shields | May use a coating, wrap, separate shield, or no shield | Original wire routing may no longer provide enough heat protection |
| Clearance | Engine-bay packaging validated by the vehicle manufacturer | Depends on tube routing, engine mounts, drivetrain movement, and installation position | A wire that clears while parked may touch when the engine moves under torque |
| First-cycle odor | Usually already cured after years of service | May include machining oil, coating, fingerprints, or shipping protection | A temporary odor is more common after installing new parts |
Those temperature figures are working ranges, not pass-or-fail numbers. Sensor location, surface finish, engine load, ignition timing, mixture, and airflow can move the reading substantially. For a closer look at those variables, read our guide to normal exhaust header temperatures under idle and driving conditions.
If you are replacing a cracked manifold or building a freer-flowing system, Flashark offers application-specific performance exhaust headers for street and truck applications. Fitment still matters more than the shine in the product photo—verify the model, year, engine, drivetrain, downstream connection, and emissions requirements before installation.
7 Red Flags That Mean Shut the Engine Off Now
Fire-Risk Warning
Do not lean over a smoking engine bay or crawl under a running vehicle to get a closer look. If smoke is increasing, shut the engine off. Move people away, keep the hood closed if active fire is suspected, and use a properly rated fire extinguisher only if it is safe to do so.
1. You See Flame or Glowing Material
A tiny flame is not part of the curing process. Neither is a glowing piece of insulation. Shut the engine off immediately. Do not reach in with a shop rag, and do not throw water onto an unknown fluid or electrical fire.
2. The Smoke Gets Thicker
Surface residue normally becomes less dramatic as it burns away. Smoke that thickens after 30 seconds, disappears at shutdown, and returns even stronger at the next startup points toward a continuing source.
3. Oil or Coolant Is Dripping Onto the Exhaust
Fresh oil on a header can ignite under the wrong conditions. Coolant on a hot tube may flash into steam and hide the source of the leak. Either way, continuing to idle the engine is the wrong test.
Check the fluid level only after following the vehicle manufacturer’s safe procedure. Never remove a hot cooling-system pressure cap.
4. A Wire, Boot, Hose, or Plastic Panel Is Melting
Plastic that has gone glossy, sagged, blistered, or pulled into strings has already exceeded its happy temperature range. The same goes for a spark plug boot that has hardened or split against a header tube.
Heat sleeves can help in the correct application, but they do not fix a wire physically lying on the exhaust. Route and retain the component first. Add thermal protection second.
5. The Smell Is Sharp and Electrical
Electrical insulation has a distinct, biting odor. It may arrive with a blown fuse, intermittent sensor signal, slow cranking, misfire, or warning light. A starter cable shorting against a header is a serious problem, not a break-in smell.
6. Fumes Enter the Cabin
A little odor outside the car during a first heat cycle is one thing. Raw exhaust entering the passenger compartment is another.
A leak near the cylinder head, collector, firewall, or front floor can allow gases to reach the HVAC intake. Carbon monoxide itself has no odor, so your nose cannot certify that the cabin is safe. Stop driving, ventilate the car, and inspect the connections.
7. The Engine Develops a Misfire, Warning Light, or Fluid Loss
A pinched O2 wire, melted plug lead, disturbed connector, or fluid leak can show up at the same time as the smoke. If the engine begins running rough, the oil-pressure warning appears, coolant temperature climbs, or a fluid level drops, shut it down.
Do not blame every new symptom on harmless header burn-off just because it appeared after the same installation.
The Most Common Dangerous Cause: Oil Dripping on Hot Headers
Oil leaks are sneaky around a fresh exhaust installation. A small valve cover seep may have existed for months without visible smoke because the original manifold and heat shield directed the oil elsewhere. Change the tube routing, remove a shield, or disturb a brittle gasket, and that same leak may now land directly on a hot primary.

Check the Valve Cover Area First
Look at the lower edge and rear corners of the valve cover. On many V-engine layouts, the rear corner sits close to the firewall, making a small trail difficult to see from above.
Use a bright light after the engine and exhaust are completely cold. Fresh oil will often look wet and glossy compared with old, dusty seepage. Follow the wet trail downward until it reaches the header.
Check for Oil Spilled During Related Work
Not every oil spot is a failed gasket. Oil may have been spilled while topping up the engine, changing a filter, moving a dipstick tube, or working around the valve cover. Clean the area, let it dry, and watch whether fresh oil returns.
Trace the Smoke Upward
A common mistake is staring at the smoking pipe and assuming the pipe caused the problem. The exhaust is the hot surface. The source may be six inches above it.
Look above and slightly forward of the smoke point. Check seams, hoses, fittings, and the underside of nearby engine components. Do this cold. A bare header can remain hot enough to burn skin long after the visible smoke stops.
Shop-Floor Case
I remember checking a V8 after a long-tube header installation. The owner was convinced the new coating was curing, and at first glance that explanation sounded reasonable—the smoke was light and the engine ran clean.
But only one tube on the passenger side smoked. After the system cooled, I followed a narrow wet line upward and found fresh oil at the rear corner of the valve cover. Each time the engine warmed up, one drop rolled onto the same primary and started the show again.
That is the distinction I want you to remember: manufacturing residue burns away once; an active leak reloads the hot surface every time.
Wires, Hoses, and Insulation That Can Touch the Exhaust
Headers move heat closer to parts that were comfortable around the stock manifold. Sometimes the clearance problem is obvious. Sometimes everything looks fine with the engine off, then drivetrain movement under throttle pulls a wire against a primary.

O2 Sensor Harness Routing
An O2 sensor wire should not rest on the header, collector, downpipe, or catalytic converter. Make sure the connector is locked, the harness is not twisted around the sensor lead, and there is enough slack for drivetrain movement without leaving a loose loop near the pipe.
When working around turbocharged systems, inspect the sensor and line routing carefully before fitting an upgraded performance exhaust downpipe for turbo applications. The turbine outlet and catalytic-converter area can reach severe temperatures quickly, and a harness routed incorrectly may survive idle but fail during a loaded drive.
Spark Plug Wires and Boots
A plug boot touching a header often produces a burning-rubber smell before it produces a noticeable misfire. Later, the insulation carbon-tracks or splits, and the spark finds an easier path to ground than the plug gap.
Route the wires with proper separators and retainers. Check clearance at every cylinder, including the rear cylinders that are hard to see. If a heat sleeve is specified, install it correctly—but do not treat a sleeve as permission to clamp the wire against the tube.
Starter Wiring and Fluid Lines
Long-tube headers may run near the starter, transmission, and lower engine wiring. Inspect the starter power cable for abrasion, stretched insulation, and contact under engine movement. Check transmission cooler lines, brake lines, and fuel lines anywhere the new tubing passes through a tighter corridor than stock.
Heat Shields, Underbody Insulation, and Plastic Panels
A heat shield can be bent during removal and look harmless while the car is lifted. Once the vehicle is lowered and the exhaust expands, it may rub or press into nearby insulation.
Also check undertrays, splash shields, bumper trim, and adhesive-backed heat material. A plastic edge touching a hot tailpipe can create a sharp odor even though the problem is several feet behind the engine.
Exhaust Smoke After Installation: Engine Bay or Tailpipe?
Exhaust smoke after installation is too broad a description to diagnose without identifying where the smoke exits. Smoke rising from the outside of a header and smoke blowing out of the tailpipe are different symptoms.
Smoke Rising Off the Outside of the Exhaust
This points toward surface residue, coating cure, a fluid landing on the exhaust, or a nearby material touching it. Pay attention to whether the smoke covers the whole new part or originates at one point.
Thin White Vapor From the Tailpipe
Water is a normal product of combustion. On a cool morning, visible vapor may leave the tailpipe until the exhaust warms. Condensation can also drip from drain points or joints before the system is fully hot.
Dense white smoke that continues after warm-up—especially with a sweet odor, overheating, or falling coolant level—needs an engine and cooling-system diagnosis. A new cat-back does not create coolant consumption.
Blue or Gray Tailpipe Smoke
Blue-gray smoke typically suggests oil entering the combustion stream. Possible sources include valve seals, piston rings, PCV problems, or a turbocharger oil-seal issue. The new exhaust may make an existing condition easier to see, but the rear pipe itself is not generating engine oil.
Black Tailpipe Smoke
Black smoke points toward excess fuel or incomplete combustion. If it begins immediately after a header or downpipe installation, recheck O2 sensor connectors, damaged harnesses, exhaust leaks ahead of a sensor, and any calibration changes made at the same time.
How Long Should New Headers Smell?
There is no honest universal answer in miles. A car that idles for five minutes and sits for three days has completed less burn-off than a vehicle driven through several full heat cycles.
For light surface residue, the strongest odor often occurs during the first warm-up and drops noticeably over the next two or three heat cycles. Some coated parts, mufflers, or wrapped systems may retain a mild hot smell for several drives. The direction of change matters: it should get weaker.
A Practical Heat-Cycle Test
- Start with a cold, visually inspected vehicle outdoors.
- Run it only while the smoke remains light and is clearly decreasing.
- Shut it off and let the exhaust cool completely.
- Inspect for fresh oil, melted material, loose wiring, and contact marks.
- Repeat only if the first inspection shows no active fault.
- Compare the second cycle with the first. It should be less smoky, not equally bad or worse.
If the odor remains strong after repeated full heat cycles, returns from the same location, or appears every time you stop after driving, stop calling it “new exhaust smell.” Find the source.
A Safe First-Startup Inspection After Exhaust Installation

Step 1: Inspect the System Cold
Before starting the engine, account for tools, rags, packaging, protective film, and temporary ties. Check every place where the new system passes a wire, hose, shield, floor panel, crossmember, or bumper.
Step 2: Wipe Accessible Surfaces
Wear clean gloves and wipe fingerprints and visible residue from accessible exhaust surfaces using a cleaner approved for the material and coating. Do not soak joints or sensors, and never spray the cleaner onto a hot part.
Step 3: Start the Vehicle Outdoors
Do not perform the first heat cycle in a closed garage. Keep the vehicle on level ground, engage the parking brake, and keep flammable materials away from the exhaust outlet and underbody.
Step 4: Observe From a Safe Position
Watch for the first smoke location. Listen for ticking at the flanges and joints. Check the instrument panel. Do not touch the tubes, and do not slide under the vehicle while it is running.
Step 5: Shut Down if the Smoke Intensifies
If the smoke grows, becomes concentrated, or changes to a plastic or electrical odor, turn the engine off. Waiting another ten minutes will not make an active oil leak safer.
Step 6: Reinspect After a Full Cooldown
Look for fresh wetness, softened wire loom, melted boots, shiny rub marks, black soot, or a heat shield that has shifted. If black residue is concentrated at a gasket or connection, use the checks in our guide to black soot around an exhaust flange after header installation.
Step 7: Recheck Hardware Correctly
Follow the manufacturer’s instructions for flange bolts, band clamps, slip joints, and V-band connections. Do not apply one generic torque value to every exhaust fastener. Thread size, gasket design, flange thickness, material, lubricant, and hardware grade all change the requirement.
Also do not attack a crooked system by tightening the clamps harder. Exhaust sections should be positioned without forced contact before final tightening. For a cat-back installation, Flashark’s vehicle-specific cat-back exhaust systems should still be checked for wheelbase, engine, outlet layout, and connection compatibility before the first startup.
How to Prevent the Smell Before the First Startup
- Wear clean gloves: This limits fingerprints and keeps old grease off stainless or coated tubing.
- Use penetrating oil sparingly: Aim at the fastener instead of soaking the entire flange and pipe.
- Clean overspray: Remove visible lubricant only after the area is cold and with a finish-safe product.
- Verify dynamic clearance: Account for engine movement and thermal expansion, not just the gap visible on jack stands.
- Secure sensor wiring: Use proper retainers and temperature-appropriate protection, not a loose plastic tie near the collector.
- Inspect every shield: A bent shield can trap residue, rattle, or push insulation into the exhaust.
- Take photos: Photograph O2 wiring, plug wires, flanges, and tight-clearance areas before startup. If something moves later, you have a reference.
Flashark exhaust components can be part of a clean, reliable upgrade, but the part cannot correct careless routing or an existing engine leak. Good installation work is still the line between a brief first-cycle odor and a damaged harness.
What If the Burning Smell Enters the Cabin?
Treat cabin odor more seriously than a mild smell outside the car. A new coating may produce an odor that gets pulled into the HVAC intake briefly, but persistent raw exhaust inside the vehicle can indicate a leak upstream.
Inspect the cylinder-head flanges, collector connections, slip joints, O2 sensor bungs, and any joint disturbed during the installation. Look for dry black soot, listen for a cold-start tick, and confirm that each gasket is correctly positioned.
A fresh leak may not leave soot immediately. If the smell persists, use a suitable low-pressure smoke test or have the system inspected professionally. Our guide to exhaust header leak warning signs covers the additional sounds, drivability changes, and visual evidence to check.
Do Not Drive Through This
If anyone in the vehicle develops a headache, dizziness, nausea, unusual fatigue, confusion, or eye irritation, stop in a safe outdoor location, exit the vehicle, and seek appropriate medical help. Do not continue driving with suspected exhaust-gas intrusion.
Final Verdict: Follow the Smoke, Not the Assumption
A light, decreasing burning smell after exhaust install is often nothing more than manufacturing oil, fingerprints, coating cure, or a little penetrating fluid. That is the normal side of the first heat cycle.
The dangerous side looks different. Smoke keeps returning from one point. Oil reappears after cleaning. A plug wire softens against a primary. A plastic panel sags onto the pipe. Raw fumes enter the cabin. The smoke becomes heavier instead of clearing.
Listen to me on this one: do not let the phrase “new headers smell” talk you out of inspecting the car. If the evidence is moving in the wrong direction, shut it off, let everything cool, and find the source. Ten careful minutes with a light is cheaper than a burned harness—or a fire.
Frequently Asked Questions
Q1: Is a burning smell normal after installing a new exhaust?
A1: A light oily or chemical smell can be normal during the first few heat cycles. Manufacturing oil, corrosion protection, fingerprints, and coating residue may burn away as the exhaust heats. The smell should become progressively weaker. A growing odor, repeated smoke from one point, leaking fluid, or melting material is not normal.
Q2: Why are my new headers smoking on the first startup?
A2: Common causes include machining oil, protective coating, fingerprints, penetrating-fluid overspray, anti-seize residue, or paint curing on the tubes. Check whether the smoke is thin and spread across the new surface. Smoke concentrated below a valve cover, wire, hose, or gasket needs further inspection.
Q3: How long should new headers smell after installation?
A3: The strongest odor commonly occurs during the first heat cycle and should drop over the next two or three cycles. Some coatings, wraps, and muffler materials may smell for several drives. There is no fixed mileage, but the odor and smoke must trend downward rather than remain equally strong.
Q4: Should I shut the engine off if my new headers start smoking?
A4: Shut it off if the smoke becomes thicker, comes from one wet point, smells like burning plastic or wiring, enters the cabin, or appears with a warning light, misfire, fluid leak, or flame. Light surface smoke that is clearly fading may be observed cautiously outdoors.
Q5: Can fingerprints make new headers smoke?
A5: Yes. Skin oil and grease from dirty gloves can create a light odor or thin smoke when the tubes heat up. Fingerprints may also leave discoloration on some finishes. They should not cause heavy smoke that repeatedly returns from one location.
Q6: Can PB Blaster or WD-40 cause exhaust smoke?
A6: Yes. Penetrating fluid sprayed during removal can land on the exhaust and smoke when heated. Clean accessible overspray after the system has cooled. If the smoke keeps returning, check for an active fluid leak rather than assuming all of it is penetrating oil.
Q7: What does burning oil on headers smell like?
A7: It usually has a heavy, oily, cooked smell rather than the lighter chemical odor of a new coating. Inspect the valve cover edges, oil filter area, dipstick tube, oil cap, and any component above the smoke. Fresh oil will often leave a glossy trail leading to the hot tube.
Q8: Why is only one side of my headers smoking?
A8: Smoke from only one side is more likely to have a localized cause, such as a valve cover leak, spilled fluid, concentrated installation residue, a plug wire touching a tube, or a nearby shield or hose overheating. Allow the exhaust to cool and inspect above the exact smoke point.
Q9: Can an exhaust leak cause a burning smell after installation?
A9: Yes, although an exhaust leak often smells more like raw or sharp exhaust than burning oil. A leaking flange or joint can direct hot gas toward wiring, insulation, grease, or oil residue. Check for ticking, loose hardware, damaged gaskets, and dry black soot around the connection.
Q10: Is white smoke from the engine bay normal after a header install?
A10: Thin white or pale smoke can be normal if it comes from residue spread across the new header and fades quickly. Dense smoke, smoke from one point, or smoke that becomes stronger should be treated as a possible fluid leak or heat-contact problem.
Q11: Why does my car smell like burning plastic after an exhaust install?
A11: Inspect O2 sensor wiring, spark plug boots, starter cables, plastic undertrays, rubber parts, and heat insulation near the new exhaust. Burning plastic or electrical insulation is not a normal header-curing odor. Shut the engine off and inspect after the system cools.
Q12: Can a new exhaust cause smoke from the tailpipe?
A12: A new muffler may produce a temporary odor, and normal condensation can create light white vapor. Persistent blue-gray smoke suggests oil burning, dense white smoke may indicate coolant, and black smoke can indicate excessive fuel. Those symptoms require engine or sensor diagnosis rather than surface cleaning.
Q13: Is it safe to drive with a burning smell after an exhaust install?
A13: Drive only after confirming that there is no fluid leak, melted wiring, plastic contact, cabin exhaust odor, warning light, or continuing smoke source. If the odor is mild and clearly decreasing after a clean inspection, a cautious heat cycle may be reasonable. When in doubt, stop and inspect.
Q14: Why can I smell the new exhaust inside the car?
A14: The HVAC intake may briefly pick up an outside curing odor, but persistent raw exhaust inside the cabin can indicate a leak at a header flange, collector, slip joint, O2 bung, or another disturbed connection. Stop driving and inspect the system, especially if anyone develops a headache or dizziness.

Steven Chen
Automotive Performance Specialist | Engine & Exhaust Systems
Steven focuses on practical engine performance, exhaust fitment, and real-world upgrade paths for classic and modern enthusiast vehicles. He reviews small-block Ford, LS, truck, and street/strip applications with one goal in mind: helping builders choose parts that actually work together. His philosophy: "Good power starts with the right combination, not the biggest part."














