


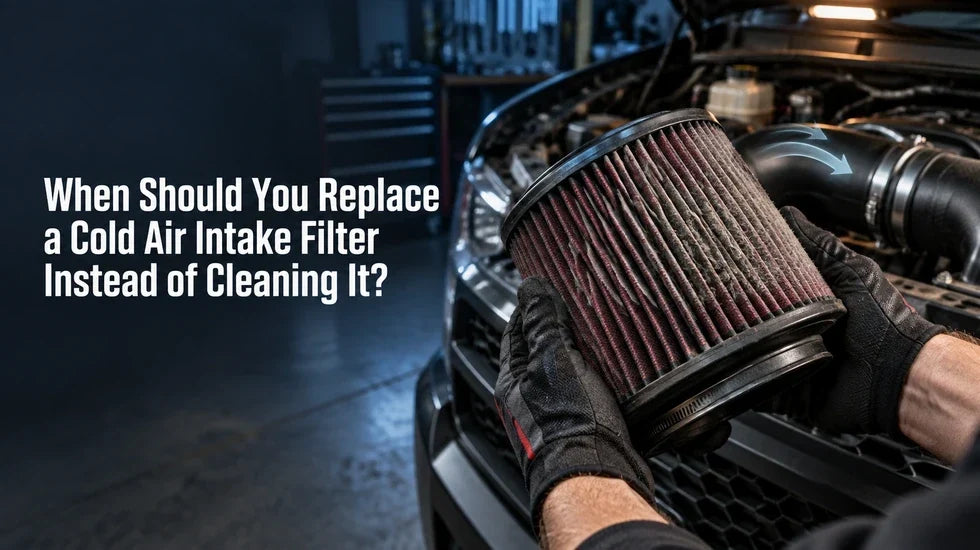
A dirty cone filter makes people nervous. Fair enough. You pop the hood, see a dark gray filter sitting at the end of the intake tube, and immediately wonder whether it is choking the engine—or whether you are about to throw away a perfectly usable part.
Here’s the straight answer: a dirty filter is not automatically a bad filter. But a filter with torn media, a distorted sealing flange, collapsed pleats, stubborn oil contamination, or repeated-service damage has earned its retirement. Cleaning cannot repair a broken filtration path.
Quick Answer: Clean It or Replace It?
- Replace it now if the filter has holes, torn pleats, loose end caps, cracked rubber, a poor seal, collapsed media, or contamination that will not wash out.
- Clean it only when the manufacturer identifies the media as reusable, the filter still holds its shape, and the flange seals tightly on the intake tube.
- Inspect more often if you drive dusty back roads, follow construction traffic, tow on dry shoulders, run trails, or use an open-element intake near the wheel well.
- Do not reinstall it wet. A washable filter needs full drying time; an oiled filter needs the correct oil applied sparingly after it is dry.
Why a Dirty Cold Air Intake Filter Is Not Always a Bad Filter
Filters are supposed to get dirty. That is literally the job. The real question is whether the captured dirt is still sitting safely in the media, or whether the filter has become restricted, damaged, or unable to seal.
Old-school advice like “if it is dark, replace it” is too simple. A reusable filter can look pretty rough and still work fine after a proper service. On the other hand, a filter can look decent from the top and have a split at the base where unfiltered air slips straight into the intake tube. That is the one that worries me.
Technician’s note: The clean side of the filter matters more than the color on the dirty side. If you find dust trails inside the intake tube, stop treating this as a cosmetic maintenance job and inspect the filter flange, clamp, tube, and media carefully.
A clean, properly seated filter helps the engine get the air the intake system was designed to supply. That does not mean every fresh filter creates a dramatic power jump. On a healthy street vehicle, the bigger win is usually consistency: stable airflow, clean metering, and fewer avoidable intake issues.
Identify Your Filter Before You Start a Cold Air Intake Filter Change
Do not grab cleaner just because the filter is cone-shaped. I have seen plenty of people wash a disposable filter because it “looked like a performance filter.” That shortcut can ruin it in one afternoon.

Disposable Paper Filters: Replace, Do Not Wash
Most pleated paper or cellulose filters are service items, not washable parts. Water can swell the media. Aggressive brushing can tear it. Compressed air can stretch weak areas that you will not notice until dust gets past the filter.
If the filter instructions do not clearly say washable or reusable, treat it as a replacement filter.
Dry Synthetic Filters: Reusable Only When the Maker Says So
Some synthetic filters are washable and run dry—no oil needed. That makes maintenance simpler, especially for drivers who do not want to deal with the risk of over-oiling a MAF-equipped intake. Still, dry reusable media has limits. If the material is matted, torn, distorted, or no longer seated evenly in the frame, cleaning is not a rescue plan.
Oiled Cotton Gauze and Foam Filters: Serviceable, Not Immortal
Cotton-gauze and foam filters are designed to be cleaned and, when required, re-oiled. They can last a long time when treated right. The catch? “More oil” is not better. Too much oil can migrate toward the mass air flow sensor and create a problem you did not have before.
Use the cleaning and oiling method intended for that filter. No gasoline. No brake cleaner. No mystery solvent sitting on the workbench.
Cold Air Intake Filter Inspection Intervals: Mileage Is Only Half the Story
People love a single mileage number. Real life does not cooperate.
For a normal commuter that stays on paved roads, checking the filter at every oil change is a sensible habit. If you drive through dry farm roads, desert dust, gravel lots, road construction, or off-road trails, look much sooner. A filter that sees airborne dust every weekend can load up far faster than one that spends 15,000 highway miles behind a sealed factory-style airbox.
| Factor | Factory-Style Airbox | Open or Aftermarket Cold Air Intake |
|---|---|---|
| Filter exposure | Usually more protected from engine-bay debris and splash. | Can be more exposed, depending on heat shield design and filter location. |
| Inspection habit | Check at normal service intervals. | Check at normal service intervals and after dusty or wet events. |
| Common failure point | Loaded paper media or a poorly seated panel filter. | Loose flange, damaged pleats, over-oiling, or filter contact with nearby parts. |
| Maintenance choice | Often replace the filter element. | Clean or replace based on media type and condition. |
A good habit is to make a short note every time you service the filter:
- Date and mileage
- Filter part number
- Driving conditions since the last inspection
- Whether it was cleaned or replaced
- Whether oil was applied
- Any damage, dust trails, loose clamps, or intake-tube rubbing
That little record saves guessing later. If a reusable filter needs attention twice as often as it used to, something changed—your driving environment, the intake’s location, or the filter itself.
Replace a Dirty Cold Air Intake Filter When the Media Is Damaged
Listen, dirt can be cleaned. Structural damage cannot.

Tears, Holes, and Split Pleats
Hold the filter up to a bright light and inspect the pleats, seams, and base. You are looking for obvious holes, but also for thin spots, separated pleats, and tears where the media meets the end cap. Any opening that lets air bypass the filtering layer is reason enough to replace the filter.
Collapsed or Deformed Filter Media
Conical filters sometimes get squeezed during installation, knocked by loose engine-bay parts, or distorted after rough cleaning. If the pleats are crushed together or the filter no longer holds its intended shape, airflow is no longer moving across the media evenly.
Do not bend it back and call it fixed. That is garage optimism, not a repair.
Cracked Flanges, Loose End Caps, and Bad Seals
The rubber flange is every bit as important as the filter material. A hard, split, or deformed flange may not clamp evenly around the intake tube. Check the end cap too. If it separates from the media, the filter has lost its integrity even if the outside still looks clean.
Heavy Oil Contamination
A light, even coat of filter oil on a compatible filter is normal. Engine oil dripping onto the filter is not. If the filter is soaked with oil, first look for the source: PCV routing, excess crankcase vapor, or an engine issue that needs attention. Replacing the filter without dealing with the oil source just starts the cycle over again.
Shop-Floor Story: The “It Just Needs a Wash” Filter
I remember a 2018 Silverado 5.3L coming into the shop after a dusty summer of towing and dirt-road use. The owner had cleaned the cone filter twice and figured it only needed another wash. From the top, it looked tired but usable. Once we removed it, the lower pleats near the rubber flange were split and the inside of the intake tube had a faint dust film. The real problem was not the dark color. It was a damaged seal area and a filter that had been repeatedly handled, washed, and reinstalled under tension. We replaced the filter, corrected the tube angle, checked the clamp position, and cleaned the intake tract before putting it back together.
Use Pressure Drop and Driving Symptoms Without Guesswork
Pressure drop is simply the resistance air sees as it passes through the filter. More dirt, damaged or collapsed media, and stubborn contamination can all increase that restriction. But here is the part people miss: a lazy throttle response does not automatically mean the filter is the culprit.
On modern vehicles, a dirty filter can share the blame with a contaminated MAF sensor, a loose intake coupler, a vacuum leak, a sticky throttle body, a boost leak on turbo applications, or even a fuel-delivery issue. Do not throw parts at it.
Symptoms That Deserve an Intake Inspection
- Reduced pull at higher rpm or under a heavy load
- A sudden change in intake sound
- Visible dust inside the clean side of the intake
- Repeated MAF-related driveability complaints after filter service
- Uneven idle after an intake has been removed and reinstalled
- A filter that appears misshapen, oily, wet, or badly loaded with debris
If the engine runs rough after intake work, do not assume the filter is bad. Start with the basics. Make sure the MAF connector is fully seated, the intake tube is not cracked, and every clamp is tight without cutting into the coupler. For a deeper troubleshooting path, read this rough-idle checklist after a cold air intake installation.
When Repeated Cleaning Means It Is Time for a New Filter
A reusable filter is not a lifetime pass. Every wash cycle puts the media, mesh, glue joints, foam cells, and rubber flange through another round of handling. Done gently, that is fine. Done aggressively, it adds up.
Replace the filter instead of cleaning it again if you see any of the following:
- The media never cleans evenly anymore.
- Dirt stays embedded deep in the pleats after a proper wash.
- The filter has become brittle, warped, or noticeably soft around the flange.
- The wire mesh is bent into the media or separating from it.
- The filter is no longer round enough to sit naturally on the intake tube.
- You are cleaning it more often because the same driving conditions now load it unusually fast.
Many beginners spray cleaner, attack the filter with a stiff brush, then blast it with compressed air because they want it to look brand new. Please do not do that. A filter does not need to look showroom-clean to work. It does need to stay structurally sound.
For the proper wash, rinse, dry, and reinstall sequence, use this step-by-step cold air intake filter cleaning guide.
Drying and Oiling: The Part That Gets Rushed Too Often
The fastest way to turn simple maintenance into a headache is to reinstall a wet filter. Water trapped in the media changes airflow. On an oiled design, applying oil before the filter is fully dry makes the oil distribution uneven and messy.

Safe Filter Service Steps
- Remove the filter carefully without knocking loose dirt into the intake tube.
- Cover the open intake tube with a clean lint-free cloth while the filter is off.
- Use the filter-specific cleaner and cleaning direction recommended for the media.
- Rinse gently; do not use high-pressure water or compressed air.
- Let the filter air-dry completely in a clean area.
- Apply filter oil only if that filter requires it, using a light and even coat.
- Wipe excess oil from the flange and surrounding area.
- Reinstall the filter squarely, then tighten the clamp without crushing the rubber flange.
Warning: Do not use an open flame, heat gun, or compressed air to speed up drying. Let time do its job. Your engine can wait longer than a damaged filter or an oil-fouled sensor repair bill.
Match the Replacement Filter to the Intake, Not Just the Look
When replacement time comes, buy the filter that matches the actual intake system. That means checking the flange inside diameter, filter length, base diameter, available clearance, and the way the filter sits inside the heat shield or airbox.
A universal cone filter that is “close enough” can rub a hood liner, contact a radiator hose, sit crooked on the tube, or leave too little room for a proper clamp seal. Measure first. Then order.
If you are replacing a damaged setup or building a fresh intake path, browse vehicle-specific cold air intake kits from Flashark and match the selected configuration to your year, engine, drivetrain, emissions equipment, and intake layout.
It also helps to understand what the intake is trying to accomplish in the first place. If you are weighing intake sound, airflow path, heat management, and maintenance needs, see what a cold air intake does and where the real benefits come from.

Cold Air Intake Filter Change Checklist
- Identify the filter media before using any cleaner.
- Inspect pleats, mesh, seams, end caps, and the rubber flange.
- Look inside the clean side of the intake tube for dust traces.
- Check intake clamps, silicone couplers, MAF wiring, and nearby clearance.
- Replace filters with structural damage, poor sealing, oil saturation, or permanent deformation.
- Clean reusable filters only with the correct method.
- Allow full drying time before reinstalling.
- Use only the required amount of filter oil on oiled media.
- Record the date, mileage, filter type, and service performed.
Final Word: Replace for Damage, Clean for Maintenance
Here is my garage-rule version: if the filter can still filter, seal, and hold its shape, service it correctly. If it cannot, replace it.
A dirty cold air intake filter is normal. A torn, collapsed, oil-soaked, or loose filter is not. Spend a few extra minutes inspecting the flange and the clean side of the intake tube. That is where you separate routine maintenance from a problem that can cost more later.
If you need help matching an intake setup or replacement filter to your vehicle, contact Flashark with your vehicle details and selected configuration.
FAQ: Cold Air Intake Filter Change Questions
Q1: Can I clean a dirty cold air intake filter instead of replacing it?
A1: Yes, but only if the filter is designed to be washable and the media, end caps, mesh, and sealing flange are still in good shape. Replace disposable paper filters and any filter with structural damage.
Q2: How often should I inspect my cold air intake filter?
A2: Check it at every oil change for normal street driving. Check sooner after off-road driving, dusty towing routes, dry gravel roads, construction-zone traffic, or water exposure.
Q3: How do I know if my cold air intake filter is washable?
A3: Look for the filter manufacturer’s care instructions, part number, or washable/reusable marking. Do not decide based only on the filter’s color or cone shape.
Q4: Should I replace a filter just because it looks black?
A4: No. Dark color alone does not prove the filter has failed. Inspect the media, pleats, flange, end caps, seal, and clean side of the intake before deciding.
Q5: Can a dirty cold air intake filter reduce power?
A5: A heavily restricted filter can limit airflow under higher load and rpm, but weak acceleration can also come from MAF issues, leaks, ignition problems, fuel delivery, or other engine faults.
Q6: What filter damage means immediate replacement?
A6: Replace the filter if you find tears, holes, split pleats, collapsed media, loose end caps, cracked rubber, damaged mesh, poor sealing, or water and oil damage that changes the filter’s shape.
Q7: Can I wash a paper air filter?
A7: Usually no. Unless the filter manufacturer clearly identifies it as washable, replace it instead of washing it.
Q8: What happens if I reinstall a wet cold air intake filter?
A8: A wet filter can disturb airflow and may carry moisture into the intake path. Let it air-dry fully before reinstalling or applying filter oil.
Q9: Can too much filter oil cause MAF problems?
A9: It can. Excess oil may migrate toward the MAF sensor and affect its readings. Apply a light, even coat only when the filter design calls for oil.
Q10: How many times can I clean a reusable intake filter?
A10: There is no universal number. Replace it when repeated cleaning leaves the media distorted, permanently loaded, damaged, brittle, or unable to seal properly.
Q11: Why is there dust inside my intake tube after the filter?
A11: Check for a torn filter, a loose or cracked flange, a crooked clamp, an intake-tube crack, or an incorrect filter size. Dust on the clean side deserves immediate attention.
Q12: Do I need to replace the entire cold air intake if the filter is bad?
A12: Usually, no. Replace only the filter if the tube, couplers, heat shield, clamps, and sensor connections are in good condition. Replace damaged supporting parts as needed.
Q13: Is a dry filter better than an oiled filter for a daily driver?
A13: It depends on your maintenance habits and the filter design. Dry filters avoid oiling steps, while oiled reusable filters require careful cleaning and correct oil application. Choose the filter type that fits your intake and your service routine.
Q14: Do I need to reset the ECU after changing a cold air intake filter?
A14: Usually not. If the engine runs poorly after service, inspect the MAF connector, intake clamps, filter seating, and any excess oil before assuming the ECU needs attention.

Steven Chen
Automotive Performance Specialist | Engine & Exhaust Systems
Steven focuses on practical engine performance, exhaust fitment, and real-world upgrade paths for classic and modern enthusiast vehicles. He reviews small-block Ford, LS, truck, and street/strip applications with one goal in mind: helping builders choose parts that actually work together. His philosophy: "Good power starts with the right combination, not the biggest part."











