
Instalar tubos de prueba en su Infiniti G37 puede mejorar el rendimiento y lograr un sonido de escape más fuerte y agresivo. Sin embargo, como con cualquier modificación, es fundamental conocer los pasos correctos para garantizar una instalación correcta y eficiente. Esta guía abarca todo, desde las herramientas necesarias hasta la solución de posibles problemas, como la luz de verificación del motor.
Herramientas y piezas que necesitará antes de la instalación
Antes de comenzar la instalación de sus tuberías de prueba, asegúrese de tener todas las herramientas y piezas necesarias para el trabajo.
Herramientas necesarias
Para completar con éxito la instalación, necesitará las siguientes herramientas:
- Juego de llaves de vaso y trinquete (normalmente, una llave de 3/8" es suficiente)
- Barras de extensión para alcanzar pernos en espacios reducidos
- Llaves para mayor apalancamiento cuando sea necesario
- Aceite penetrante (PB Blaster) para aflojar pernos rebeldes
- Llave dinamométrica para apretar los pernos según las especificaciones correctas
Piezas que necesitarás
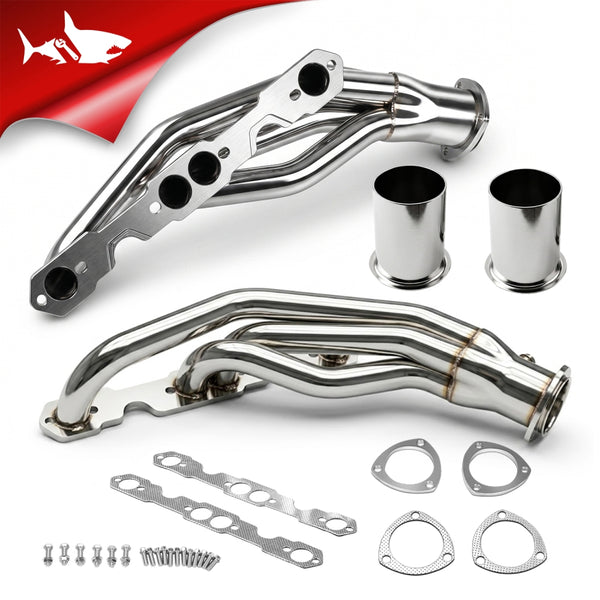
Además de los tubos de prueba G37 , aquí están las otras piezas que necesitarás:

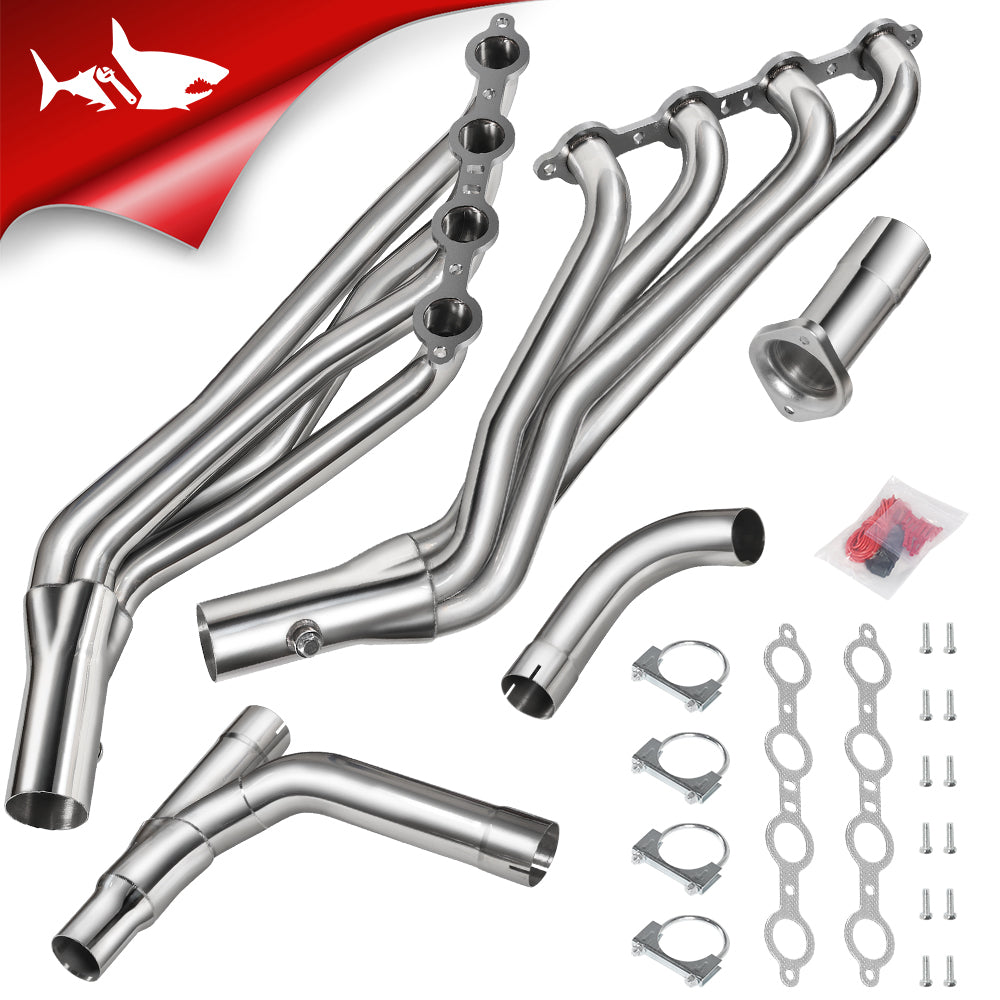
- Tubos de prueba : son la mejora principal para el sistema de escape.
- Espaciadores o desincrustantes del sensor de oxígeno: para evitar que se active la luz de verificación del motor.
- Juntas : Juntas nuevas para garantizar un ajuste sin fugas.
- Herrajes de repuesto : Pernos, tuercas y arandelas, ya que los originales pueden estar desgastados u oxidados.
Preparación de su G37 para la instalación
La preparación es clave para evitar errores y garantizar un proceso de instalación sin problemas.
- La seguridad es lo primero: Comience por comprobar que el motor esté completamente frío. Levante el coche de forma segura con un gato y colóquelo sobre soportes. Esto le dará suficiente espacio para trabajar debajo con seguridad.
- Desconecte la batería: para evitar accidentes eléctricos, desconecte el terminal negativo de la batería de su automóvil antes de comenzar a trabajar.
- Retire los protectores térmicos o paneles: Dependiendo del modelo de su G37, es posible que tenga que retirar protectores térmicos o paneles inferiores para acceder a los convertidores catalíticos. Asegúrese de retirarlos con cuidado, ya que los necesitará para la reinstalación posterior.
Extracción de los convertidores catalíticos de serie
Esta es una de las partes más técnicas de la instalación. Quitar los convertidores catalíticos requiere un poco de paciencia, sobre todo si los tornillos están oxidados.
Desatornille los convertidores catalíticos
Primero, localice los pernos que sujetan los convertidores catalíticos al colector de escape. Use la llave de tubo para retirarlos con cuidado. Si están oxidados o atascados, aplique un poco de aceite penetrante y déjelo actuar de 10 a 15 minutos antes de volver a intentarlo.
Manejo de pernos rebeldes
Para pernos especialmente resistentes, podría necesitar una barra rompedora para mayor palanca. Si es necesario, una llave de impacto puede ayudar a aflojar pernos oxidados rápidamente. Solo tenga cuidado de no dañar los componentes circundantes.
Extracción del sensor de oxígeno
Antes de retirar por completo los convertidores catalíticos, desconecte los sensores de O2. Use una llave para desenroscarlos, anotando su orientación para poder reinstalarlos más tarde o instalar espaciadores.
Instalación de los tubos de prueba
Ahora que los convertidores catalíticos están fuera del camino, estás listo para instalar los tubos de prueba .

Alinear y posicionar los tubos de prueba
Comience alineando los tubos de prueba con las bridas del escape e inserte las juntas nuevas. Asegurarse de que la alineación sea correcta es esencial para evitar fugas en el escape.
Asegure los tubos de prueba
Utilice los pernos, tuercas y arandelas de repuesto para fijar los tubos de prueba. Apriételos firmemente, pero evite apretarlos demasiado, ya que esto podría dañar las roscas o deformar el metal.
Reinstale los sensores de O2 o instale espaciadores
Si reutiliza los sensores de O2, vuelva a atornillarlos. De lo contrario, instale los espaciadores (o desincrustantes) para evitar que se encienda la luz de verificación del motor. Estos espaciadores están diseñados para alejar los sensores del flujo de escape y engañar a la ECU, haciéndole creer que los convertidores catalíticos siguen en su lugar.
Cómo lidiar con los sensores de O2 y las luces de verificación del motor
Después de instalar los tubos de prueba, es posible que se encienda la luz de verificación del motor (CEL). Aquí te explicamos por qué sucede y cómo solucionarlo.
¿Por qué aparece la luz CEL?
La ausencia de convertidores catalíticos provoca que los sensores de O2 detecten niveles anormales de oxígeno en el flujo de escape, lo que activa la luz de verificación del motor (CEL). Este es un problema común al actualizar los tubos de prueba.
Uso de espaciadores de sensor de O2
Instalar espaciadores para sensores de O2 es una solución popular. Estos espaciadores alejan los sensores de los gases de escape, lo que reduce la probabilidad de lecturas incorrectas y evita que se encienda la luz de advertencia del motor (CEL).
Ajuste de la ECU
Si desea una solución más permanente, considere ajustar o reprogramar la ECU. Esto ajustará la relación aire-combustible del vehículo y desactivará la luz de advertencia del motor (CEL) permanentemente, optimizando el sistema para la nueva configuración del escape.
Mejoras en el rendimiento y el sonido del escape después de la instalación
Después de instalar los tubos de prueba, notará varios cambios tanto en el rendimiento como en el sonido.
Mejoras en el rendimiento
Los tubos de prueba reducen la contrapresión del escape, mejorando el flujo de escape. Esto puede resultar en un aumento de entre 5 y 15 hp (potencia de rueda), dependiendo de los tubos de prueba específicos y otras modificaciones. Este aumento se traduce en una aceleración más sensible y un mayor rendimiento general.
Sonido de escape
El sonido de su coche cambiará drásticamente con la instalación de tubos de escape. Sin convertidores catalíticos, los gases de escape se expulsan con mayor libertad, creando un sonido más fuerte y agresivo. Los tubos de escape sin resonancia harán que el sonido sea más fuerte, especialmente a altas revoluciones. Si prefiere un sonido más suave, los tubos de escape con resonancia podrían ser la mejor opción, ya que ayudan a reducir el zumbido y, al mismo tiempo, ofrecen un sonido de escape mejorado.
Consideraciones sobre la legalidad en la calle y las emisiones
Es importante considerar las implicaciones legales de instalar tuberías de prueba en su región.
Pruebas de emisiones
Los tubos de prueba retiran los convertidores catalíticos, cruciales para aprobar las pruebas de emisiones en algunos estados (como California). Quitarlos hace que el vehículo incumpla con las normas de emisiones y podría no aprobar las pruebas requeridas.
Alternativas legales: convertidores catalíticos de alto flujo (HFC)
Si le preocupa el cumplimiento de las normas de emisiones, considere instalar convertidores catalíticos de alto flujo (HFC). Si bien no ofrecen el mismo aumento de rendimiento que los tubos de prueba, mejoran el flujo de escape sin infringir las leyes de emisiones, lo que los convierte en una alternativa legal.
Consejos de mantenimiento después de instalar las tuberías de prueba
El mantenimiento regular es esencial para mantener su sistema de escape en óptimas condiciones después de instalar los tubos de prueba.
Compruebe si hay fugas de escape
Después de la instalación, asegúrese de inspeccionar el sistema de escape para detectar fugas en las conexiones de la tubería de prueba. Si hay fugas, pueden afectar negativamente el rendimiento. Asegúrese de que los pernos estén bien apretados.
Vuelva a apretar los pernos periódicamente
La expansión y contracción por calor pueden aflojar los pernos con el tiempo. Es importante revisar y reapretar periódicamente los pernos que sujetan los tubos de prueba para evitar traqueteos o fugas de escape.
Monitorear los sensores de O2
Vigile los sensores de O2. Si usa espaciadores, verifique si hay algún problema, como un bajo consumo de combustible o una luz de advertencia de falla del motor (CEL). Reemplazar los sensores defectuosos puede ayudar a mantener un rendimiento óptimo.
Conclusión: Mejore su G37 con tubos de prueba para un mejor rendimiento y sonido
Instalar tubos de prueba en tu Infiniti G37 es una excelente manera de optimizar el rendimiento, optimizar la respuesta del acelerador y lograr un sonido de escape más agresivo. Siguiendo esta guía paso a paso, podrás completar la instalación tú mismo, ahorrando tiempo y dinero. Solo asegúrate de usar las herramientas adecuadas, tomar precauciones de seguridad y considerar las implicaciones legales de retirar los convertidores catalíticos en tu zona.
Ya sea que busques mejorar el rendimiento de tu auto en la pista o disfrutar de una experiencia de conducción más emocionante, los tubos de prueba son una modificación fantástica. Recuerda que el mantenimiento y la supervisión regulares garantizarán que tu nueva configuración siga funcionando al máximo rendimiento. No olvides consultar la legislación local sobre emisiones para evitar problemas legales y, si es necesario, considera alternativas como los convertidores catalíticos de alto flujo.
Ahora que ya sabes cómo instalar los tubos de prueba, es hora de ponerte manos a la obra y disfrutar de la dinámica de conducción mejorada que ofrece esta modificación. ¡Que disfrutes de la conducción!