Hablemos del infame "tic" del HEMI. Si conduces un 5.7L, probablemente ya conoces el sonido. La mayoría de los chicos entran inmediatamente en pánico y piensan que sus elevadores están dañando el árbol de levas. Pero, ¿la mayoría de las veces? Es solo que los pernos del colector de escape de fábrica se rompen al ras con la culata de aluminio debido a la expansión térmica.
He quitado docenas de estos colectores de hierro fundido deformados a lo largo de los años. Es un defecto de diseño conocido, y reemplazarlos por un conjunto adecuado de colectores tubulares es la solución permanente. Pero, sinceramente, quitar esos viejos colectores es un dolor de cabeza con el que nadie quiere lidiar. Te guiaré paso a paso sobre cómo realizar esta instalación sin destruir tus culatas ni pasar el domingo taladrando pernos rotos contra el cortafuegos.

Lo más importante de inmediato (BLUF)
- ¿Puedes hacerlo en casa? Sí, si tienes paciencia, un buen gato de piso y habilidades mecánicas intermedias. Espera que te tome de 6 a 8 horas.
- ¿Cómo se evitan realmente los tornillos rotos? Se reduce al ciclo térmico y la penetración química. Si tu camioneta tiene más de 60,000 millas, empapa los tornillos en Kroil o PB Blaster durante 24 horas antes. NO uses una llave de impacto para quitarlos.
- ¿Se encenderá la luz de "Check Engine" (CEL)? Sí. La instalación de tubos largos mueve los sensores de O2 más hacia abajo. Necesitarás extensiones para los sensores de O2 y una sintonización personalizada para optimizar la relación aire/combustible y borrar los códigos.
- ¿Cuál es la ganancia real de potencia? En el dinamómetro, un 5.7L correctamente afinado con tubos largos y una admisión de aire frío típicamente produce entre 22 y 28 whp (potencia en las ruedas) adicionales y un gran aumento en el torque de rango medio.
Preparación: Preparando tu 5.7 HEMI para la cirugía
No te lances solo con un juego de llaves. Una preparación adecuada te ahorrará horas de sudor y sangre más tarde.
Comienza con el vehículo en el suelo. Abre el capó. Honestamente, una pequeña escalera de mano es una herramienta valiosa aquí, especialmente si estás trabajando en una Ram levantada. Primera regla del trabajo de escape: desconecta el terminal negativo de la batería. Estarás trabajando peligrosamente cerca del cableado del motor de arranque en el lado del pasajero.
Retira la caja de admisión de aire de fábrica y el tubo que va al cuerpo del acelerador. Quítalos completamente del camino. Ahora, mira el lado del conductor. ¿Ves ese eje de dirección? Quita el perno del eje de dirección y jala el eje. No te saltes este paso. Intentar pasar un enorme colector alrededor de un eje de dirección conectado es un error de novato que te costará una hora de pura frustración.
Muévete hacia el paso de rueda del pasajero. Retira completamente el revestimiento de plástico interior del guardabarros. Créeme en esto. Lleva cinco minutos y te da una vista directa y sin obstáculos de los tornillos del colector que simplemente no puedes alcanzar desde arriba o desde abajo.

El secreto del mecánico: cómo evitar los tornillos rotos del colector de escape
Los tornillos de fábrica son de Grado 8, pero el constante ciclo de calor contra una culata de aluminio los vuelve frágiles. He pasado demasiadas horas taladrando tornillos rotos cerca del cortafuegos porque me apresuré con una pistola de impacto. No hagas eso. Tómate tu tiempo, déjalos en remojo durante la noche y usa solo herramientas manuales.
- Remójalos temprano: 24 horas antes de tocar una llave, empapa cada tornillo del colector en PB Blaster, Kroil o una mezcla 50/50 de ATF y acetona. Déjalo reposar toda la noche.
- Ciclos de calor: Si la camioneta aún funciona, enciéndela durante 3 minutos para calentar los colectores (no al rojo vivo, solo tibios al tacto), luego rocíalos de nuevo. El calor atrae el fluido penetrante a las roscas.
- Solo herramientas manuales: Usa un dado de 6 puntas (no de 12 puntas, los redondearás) y un trinquete estándar. Aplica una presión suave y constante. Si se atasca, aprieta un poco, rocía de nuevo y sácalo lentamente. Trabájalo hacia adelante y hacia atrás.
Paso a paso: Extracción de los colectores de fábrica y el tubo en Y

Bien, es hora de levantar el vehículo. Usa soportes de gato de alta resistencia. Una vez que estés debajo, soporta la transmisión con un gato. Si tienes un modelo 4WD, retira la placa de deslizamiento. Quita las tuercas y pernos del travesaño de la transmisión y retira el travesaño para darle espacio al escape.
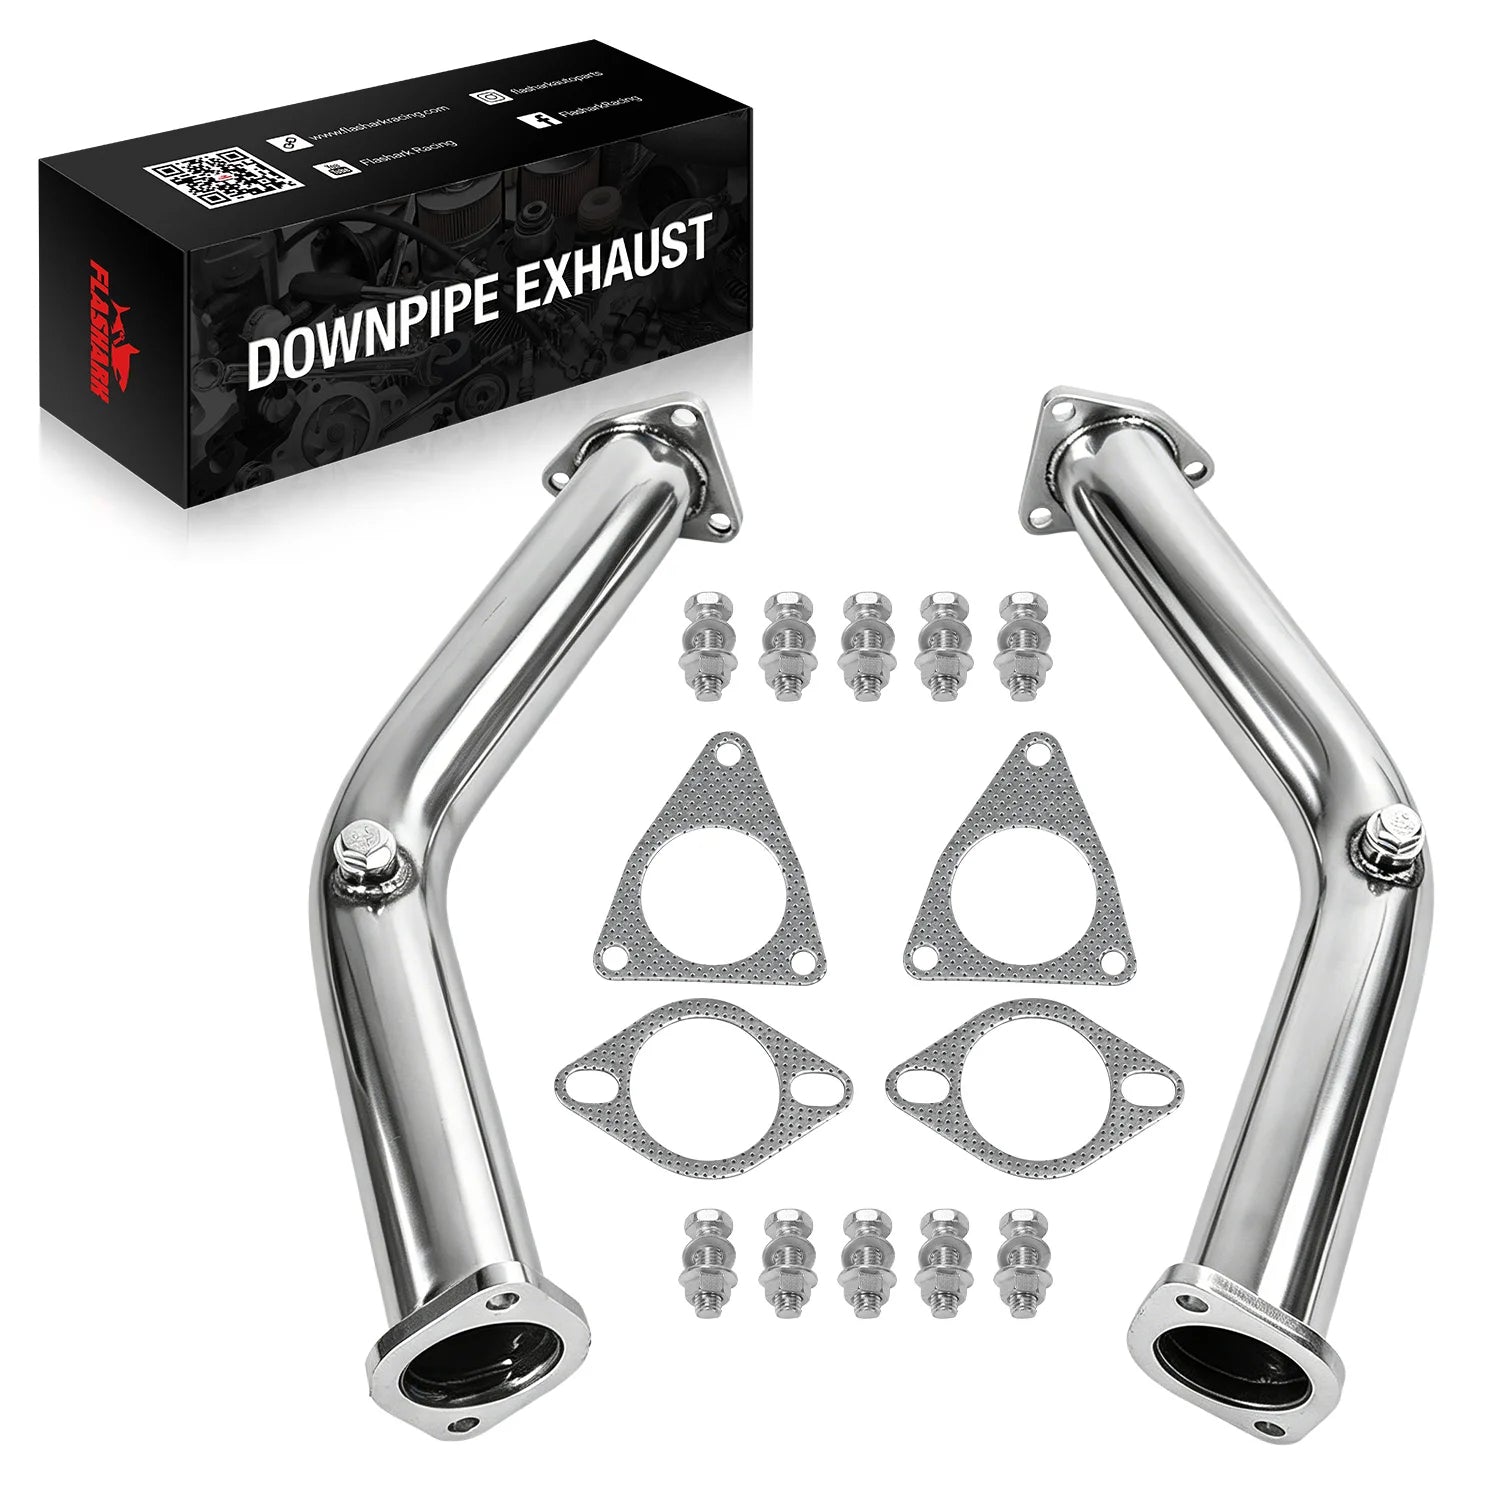
Retira las tuercas que unen el escape cat-back al tubo en Y. Toma una palanca o un destornillador plano grande y empuja el tubo cat-back unas 2 pulgadas para liberar las bridas.
Antes de desatornillar el tubo en Y de los colectores, desconecta los cuatro arneses del sensor de O2 del cableado de fábrica. No retuerzas los cables. Desatornilla el tubo en Y de los colectores de fábrica del lado del conductor y del pasajero y sácalo de ahí. Vuelve a instalar temporalmente el travesaño de fábrica para que la transmisión no cuelgue del gato todo el día.
Baja el gato de la transmisión, vuelve a los pasos de rueda y termina de quitar los pernos del colector de escape de fábrica. Retira los viejos colectores de hierro fundido.
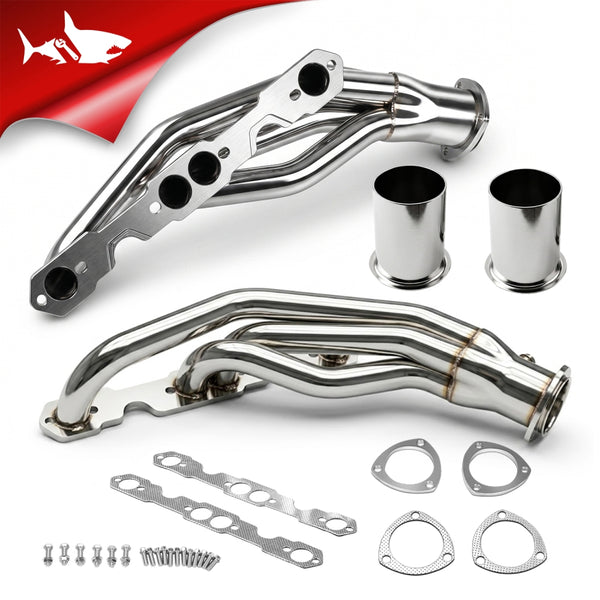
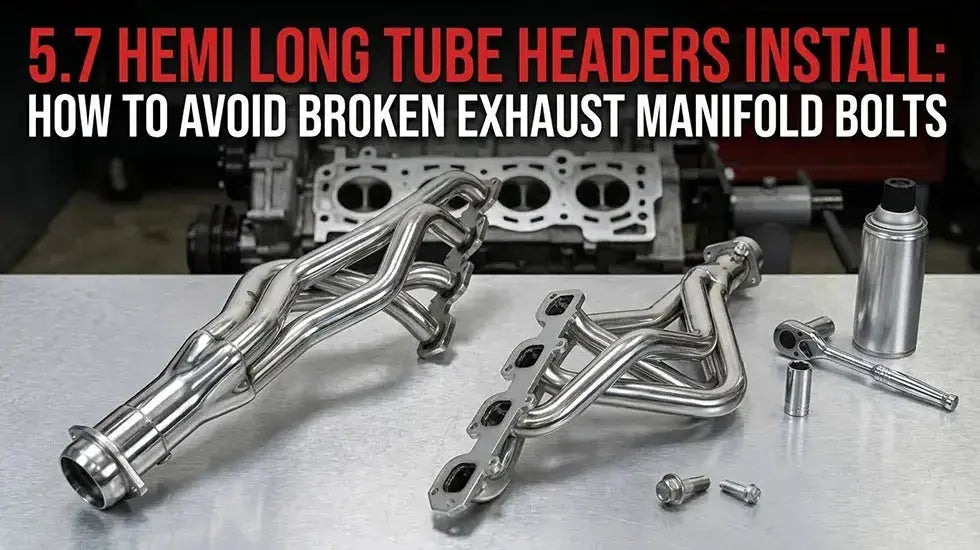
Instalación de tus nuevos colectores de tubo largo para HEMI 5.7
La preparación de la superficie lo es todo. Con un trapo limpio, un limpiador de frenos o desengrasante, limpia las superficies de acoplamiento de la culata hasta que queden impecables.
Cuando se trata de colocar las nuevas piezas, el grosor de la brida lo es todo. La razón principal por la que fallaron los colectores de fundición de fábrica es que se deformaron bajo el calor. Si atornillas un colector de posventa barato con una brida delgada, estarás reparando otra fuga de escape en seis meses.
Esta es exactamente la razón por la que usamos y recomendamos los colectores de tubo largo Flashark 5.7 HEMI. Utilizan una brida gruesa mecanizada por CNC y acero inoxidable 304 doblado con mandril que maneja la expansión térmica mucho mejor que la configuración de fábrica.

Colectores de tubo corto y largo para RAM 1500 Hemi 5.7L 09-18
- Solución permanente: Previene el tic del Hemi y la deformación del colector.
- Potencia máxima: Desbloquea +15-30 HP sobre el escape de fábrica restringido.
Ver ajuste y especificaciones
Especificaciones: Acero inoxidable 201, hardware de montaje incluido. Envío gratis de 3 a 6 días.
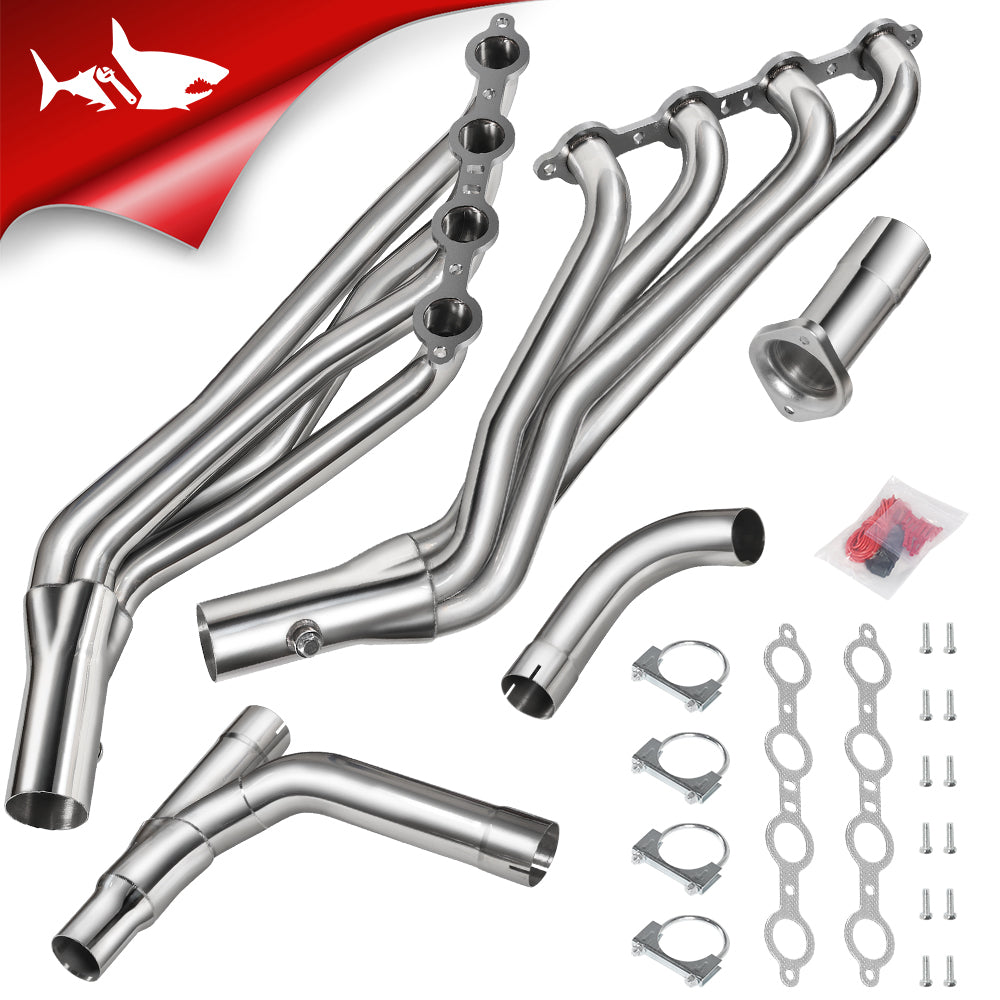
Además, el enrutamiento es específico del chasis. No puedes simplemente poner colectores de camioneta en un automóvil; si estás en una plataforma LX, necesitas los colectores específicos para Challenger/Charger/300C para no golpear el eje de dirección al intentar ajustarlos.

Colectores de tubo largo para Challenger/Charger/300C 5.7/6.1L 05-11
- Específico para chasis: Despeja perfectamente los ejes de dirección de la plataforma LX.
- Diseño de tubería 8-2: Ofrece un rugido profundo de muscle car y HP de gama alta.
Ver ajuste y especificaciones
Especificaciones: Salida de 3", Brida de cabezal de 7/16". Nota: Pernos no incluidos.
| Especificación / Métrica | Colectores de fundición de fábrica (OEM) | Colectores de tubo largo Flashark |
|---|---|---|
| Material | Hierro fundido pesado (propenso a agrietarse y deformarse) | Acero inoxidable 304 doblado con mandril |
| Grosor de la brida | Estándar de fábrica (propenso a la distorsión) | CNC mecanizado de 3/8" de espesor (Anti-deformación) |
| Tamaño del tubo primario | N/A (Diseño de tipo "log" restrictivo) | 1 3/4" o 1 7/8" (Optimizado para el flujo) |
| Barrido de escape | Extremadamente deficiente | Excelente (Primarios de igual longitud) |
| Ganancia esperada de HP | Línea base | +20 a +30 WHP (con ajuste adecuado) |
| Tiempo estimado de instalación | N/A | 6 - 8 horas (DIY) / 4 - 5 horas (Taller) |
Especificaciones de torque, gestión del calor y reensamblaje
Desliza los colectores en su lugar desde abajo o a través del paso de rueda (según tu chasis). Enrosca todos los pernos a mano primero para asegurarte de no roscar mal la culata de aluminio.
Ahora, apriétalos. La especificación de fábrica es de alrededor de 18-20 ft-lbs. Honestamente, no podrás usar una llave dinamométrica en la mitad de estos pernos debido a las curvas de los tubos. Usa una llave estándar y tu mejor juicio: apriétalos desde el interior hacia afuera. APRETADO, pero no los rompas.
Baja el vehículo y vuelve a instalar el tubo de la varilla de nivel de aceite pasándolo por los tubos primarios del lado del conductor. Usa el espaciador suministrado y el perno más largo si tu kit incluía uno.
En el lado del pasajero, esas mangueras del calentador pasan peligrosamente cerca de los primarios calientes. Envuélvelas con cinta térmica de alta temperatura y usa bridas resistentes para apretarlas contra las bobinas de encendido, lejos del escape.
Invierte los pasos de desmontaje. Vuelve a instalar los nuevos tubos intermedios, conecta los sensores de O2 (usando tus extensiones), atornilla el travesaño, conecta el eje de dirección y, finalmente, vuelve a conectar la batería.
La regla de oro final: Cicla el motor con calor. Enciéndelo, comprueba si hay fugas, déjalo alcanzar la temperatura de funcionamiento y apágalo. Después de 100 millas de conducción, debes volver a apretar todos los pernos del colector. Las juntas se comprimirán y, si no las vuelves a apretar, tendrás que lidiar con una fuga de escape que hace tic tac de nuevo.
Preguntas frecuentes (FAQ)
P1: ¿Necesito un ajuste personalizado después de instalarlos?
R: Absolutamente. Debido a que los sensores de O2 se reubican más hacia abajo, su ECU leerá el flujo de escape incorrectamente y encenderá la luz de Check Engine (CEL). Un ajuste adecuado recalibra la relación aire/combustible y desbloquea la potencia real por la que acaba de pagar.
P2: ¿Cuántos caballos de fuerza puedo esperar ganar?
R: En un dinamómetro, instalar estos con un tubo intermedio de alto flujo y un ajuste generalmente te da entre 20 y 30 caballos de fuerza en las ruedas (whp) reales, junto con un gran aumento en el torque a bajas revoluciones.
P3: ¿Esta mejora solucionará el infame sonido de tictac?
R: Si el tictac es causado por un tornillo del colector de escape roto (lo que representa la gran mayoría de estos casos), entonces sí, la mejora de su configuración y el reemplazo del hardware eliminarán completamente el ruido.
P4: ¿Debería optar por colectores "shorty" o de tubo largo?
R: Los "shorties" son más fáciles de instalar y a menudo se atornillan directamente a los tubos intermedios de fábrica, lo que los hace excelentes para reemplazos básicos. Sin embargo, si desea la máxima potencia de RPM medias a altas y una nota de escape mucho más profunda y agresiva, los tubos largos son el camino a seguir.
P5: ¿Cuánto tiempo lleva este trabajo en una Ram 1500?
R: Un mecánico experimentado en un elevador puede hacerlo en 4 a 6 horas. Si usted es un aficionado que trabaja en el suelo con gatos de elevación, planifique un fin de semana completo, especialmente si tiene que lidiar con tornillos difíciles.
P6: ¿Puedo hacer la instalación sin sacar el motor?
R: Sí. Tanto en las camionetas como en los autos con plataforma LX, no es necesario levantar el motor. Quitar los revestimientos interiores del guardabarros y desatornillar el eje de dirección proporciona suficiente espacio para deslizarlos.
P7: ¿Cuál es el par de apriete correcto para los tornillos del colector?
R: La especificación de fábrica es generalmente de 18 a 20 ft-lbs. Es crucial apretarlos uniformemente, comience por los pernos centrales y trabaje hacia afuera para asegurar que la junta asiente perfectamente.
P8: ¿Hará que mi camioneta sea significativamente más ruidosa?
R: Definitivamente. Los colectores de hierro fundido gruesos amortiguan mucho el ruido del motor. Cambiar a tubos de acero inoxidable le dará a su V8 un rugido crudo, agresivo y mucho más profundo.
P9: ¿Por qué se rompen los tornillos de fábrica en primer lugar?
R: Es un problema de metalurgia. La culata de aluminio se expande y contrae a un ritmo diferente al del colector de hierro grueso. Este constante cambio térmico ejerce una inmensa tensión de cizallamiento sobre los pernos de acero más traseros, lo que finalmente los rompe.
P10: ¿Necesito extensiones para el sensor de O2?
R: Sí. El colector se asienta mucho más atrás bajo el chasis que la configuración de serie. El cableado de fábrica no llegará, por lo que se requieren arneses de extensión plug-and-play.