


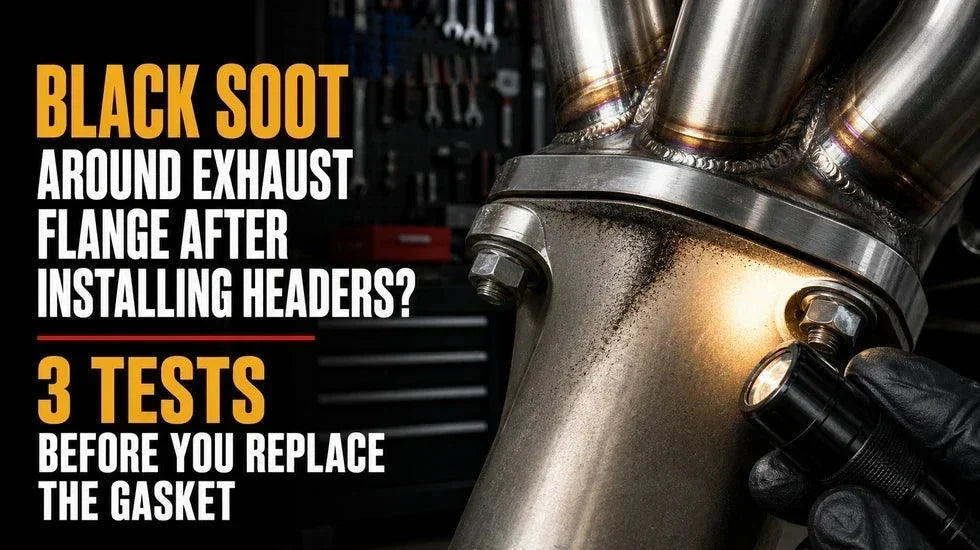
¿Hollín Negro Alrededor de la Brida del Escape Después de Instalar Colectores? 3 Pruebas Antes de Reemplazar la Junta
Terminas la instalación, bajas el coche y lo arrancas. Todo suena decente. Quizás un poco más nítido de lo esperado, pero los colectores nuevos siempre cambian el ruido mecánico bajo el capó.
Luego miras debajo dos días después.
Ahí está: una mancha negra alrededor de la brida. Quizás está seca y polvorienta. Quizás parece que alguien roció agua sucia por el tubo. Ahora te preguntas si la junta está goteando, el motor está funcionando rico, o estás viendo condensación normal del escape.
Aquí está la respuesta honesta: el hollín negro alrededor de una brida de escape es una pista sólida, pero el color por sí solo no prueba dónde comenzó la fuga. Los pulsos de escape pueden lanzar hollín a varias pulgadas de la abertura real. El agua también puede mezclarse con el carbono dentro del tubo y dejar una mancha de aspecto desagradable que se parece al aceite.
Así que no cojas la llave más grande del cajón todavía. Limpia la zona, lee el rastro de hollín y realiza las tres pruebas siguientes.
Respuesta Rápida
- El hollín seco que comienza en el borde de la junta y se extiende hacia afuera suele indicar una fuga activa en el escape.
- El agua negra fina que aparece durante un arranque en frío y se detiene a medida que el escape se calienta puede ser condensación mezclada con carbono, especialmente después de trayectos cortos.
- Si la zona está limpia pero desarrolla una nueva marca negra después de uno a tres ciclos de arranque en frío, trátalo como una fuga hasta que las pruebas demuestren lo contrario.
- Un tic al arrancar en frío, una tira de papel pulsante, burbujas visibles o un soplo de gas en la junta hacen que una fuga de junta o brida sea mucho más probable.
- Si hueles a escape dentro del habitáculo, deja de tratar el problema como cosmético. El vehículo necesita una inspección inmediata.
Lo que Realmente Significa el Hollín Negro Alrededor de una Brida de Escape
El gas de escape no se filtra de una junta defectuosa en un flujo suave. Sale en pulsos. Cada vez que una válvula de escape se abre, otra onda de presión caliente se mueve a través del colector, el múltiple, el colector, el tubo de bajada y el resto del sistema.
Dale a esa onda de presión un hueco del ancho de un cabello y se convierte en una pequeña pistola de hollín.
El gas sale disparado por la abertura, se enfría contra el metal cercano y deposita carbono en la brida, la cabeza del perno, el escudo térmico, el cortafuegos o el suelo del coche. Por eso el hollín de una fuga de escape normalmente tiene dirección. La pista útil no es meramente donde la superficie es más oscura. Es donde comienza la parte más estrecha del rastro.

Leer el Rastro de Hollín al Revés
Coge una linterna brillante y busca uno de estos patrones:
- Una línea negra estrecha que cruza desde el borde interior de una junta hacia el exterior.
- Una mancha en forma de abanico que se hace más ancha a medida que se aleja de la brida.
- Una mancha oscura concentrada alrededor de un puerto del colector o un perno de la brida.
- Hollín acumulándose solo en un lado de una conexión de abrazadera en V o de colector.
- Una interrupción limpia en el patrón de hollín donde dos superficies de sellado deberían tocarse.
Sigue la marca a la inversa. El extremo estrecho suele estar más cerca de la abertura. Sin embargo, "suele" importa aquí. Los ventiladores de refrigeración y el flujo de aire de la carretera pueden arrastrar el hollín lejos de la fuente, mientras que un soporte más frío puede acumular más carbono que la propia unión con fugas.
Por eso limpio toda la zona sospechosa antes de tomar la decisión final. El limpiador de frenos puede no ser adecuado para algunas superficies y revestimientos calientes, así que usa un limpiador sin residuos apropiado en un sistema completamente frío. Toma una foto. Añade una pequeña referencia con un rotulador de pintura al lado de la unión. Luego, revísala de nuevo después de algunas conducciones.
Hollín de Fuga de Escape Fresco vs. Suciedad de Instalación Antigua
Los colectores se manipulan mucho. Durante una instalación, guantes sucios tocan los tubos, el aceite penetrante gotea por la brida y el antiagarrotamiento acaba en lugares a los que nunca debería llegar. Algunos componentes de escape nuevos también echan humo o huelen brevemente a medida que se queman los residuos de fabricación.
La suciedad vieja suele parecer aleatoria. Una fuga viva tiende a reconstruir un camino reconocible.
Si la marca negra no reaparece después de limpiar la superficie, es posible que estuvieras viendo residuos de la instalación o una fuga antigua. Si reaparece desde el mismo borde de sellado después de dos arranques en frío, tienes mucha mejor evidencia.
Hollín de Fuga de Escape vs. Manchas de Condensación Normales
El agua en un sistema de escape no es automáticamente una mala noticia. El vapor de agua es un producto normal de la combustión. Cuando el escape está frío, ese vapor se condensa dentro de los tubos, el resonador, el silenciador y los puntos bajos del sistema.
Mezcla esa agua con el carbono que ya está dentro del tubo y obtendrás líquido negro. Puede verse horrible en una entrada de hormigón. Incluso puede parecer un poco a aceite de motor usado hasta que lo toques con un trapo de taller.

Nota del Mecánico
La condensación puede ser normal, pero la ubicación sigue siendo importante. El agua que sale de un orificio de drenaje de un silenciador de fábrica es una cosa. El agua negra que sopla repetidamente a través de una junta de colector de escape es evidencia de que la unión tiene un camino abierto hacia el exterior.
| Lo que Ves | Explicación Más Probable | Qué Hacer a Continuación |
|---|---|---|
| Abanico seco y polvoriento que comienza en el borde de la junta | Fuga activa en la brida o junta | Límpialo y realiza las tres pruebas de fuga |
| Agua negra fina durante los primeros minutos de un arranque en frío | Condensación mezclada con carbono | Verifica si se detiene después de un ciclo de calentamiento completo |
| Fluido pegajoso que gotea desde arriba del colector | Posible fuga de aceite de motor | Rastrea hacia arriba, hacia la tapa de válvulas o la tapa de levas |
| Contorno negro alrededor de la brida pero sin rastro a través de la superficie de sellado | Residuo antiguo o hollín proyectado desde otra unión | Inspecciona soldaduras ascendentes, juntas deslizantes y puertos cercanos |
| Marca húmeda más burbujas rítmicas o pulsos de gas | Vía de fuga confirmada | Inspecciona la junta, la alineación, la brida y los herrajes |
¿Es Hollín, Aceite o Refrigerante?
- Hollín seco: Polvoriento, negro mate y fácil de manchar en una toalla blanca.
- Hollín y condensación: Acuoso en lugar de resbaladizo; se seca formando un anillo gris o negro.
- Aceite de motor: Resbaladizo y persistente. Comúnmente gotea de una tapa de válvulas u otro punto encima del escape.
- Refrigerante: Puede dejar residuos de color o con costra. Nunca pruebes un fluido automotriz desconocido.
- Residuo de ensamblaje: Más notorio durante los primeros ciclos de calentamiento y generalmente deja de reaparecer.
Señales de Fuga de Junta de Colector de Escape Que Importan Juntas
Un síntoma puede engañarte. Tres síntomas que apuntan a la misma brida son mucho más convincentes.
Tic-Tac al Arrancar en Frío Que Desaparece Cuando el Motor se Calienta
Una pequeña fuga en el colector a menudo produce un tic agudo cuando el motor está completamente frío. A medida que el metal se calienta y se expande, la abertura puede hacerse más pequeña y el sonido puede desvanecerse.
No te dejes engañar. La expansión térmica ha cambiado temporalmente el espacio; no ha reparado la junta.
Si tienes una F-150 y estás separando el ruido del inyector de un tic del múltiple, nuestra guía para diagnosticar los síntomas de fuga de escape de la F-150 profundiza en las pistas específicas de la plataforma.

Soplo, Resoplido o una Nota Raspante Inesperada
Una pequeña fuga cerca de la culata tiende a producir un tic. Una fuga más grande en el colector o en la junta tórica a menudo suena más como un "puff-puff" o un "chuff-chuff". Más abajo, el mismo problema puede crear un borde áspero y raspante en lugar de una nota de escape limpia.
Escucha junto a una pared durante un arranque en frío. El sonido reflejado puede hacer que una pequeña fuga en la brida sea mucho más fácil de escuchar. Simplemente no confundas el ruido normal de los colectores de pared delgada con una fuga de presión. Los tubos de acero inoxidable transmiten más sonido mecánico que un pesado colector de hierro fundido.
Olor a Escape Debajo del Capó o en el Habitáculo
Esta es la señal que no debes ignorar. El escape que entra en el compartimento del motor puede ser arrastrado hacia la entrada de aire fresco y hacia el habitáculo. Si el olor es notable dentro del vehículo, limita la conducción y soluciona la fuente.
Hardware Suelto o un Espacio Irregular en la Brida
Examina de cerca la unión:
- ¿Están todos los tornillos y tuercas presentes?
- ¿Algún sujetador muestra roscas limpias expuestas, lo que sugiere que se aflojó?
- ¿Un lado de la junta está más aplastado que el otro?
- ¿El tubo tiene que ser empujado lateralmente para alinearse con la brida?
- ¿Falta un colgador, está doblado o está sacando el sistema de su posición?
Una junta no puede compensar para siempre un tubo que intenta moverse media pulgada lateralmente.
Tres Pruebas Seguras y Caseras para una Fuga en la Brida de Escape
Advertencia de Seguridad
Las piezas de escape se calientan lo suficiente como para quemar la piel casi instantáneamente. Trabaja al aire libre o en un espacio bien ventilado. Mantén las manos, el papel, la ropa y las herramientas alejados de los ventiladores, correas, poleas y catalizadores calientes. Nunca te arrastres debajo de un vehículo apoyado solo en un gato.

Prueba 1: La Prueba Táctil en Frío
Esta no cuesta nada y funciona sorprendentemente bien cuando la junta es accesible.
- Deja que el motor y el escape se enfríen completamente, preferiblemente durante la noche.
- Colócate de manera que puedas alcanzar el área sin cruzar una correa o un ventilador.
- Arranca el motor y revisa la unión inmediatamente.
- Mantén una mano abierta cerca de la brida sin tocar ningún metal.
- Siente un soplo rítmico y agudo sincronizado con la velocidad del motor.
Una vaga brisa cálida no es suficiente. Buscas un pulso localizado. Detente tan pronto como los componentes comiencen a calentarse.
Prueba 2: La Prueba de la Tira de Papel
Corta una tira ligera de papel de aproximadamente 1 pulgada de ancho y 6 pulgadas de largo. Sostenla cerca, pero nunca contra, la brida sospechosa.
Una fuga activa puede empujar el papel hacia afuera en un ritmo constante. Mueve la tira alrededor de la circunferencia de la unión. Si solo se mueve en el lado del ventilador del radiador y aletea continuamente en lugar de pulsar, es posible que simplemente estés leyendo el flujo de aire del ventilador.
Esta es una prueba de detección, no un veredicto de tribunal. Combínala con el patrón de hollín o la prueba de burbujas.
Prueba 3: La Prueba de Burbujas con Agua Jabonosa
Mezcla agua con suficiente jabón para platos para crear una película y ponla en un pulverizador. Hay dos formas sensatas de usarla:
- Verificación breve en arranque en frío: Pulveriza una brida accesible aguas abajo mientras aún está fría y observa si aparecen burbujas que crecen repetidamente en un punto.
- Verificación de presión con el motor apagado: Con el escape completamente frío, introduce aire o humo a muy baja presión por el tubo de escape y pulveriza las juntas.
La versión con el motor apagado es más limpia y fácil de leer. La alta presión es innecesaria. Solo necesitas suficiente flujo de aire para revelar una abertura.
No uses un encendedor ni llamas. Sí, la gente todavía lo recomienda en línea. Escúchame en esto: no hay razón para acercar una llama al vapor de combustible, residuos de aceite, protectores de plástico o revestimientos de la carrocería cuando un trozo de papel y jabón pueden hacer el trabajo.
¿Qué Pasa Si las Pruebas No Concuerdan?
- Hollín presente, pruebas negativas: Limpia la zona e inspecciónala de nuevo después de varios arranques en frío. Podría ser hollín viejo o hollín arrastrado de otra conexión.
- Sin hollín, prueba de burbujas positiva: La fuga puede ser nueva, pequeña o estar ubicada en un motor de gasolina relativamente limpio.
- Fuga solo en frío: Revisa la compresión de la junta, el hardware suelto, la planitud y los espárragos rotos.
- Fuga solo en caliente: Sospecha de distorsión de la brida, precarga del tubo, una grieta que se abre con la expansión o una soldadura tensa.
Por Qué Gotea una Junta Nueva del Colector Después de la Instalación
Las piezas nuevas no eliminan los errores de instalación. De hecho, los sistemas de posventa nuevos a veces revelan problemas de alineación que una conexión de fábrica blanda y oxidada había estado ocultando durante años.

Los Sujetadores Estaban Aprestados, pero la Carga de Sujeción Era Desigual
"Los apreté muy fuerte" no me dice casi nada. Un perno puede estar tirando el doble de fuerte que el siguiente. Otro puede estar tocando fondo en un agujero sucio. Un tercero puede estar estirándose.
La carga de sujeción correcta proviene de roscas limpias, el hardware especificado, una llave dinamométrica precisa y la secuencia de apriete adecuada. No proviene de apoyarse en una barra rompedora de 24 pulgadas hasta que la brida deje de moverse.
El Tubo Fue Puesto en su Lugar con los Tornillos
Este es uno de los errores más comunes en las instalaciones caseras. El colector se encuentra a tres octavos de pulgada del tubo central, por lo que el instalador inicia los pernos y los usa para unir las piezas.
Ahora el sistema está bajo tensión permanente. Cada ciclo de calor tira de la junta. Puede sellar en el garaje y empezar a dejar hollín una semana después.
La Brida Está Deformada, Picada o Sucia
Coloca una regla de precisión sobre la brida y verifica si hay luz visible o espacios medibles con un calibrador de espesores. No existe una cifra universal de deformación aceptable; el fabricante del vehículo o del colector debe proporcionar esa especificación.
Una junta gruesa puede ocultar una pequeña imperfección. No reparará de forma fiable una brida muy curvada, un cráter de óxido o una distorsión de soldadura.
La Junta Es Incorrecta o Está Instalada al Revés
Las juntas planas multicapa, las juntas de grafito compuesto, los sellos de rótula y las juntas tóricas funcionan de manera diferente. Verifica el diámetro del puerto, el patrón de pernos, la forma de sellado y la orientación antes del montaje.
Asegúrate también de que la junta no cuelgue en el flujo de escape. Esto crea turbulencias, expone un borde al ataque de los gases calientes y puede quemar la junta de adentro hacia afuera.
La Fuga Está Realmente en una Soldadura o en la Sonda Lambda
No condenes la junta hasta que inspecciones:
- Soldaduras del colector
- Soldaduras de brida a tubo
- Racores de sensor de O2
- Soldaduras de abrazaderas en V
- Trenzado del tubo flexible y collares de extremo
- Juntas deslizantes cercanas
En los coches turboalimentados, también ayuda comprender dónde comienza cada sección. Nuestra explicación de qué es un downpipe y qué hace puede ayudarte a determinar si la marca negra está en la salida del turbo, en el downpipe o en la conexión del cat-back.
Caso de Taller Compuesto: La Junta que No Estaba Mal
Uso este caso porque refleja un patrón de fallas que aparece una y otra vez. Imagina un Mustang GT de 2018 con colectores de tubo largo. Después de tres ciclos de calor, el colector del lado del pasajero desarrolla un abanico negro a través del túnel de transmisión. El propietario vuelve a apretar los dos pernos de la brida. El tic se vuelve más silencioso y luego regresa.
Limpio la brida, hago la prueba del papel y descubro que el pulso es más fuerte aproximadamente una pulgada por encima de la junta. Así que dejo de culpar a la junta. Con el tubo central apoyado y aflojado, el colector se desplaza lateralmente aproximadamente 3/8 de pulgada. El sistema había sido arrastrado a su posición con los pernos de la brida, y la soldadura de brida a tubo estaba soportando esa carga.
La reparación correcta no es otra capa de sellador. Primero se corrige la alineación del tubo, se repara la soldadura sometida a tensión, se instala una junta nueva y se aprieta el hardware de manera uniforme según la especificación de la aplicación. Después de tres arranques en frío y un ciclo completo de calentamiento en carretera, no vuelve a aparecer hollín fresco.
Esa es la lección: una junta es un sello, no una herramienta de alineación estructural.
Juntas de Colector OEM vs. Juntas de Tubo de Escape de Aftermarket
Las conexiones de escape de fábrica y modificadas lidian con el mismo calor, pero no se comportan exactamente de la misma manera. Las siguientes cifras son rangos comunes, no especificaciones de ajuste para cada vehículo.
| Parámetro | Sistema de colector OEM típico | Sistema de cabezal de aftermarket típico | Diferencia relevante para fugas |
|---|---|---|---|
| Construcción principal | Colector de hierro fundido o acero inoxidable compacto | Acero inoxidable tubular soldado o acero revestido | Los tubos largos crean más palanca en la brida y el colector |
| Tamaño primario común | Conductos compactos adaptados al puerto; altamente específicos para la aplicación | Aproximadamente 1-5/8, 1-3/4 o 1-7/8 pulgadas en muchas aplicaciones de V8 de alto rendimiento | Los tubos más grandes y largos se expanden más durante un ciclo de calentamiento |
| Tamaño de colector común | Normalmente dimensionado alrededor del catalizador de serie y el embalaje | A menudo 2.5 o 3 pulgadas; algunos sistemas V8 de alta potencia usan colectores más grandes | Los reductores y adaptadores mal emparejados pueden precargar la junta |
| Comportamiento de la brida | Pesada y relativamente rígida | Los sistemas de calidad suelen utilizar bridas mecanizadas de 3/8 de pulgada o más gruesas | Las bridas delgadas o mal soldadas son más vulnerables a la distorsión |
| Sensibilidad de instalación | Normalmente alineado por los soportes de fábrica y las conexiones fijas | Más dependiente de la alineación del colector, tubo intermedio, colgador y chasis | El ajuste en seco antes del torque final se vuelve crítico |
Cuando un colector de fábrica está agrietado o una construcción modificada necesita un mejor flujo, los tubos de escape de rendimiento específicos para vehículos correctamente emparejados pueden ser parte de la solución a largo plazo. El ajuste sigue siendo lo primero. Confirme el año, el motor, la transmisión, la forma del puerto, la conexión del colector y el tipo de junta incluida antes de realizar el pedido.
Cómo volver a apretar correctamente una brida de escape
Volver a apretar tiene sentido cuando el hardware se ha aflojado pero la junta, la brida y las roscas siguen siendo útiles. No arregla un perno roto, una junta quemada, una soldadura agrietada o un tubo torcido.
- Encuentre la especificación correcta. Utilice la información de servicio del vehículo o las instrucciones del fabricante del cabezal. No copie un número de torque de un motor diferente.
- Deje que el sistema se enfríe completamente. A menos que el fabricante especifique lo contrario, revise los sujetadores de escape en frío.
- Inspeccione las roscas. Una tuerca que gira porque el perno se está saliendo no se está "volviendo a apretar".
- Libere la tensión aguas abajo. Afloje las abrazaderas o colgadores apropiados si están desalineando la brida.
- Asiente la junta de manera uniforme. Apriete los sujetadores en pequeños pasos alternados.
- Utilice la secuencia especificada. Los colectores de múltiples puertos suelen apretarse desde el centro hacia afuera, pero siga las instrucciones para la aplicación exacta.
- Limpie y vuelva a probar. Nunca asuma que la fuga ha desaparecido solo porque la llave hizo clic.
Si está trabajando en un Ford modular, la secuencia de instalación en nuestra guía de instalación de tubos de escape largos para Mustang 4.6 proporciona una preparación y un contexto de alineación específicos de la plataforma.
Cómo reemplazar una junta de brida de escape o colector que gotea
1. Confirme la fuente antes de desmontar
Marque la ubicación de la fuga con un rotulador de pintura. Fotografie el camino del hollín. Verifique las soldaduras y las juntas cercanas. Una vez que todo está en el suelo, es mucho más difícil recordar exactamente dónde comenzó la marca.
2. Prepare el vehículo de forma segura
- Trabaje en una superficie plana.
- Ponga el freno de estacionamiento y calce las ruedas.
- Permita que el escape se enfríe completamente.
- Utilice soportes de gato nominales en los puntos de elevación correctos.
- Use protección ocular; el óxido siempre encuentra su cara.
3. Soporte el escape antes de retirar el hardware
Utilice un gato de transmisión, un soporte ajustable u otro soporte apropiado debajo del tubo desconectado. No deje que un tubo intermedio pesado cuelgue de un cable del sensor de O2, una sección flexible o la brida en el extremo opuesto.
4. Quite los sujetadores con cuidado
Use aceite penetrante y un dado de seis puntos en herrajes oxidados. Mueva una tuerca obstinada hacia adelante y hacia atrás en lugar de forzarla a través de roscas corroídas. Si el perno comienza a girar con la tuerca, deténgase y reevalúe.
5. Lea la junta vieja
La junta extraída cuenta una historia:
- Una marca negra desde el puerto hasta el borde exterior muestra fugas de gases.
- Un aplastamiento pronunciado en un lado indica una sujeción desigual o una desalineación.
- Una muesca quemada sugiere una fuga que ha estado activa durante algún tiempo.
- Un anillo de sellado intacto con hollín solo en su cara exterior sugiere que el hollín pudo haber provenido de otro lugar.
6. Limpie e inspeccione ambas superficies
Retire el material de la junta vieja sin rayar la brida. Busque grietas, óxido, material de soldadura elevado y distorsiones. Coloque una regla en varias direcciones, no solo en una.
7. Pruebe el ajuste en seco de toda la conexión
Una los tubos sin usar los pernos como un cabrestante. Las caras deben acercarse entre sí de forma cuadrada. Si no lo hacen, corrija la posición de la percha, gire las juntas deslizantes o afloje las conexiones adyacentes hasta que el sistema descanse naturalmente.
8. Instale la junta nueva correcta
Haga coincidir la abertura, el patrón de pernos, el grosor, el material y la orientación. No reutilice una junta que ya haya sido aplastada o dañada por el calor a menos que su fabricante apruebe específicamente su reutilización.
9. Comience cada sujetador a mano
Enrosque cada perno o tuerca varias vueltas antes de apretar nada. Esto reduce la posibilidad de enroscar incorrectamente y evita que un lado atrape la junta fuera de posición.
10. Apriete por etapas
Utilice un patrón alterno y alcance el torque especificado en múltiples pasadas. Por ejemplo, el proceso podría implicar una pasada de asentamiento ligera, una pasada intermedia y una pasada de especificación final, pero los valores reales deben provenir de las instrucciones para ese vehículo y hardware.
11. Restaure los colgadores, sensores y protectores térmicos
Verifique cuidadosamente el cableado del sensor de O2. No debe estar torcido, estirado o apoyado contra un tubo colector. Vuelva a instalar todos los protectores térmicos y soportes retirados para el acceso.
12. Pruebe en frío y vuelva a verificar después de los ciclos de calor
Realice la prueba de arranque en frío antes de que los tubos se calienten. Después de un ciclo de calentamiento completo y un enfriamiento total, inspeccione nuevamente la brida. Solo vuelva a apretar después de los ciclos de calor si las instrucciones del producto lo indican.

¿Volver a apretar, reemplazar la junta o reparar la brida?
| Resultado de la inspección | Reparación recomendada |
|---|---|
| Sujetadores ligeramente sueltos; brida plana; junta sin quemar | Corregir alineación, apretar según especificación y volver a probar |
| Rastro de hollín que cruza la superficie de sellado de la junta | Reemplace la junta e inspeccione ambas caras de acoplamiento |
| Perno roto o roscas dañadas | Repare el hardware antes de instalar una junta nueva |
| Brida deformada o profundamente picada | Volver a superficie cuando esté permitido o reemplazar el componente |
| Colector agrietado o soldadura de brida | Reparación de soldadura profesional o reemplazo de componentes |
| El tubo se desplaza al aflojar los pernos de la brida | Corregir la alineación del colgador y el escape antes de volver a sellar |
Soluciones comunes que a menudo empeoran la fuga
Apretar más fuerte la llave
Un torque excesivo puede aplastar la junta de forma desigual, deformar una brida delgada, estirar un perno o pelar las roscas en una cabeza de aluminio. Una vez que se ha alcanzado la especificación correcta, deténgase.
Apilar dos o tres juntas
Sí, la gente ha logrado sellar temporalmente con juntas apiladas. Eso no lo convierte en una reparación general sólida. Las capas adicionales pueden moverse, comprimirse de forma desigual y ocultar una brida que necesita ser corregida.
Untar RTV en cada superficie
Algunos productos de escape permiten un sellador específico de alta temperatura. Otros están diseñados para instalarse en seco. El silicio aleatorio no sustituye a las superficies planas y la carga de sujeción correcta, y no todos los selladores son seguros cerca de los sensores de oxígeno.
Usar masilla de escape como metal estructural
La masilla puede cerrar un pequeño orificio inmóvil cuando el producto está clasificado para ese uso. No puede reemplazar un borde de brida faltante, mantener unido un tubo agrietado o resistir una junta que está siendo tirada lateralmente.
Reemplazar la junta sin corregir la precarga
Así es como la gente termina instalando la misma junta durante tres fines de semana seguidos. Si el escape salta de posición cuando se afloja la conexión, la alineación es parte de la reparación.
Elegir piezas de repuesto sin crear otra fuga
Comience con el ajuste, no con el diámetro de tubo más grande de la página. Confirme:
- Año, marca, modelo, motor, transmisión y transeje
- Puerto de la culata y patrón de pernos
- Estilo de la brida de salida del colector o turbo
- Diámetro del tubo en ambos lados de la conexión
- Cantidad de sensores de O2 y ubicación del orificio
- Juntas, abrazaderas, pernos, tuercas y adaptadores necesarios
- Compatibilidad con el convertidor catalítico y el tubo intermedio existentes
Para un motor de aspiración natural o una construcción que reemplace colectores de fábrica agrietados, los colectores de escape de rendimiento específicos para cada vehículo de Flashark proporcionan un punto de partida sensato para comparar la disposición de los puertos, el diseño de la brida y el ajuste a la aplicación.
Si la sección con fugas o corroída está detrás del convertidor catalítico, explore los sistemas de escape cat-back de ajuste directo para construcciones de calle y rendimiento. Sin embargo, un cat-back no reparará una fuga en la culata o el turbo. Verifique la ubicación de la fuga antes de comprar la mitad del sistema de escape.
Las aplicaciones con turbocompresor necesitan la misma disciplina. Cuando el problema está en la salida del turbo o en la sección de escape delantera, compare las mejoras de la tubería de bajada del turbo específicas del vehículo por tipo de brida, configuración del catalizador, posición del sensor y conexión aguas abajo.
Cuando una fuga en la brida del escape es peligrosa para conducir
Una pequeña fuga aguas abajo no es automáticamente una emergencia. Una fuga aguas arriba cerca de la cabina, el sistema de combustible, el cableado o el turbo merece mucha más urgencia.
Deje de conducir o solicite una inspección profesional inmediata cuando:
- Entre olor a escape en la cabina.
- Salga gas caliente hacia el cableado, mangueras, plástico, líneas de freno o el suelo.
- Un colector o tubo esté visiblemente suelto.
- Se haya roto un espárrago y la brida se esté separando.
- La fuga se vuelva notablemente más ruidosa en un corto período de tiempo.
- El vehículo desarrolle fallos de encendido, un comportamiento inusual del ajuste de combustible o un código de sensor de O2.
- Un turbocompresor pierda respuesta y aparezca hollín antes de la turbina o en su conexión de entrada.
Cómo evitar el hollín por fuga de escape después de la próxima instalación
- Primero, ajuste en seco: Verifique la posición de cada brida y soporte antes de aplicar el torque final.
- Utilice piezas de sellado nuevas: Reemplace las juntas aplastadas y el hardware de bloqueo dudoso.
- No fuerce la alineación: Ajuste las juntas deslizantes y los soportes en lugar de usar los pernos de la brida para unir los tubos.
- Siga las instrucciones reales: El torque, la secuencia, el uso de sellador y los procedimientos de ciclo de calor varían según la aplicación.
- Cree una línea de base limpia: Limpie las juntas después de la instalación y tome fotos.
- Inspeccione después de conducir: Verifique nuevamente después de los primeros ciclos completos de calor y después de varios cientos de millas.
¿Conclusión? Límpielo, confírmelo y repare la causa, no solo la mancha negra. Una unión saludable permanece alineada y sellada a través de repetidas expansiones y contracciones. Si el hollín fresco de la fuga de escape sigue reapareciendo, otra vuelta de llave no es automáticamente la respuesta.
Preguntas frecuentes sobre el hollín por fuga de escape
P1: ¿El hollín negro alrededor de una brida de escape siempre es una fuga?
R1: No. Puede ser residuo antiguo o hollín proyectado desde otra conexión. Sin embargo, un rastro fresco que comienza en el borde de sellado, regresa después de la limpieza y sigue un camino en forma de abanico es una fuerte evidencia de una fuga activa.
P2: ¿Qué aspecto tiene el hollín por fuga de escape?
R2: Suele ser seco, de color negro mate y pulverulento. En una brida, a menudo forma una línea estrecha en el punto de fuga y se ensancha a medida que se aleja. El hollín húmedo puede parecer agua negra hasta que la humedad se evapora.
P3: ¿Puede la condensación normal del escape dejar manchas negras?
R3: Sí. El agua condensada puede arrastrar el carbono del interior del tubo y dejar gotas negras. Es más común durante el clima frío y los viajes cortos. La condensación por sí sola no suele crear un pulso de presión repetitivo en la brida.
P4: ¿Cómo puedo distinguir la condensación negra del aceite de motor?
R4: La condensación es fina y normalmente se seca formando un anillo gris o negro. El aceite del motor permanece resbaladizo y a menudo desciende desde una fuga por encima del escape, como una junta de la tapa de válvulas.
P5: ¿Cuáles son las señales más comunes de fugas en la junta del colector?
R5: Las señales comunes incluyen un tictac al arrancar en frío, un resoplido rítmico, hollín fresco en el borde de la junta, olor a escape, herrajes sueltos y una tira de papel que pulsa cerca de la unión.
P6: ¿Por qué mi colector de escape hace ruido solo cuando el motor está frío?
R6: El metal frío se contrae. Una pequeña abertura en la junta o una brida deformada pueden apretarse a medida que las piezas se calientan y se expanden, lo que hace que el sonido se desvanezca. La reducción del ruido no significa que la junta se haya reparado sola.
P7: ¿Puedo encontrar una fuga en el escape con agua jabonosa?
R7: Sí. Aplique una película de agua y jabón en una junta fría y busque burbujas repetidas. Una prueba de baja presión con el motor apagado es más fácil de leer y evita rociar líquido sobre un escape caliente.
P8: ¿Funciona la prueba del papel en fugas pequeñas del escape?
R8: Puede revelar un pulso de gas rítmico, pero el flujo de aire del ventilador de refrigeración y el viento pueden causar movimientos falsos. Utilice la prueba del papel junto con la dirección del hollín, el sonido o una prueba de burbujas.
P9: ¿Debo volver a apretar los tornillos del colector después del primer ciclo de calor?
A9: Solo si lo requiere el fabricante del vehículo, cabezal, junta o hardware. Realice la verificación a la temperatura especificada y use la secuencia de torque correcta. No invente un valor de torque universal.
Q10: ¿Puedo reutilizar una junta de brida de escape?
A10: Una junta que está aplastada, quemada, agrietada o pegada a la brida generalmente debe reemplazarse. Algunas juntas metálicas especializadas pueden ser reutilizables, pero solo cuando su fabricante lo indique y la inspección confirme que no están dañadas.
Q11: ¿Puedo apilar dos juntas de escape para detener una fuga?
A11: Puede ocultar un pequeño problema de alineación temporalmente, pero no es una reparación confiable para una brida deformada o una tubería tensa. Corrija las superficies de acoplamiento y la alineación en lugar de construir un apilamiento de juntas más alto y menos estable.
Q12: ¿Debo poner RTV en una junta de cabezal?
A12: No, a menos que las instrucciones de la junta o del cabezal lo indiquen específicamente. Muchas juntas de escape están diseñadas para instalación en seco. El sellador incorrecto puede quemarse, contaminar los sensores o disimular un problema de alineación.
Q13: ¿Por qué mi junta de escape nueva sigue goteando?
A13: Las causas comunes incluyen un torque desigual, una brida deformada, la junta incorrecta, una junta al revés, roscas dañadas, una percha estresada, desalineación de la tubería o una soldadura agrietada cercana.
Q14: ¿Puede una fuga en la brida del escape causar que se encienda la luz de "check engine"?
A14: Sí, puede ocurrir cuando la fuga está lo suficientemente cerca de un sensor de O2 como para alterar la lectura de oxígeno. Una pequeña fuga detrás de todos los sensores puede cambiar el sonido sin generar un código.
Q15: ¿Puede una fuga de escape reducir la potencia?
A15: La ubicación importa. Una fuga antes de un turbo puede desperdiciar energía que debería impulsar la turbina. Una fuga cerca de un sensor de O2 aguas arriba puede afectar las lecturas de control de combustible. Una pequeña fuga cerca del silenciador trasero suele tener poco efecto medible en la potencia del motor.
Q16: ¿Es seguro conducir con una pequeña fuga en la junta del cabezal?
A16: No hay una respuesta segura basada solo en el nivel de sonido. Si los humos entran en la cabina, el gas caliente golpea los componentes cercanos, un espárrago está roto o la fuga está empeorando, deje de conducir y repárelo rápidamente.

Steven Chen
Especialista en Rendimiento Automotriz | Sistemas de Motor y Escape
Steven se enfoca en el rendimiento práctico del motor, el ajuste del escape y las rutas de actualización reales para vehículos de entusiastas clásicos y modernos. Revisa aplicaciones Ford de bloque pequeño, LS, camiones y de calle/pista con un objetivo en mente: ayudar a los constructores a elegir piezas que realmente funcionen juntas. Su filosofía: "Una buena potencia comienza con la combinación correcta, no con la pieza más grande."











