


The headers are bolted to the cylinder heads. The hard part should be over.
Then you slide underneath the truck, lift the factory exhaust into position, and find two pieces of pipe staring past each other. Wrong length. Wrong angle. Maybe the collector is 3 inches while the stock connection is smaller. Nothing bolts together, the vehicle is stuck on stands, and the original Saturday-afternoon install has turned into a call to a fabrication shop.
That is the part nobody enjoys discussing when shiny long tubes are sitting on a workbench.
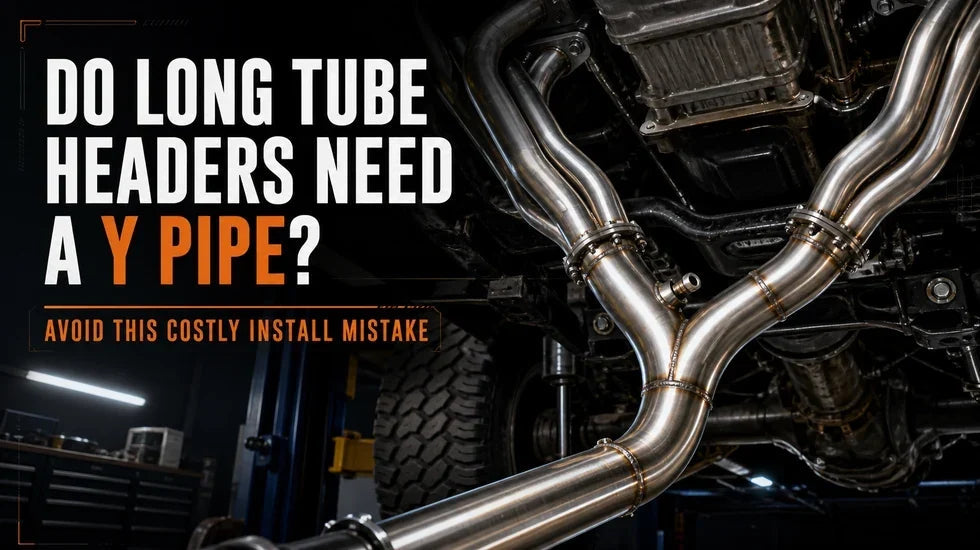
So, do long tube headers need a Y pipe? On many V-engine applications with a single downstream exhaust path, yes—a matched Y-pipe or an equivalent set of connection pipes is often required. Other vehicles use an X-pipe, H-pipe, dual connection pipes, or a vehicle-specific adapter instead. The name matters less than the job: something must connect the new header collectors to the exhaust behind them.
Quick Answer
- Long-tube headers often move the exhaust connection farther rearward than the factory manifolds or shorty headers.
- A vehicle with two header collectors merging into one exhaust path will commonly need a matched Y-pipe.
- A true-dual system may need an X-pipe, H-pipe, or two individual connection pipes instead.
- Some header systems connect to the factory cat-back through dedicated adapters. Others require cutting and welding.
- Matching pipe diameter alone is not enough. Collector position, flange style, center spacing, joint type, and exit angle must also match.
- Do not remove the factory exhaust until every part between the collectors and the cat-back is identified and on hand.
What Long-Tube Headers Replace in the Factory Exhaust
First, forget the idea that a header swap always ends where the factory manifold ends. A shorty header often stays close to the factory exhaust connection. A long tube does not have to.
The primary tubes run farther downstream before merging at the collector. That longer route is the whole point of the design, but it also changes the installation boundary. Depending on the chassis, the long tubes can occupy space previously used by the factory manifold outlet, front catalytic converters, downpipes, or the front section of the original Y-pipe.

Typical Factory Exhaust Path
Cylinder head → factory manifold → front catalytic converter → factory front pipe or Y-pipe → cat-back connection → resonator and muffler
Typical Long-Tube Exhaust Path
Cylinder head → long primary tubes → collector → catted or non-catted connection pipes → Y/X/H section → factory or aftermarket cat-back
Those are representative layouts, not a universal blueprint. A V6 coupe, a cross-plane V8 muscle car, and a GMT800 truck may use different merge points and different names for the same general section of pipe.
Here is the practical dividing line: the header ends at its collector. The cat-back begins at its front connection. Whatever fills the gap is the part buyers most often forget.
Do Long Tube Headers Need a Y Pipe?
They need a Y-pipe when the vehicle has two header collectors that must merge into one downstream pipe and the original Y-pipe cannot meet the new collector locations. That is common on trucks and other V-engine vehicles with a single exhaust path behind the front section.
But listen to me on this one: “long tube” does not automatically mean “Y-pipe.” The exhaust layout decides that.
| Downstream Layout | Likely Connector | What It Does | Main Fitment Check |
|---|---|---|---|
| Dual collectors into one pipe | Y-pipe | Merges the left and right exhaust banks | Collector spacing, angles, and single outlet location |
| Dual exhaust with crossover | X-pipe or H-pipe | Keeps two downstream pipes while connecting pressure pulses | Pipe spacing, crossover position, and floor clearance |
| True-dual exhaust | Two connection pipes | Carries each bank into a separate exhaust path | Left/right length, clocking, and hanger alignment |
| Factory cat-back retained | OEM connection adapter | Transitions the header system back to the factory connection point | Inlet/outlet diameter, joint style, and connection location |
For example, a 1999–2006 GM truck installation can be much cleaner when the headers and merge section are designed as one system. Owners working with a compatible application can review the Flashark 1999–2006 Chevy/GMC GMT800 long-tube header and Y-pipe kit rather than trying to force a factory Y-pipe onto collectors that sit in a different location.
Match the selected configuration to the vehicle year, engine, drivetrain, emissions equipment, and downstream exhaust before ordering.
Why Headers Do Not Connect to Stock Exhaust
When headers do not connect to stock exhaust, the problem is rarely solved by grabbing a larger clamp. There are several separate dimensions at work, and one bad dimension can stop the whole job.
The Collector Has Moved Rearward
Longer primary tubes usually place the collector farther back than the factory manifold outlet. Hold the stock front pipe up to that collector and it may overlap by several inches. On another chassis, the stock pipe may fall short because the replacement connection is shaped differently.
Either way, bolts do not fix length.

The Pipe Diameter Is Different
A 3-inch collector will not automatically connect to a smaller factory inlet. A reducer may handle the diameter transition, but only if the two sections already meet at the correct location and angle.
Measure the actual joint. Do not rely only on a “3-inch exhaust” description. One manufacturer may be referring to pipe outside diameter. Another may be describing the nominal system size. A slip-fit joint also needs one end sized to fit over or inside the other.
The Flange Style Is Wrong
Common exhaust joints include:
- Two-bolt flat flanges
- Three-bolt flanges
- Ball-and-socket connections
- V-band connections
- Slip-fit joints
- Butt joints secured with sleeve clamps
A flat flange cannot seal against a ball-and-socket outlet just because both openings measure 3 inches. The mating surfaces, bolt pattern, and joint movement are completely different.
The Collector Center Spacing Is Different
Measure from the center of the left collector to the center of the right collector. Then compare that distance with the two inlets on the Y-pipe or X-pipe.
This catches an ugly problem early. One side may bolt up while the other sits an inch away. People then loosen every clamp, push the exhaust sideways, and use the bolts to drag the second flange into place. That stores stress in the system. After a few heat cycles, the gasket leaks, a hanger stretches, or a weld starts cracking.
Mechanic’s Note
If a flange has to be pulled sideways with the bolts, stop. Exhaust fasteners are there to clamp two correctly aligned surfaces. They are not alignment tools.
The Exit Angle or Flange Clocking Is Off
Two pipes can meet at the same point and still refuse to seal. One collector may point slightly downward while the mating pipe points straight forward. A V-band may be clocked so the clamp contacts the floor. A two-bolt flange may be rotated several degrees, putting the holes in the wrong place.
Small angular errors at the front become much larger alignment errors at the tailpipes. That is why a collector problem can eventually show up as one exhaust tip sitting lower than the other.
Stock Exhaust vs. Long-Tube Header System
| Feature | Factory Manifold System | Long-Tube Header System | What the Buyer Must Check |
|---|---|---|---|
| Manifold length | Compact casting or short factory runners | Long primaries extending farther under the vehicle | Collector position relative to the transmission and floor |
| Front connection | Designed around the original front pipe | May require matched connection pipes or a new merge section | Joint style, flange pattern, and adapter requirement |
| Typical outlet size | Vehicle-specific factory size | Often larger, but application-specific | Actual outside diameter at both sides of the joint |
| Catalyst location | Integrated into the factory emissions layout | Can change with the selected header and connection-pipe design | Selected configuration and local road-use requirements |
| Oxygen sensors | Factory bung position and harness routing | Bung position and wire reach can change | Bung count, thread, angle, harness reach, and heat clearance |
| Installation path | Factory service procedure | Bolt-on, adapter-based, or fabricated connection | Whether cutting, welding, or calibration work is involved |
Notice there are no universal horsepower figures in that table. That is deliberate. Header performance depends on primary diameter, primary length, collector design, engine displacement, camshaft, cylinder-head flow, downstream restriction, engine condition, fuel, and calibration. A number without those conditions is decoration, not useful shop data.
For a practical comparison of the packaging, clearance, sound, and installation differences, read the long-tube vs. shorty header guide for the 5.3 Silverado.
What Is a Long Tube Header Mid Pipe?
A long tube header mid pipe is the exhaust section that carries flow away from the header collectors and toward the cat-back. Simple enough—until manufacturers start calling it five different things.
You may see:
- Connection pipes
- Lead pipes
- Front pipes
- Intermediate pipes
- Y-pipe
- X-pipe
- H-pipe
- OEM connection pipes
Do not buy by name alone. Buy by function and geometry.
Ask where the part starts, where it ends, how it seals at both ends, and whether it is designed for the exact header part number. One “mid-pipe” may run from the collectors to the factory cat-back connection. Another may be only the crossover section. A third may be a resonator delete located much farther downstream.
Catted and Non-Catted Connection Pipes
Some long-tube layouts move or replace the section where the front catalytic converters were located. That changes far more than sound.
It can affect:
- Catalyst location and heat
- Front and rear oxygen-sensor placement
- Harness routing
- Ground and floor clearance
- Exhaust odor
- Diagnostic behavior
- Road-use and emissions requirements
Review local emissions and road-use requirements before modifying emissions-related equipment. Tune requirements and diagnostic behavior vary by vehicle and installed hardware; neither should be assumed from the appearance of the pipes.
Keeping the Factory Cat-Back
Keeping the stock rear exhaust can control cost and preserve a more restrained sound. It can also work well when the header manufacturer offers a connection pipe ending at the factory cat-back location.
Still, check for a neck-down. A system can bolt to a 3-inch header collector and then reduce near the stock connection. That does not automatically make it a bad combination, but the buyer should understand what is being installed.
If the rear section is also due for replacement, compare vehicle-specific cat-back exhaust systems for matched sound and downstream fitment. The cat-back inlet location and joint style still need to match the front section.
Ten Checks to Make Before Ordering a Header Mid-Pipe or Y-Pipe
Here is where projects are saved. Not under the truck. Before the order.
-
Record the complete vehicle configuration. Write down year, make, model, engine, transmission, drivetrain, cab or body configuration, and any chassis changes.
-
Use the exact header part number. A manufacturer may offer header-only, direct-connect, catted, non-catted, or full-system versions for one vehicle family.
-
Measure collector outside diameter. Measure at the joining surface, not halfway up the collector cone.
-
Identify the collector joint. Photograph the flange, bolt pattern, ball seat, slip-fit end, or V-band from straight on.
-
Measure collector center spacing. Use the same reference point on both outlets.
-
Record vertical offset. One collector may sit higher than the other to clear the transmission or floor.
-
Measure the cat-back inlet. Record diameter, connection type, and the distance from a fixed chassis reference.
-
Check the catalytic-converter layout. Identify what stays, what moves, and what configuration is being selected.
-
Check every oxygen-sensor location. Confirm bung count, thread, sensor angle, wire reach, and clearance from hot or rotating parts.
-
Identify fabrication before teardown. If cutting, welding, or flange work is needed, schedule the shop while the vehicle can still move under its own power.
Warning: “Fits the Vehicle” Is Not the Whole Question
A header may clear the engine, steering, transmission, and chassis while still requiring a different downstream connection. Header-to-engine fitment and header-to-cat-back compatibility are two separate checks.
A Shop-Floor Fitment Check I Use Before Tightening Anything
When I evaluate a stalled long-tube installation, I do not begin by forcing the rear exhaust toward the collectors. I support the complete system in its natural position, leave the joints loose, and work from the cylinder heads toward the tailpipes.
The recurring failure pattern looks like this: one collector flange sits correctly, the other needs to be pulled sideways, and the installer assumes the hangers will absorb the difference. They will—for a while. Then the heat cycles start.
I check three things first:
- The center-to-center distance between the collectors
- The angle and clocking of both mating joints
- The amount of neutral movement available in the rubber isolators
If loosening the mid-pipe makes it jump sideways, the system was carrying preload. If a rubber hanger is stretched before the clamps are tight, the pipe is not sitting where it wants to sit. And if only the bolts can close the final gap, the parts are not properly aligned.
Never use the cylinder-head flange, collector bolts, or exhaust hangers to overpower bad downstream geometry. Correct the connection instead.

Matched System, Adapter, or Custom Fabrication?
Option 1: Use a Matched Header and Mid-Pipe System
This is usually the cleanest route. The manufacturer controls collector spacing, connection angles, merge position, and the rear outlet location as one assembly.
It still needs the correct vehicle configuration. A 2WD and 4WD truck can share an engine while having very different front driveshaft, differential, crossmember, and collector-clearance requirements.
Browse vehicle-specific Flashark performance exhaust headers by the complete vehicle configuration rather than engine displacement alone.
Option 2: Use an OEM Connection Adapter
An adapter makes sense when the goal is to keep the existing cat-back. Check both ends carefully. You need the header-side diameter and joint, the cat-back-side diameter and joint, and the installed length.
A reducer solves diameter. It does not solve a four-inch location error or a crooked flange.
Option 3: Modify the Factory Mid-Pipe
This can work when the original pipe is structurally sound and there is enough straight tubing to cut, shorten, expand, and weld correctly.
The modified pipe should meet the collectors without lateral force. Both flanges should sit flat before tightening. Leave enough clearance for drivetrain movement and heat expansion.
Option 4: Fabricate a New Connection
Custom work is often the honest answer for engine swaps, older chassis, mixed-brand exhaust systems, altered transmissions, or vehicles without a matched production mid-pipe.
A competent exhaust fabricator will need the vehicle at ride height or securely positioned on a lift. The job may involve reducers, bends, flex sections, flanges, V-bands, oxygen-sensor bungs, hangers, and a new merge.
How to Install the System Without Building Stress Into It
Once the correct parts are on the floor, installation order matters.
-
Inspect every mating surface. Remove shipping caps and check flanges, ball seats, slip joints, and threads for damage.
-
Test-fit the complete front section. Do this before final tightening at the cylinder heads.
-
Support the mid-pipe and mufflers. Let the rubber isolators sit near their neutral position.
-
Start every fastener by hand. A bolt that will not start freely is trying to tell you something.
-
Keep the joints movable. Align the complete exhaust from front to rear before locking one section in place.
-
Check clearance. Inspect the transmission, crossmember, driveshaft, steering shaft, wiring, brake lines, floor, and heat shields.
-
Tighten progressively. Follow the hardware and gasket requirements for the selected system.
-
Check oxygen-sensor wiring. Keep the harness away from collectors, sharp edges, and rotating parts.
-
Start the engine and inspect for leaks. Do not reach around hot or moving components.
-
Recheck after heat cycling. Inspect joints, fasteners, soot marks, contact points, and hanger position.
For a broader preparation and installation sequence, use this performance exhaust header installation and maintenance guide.
Common Problems After the Pipes Bolt Together
Collector Leak
A sharp ticking noise near the collector, exhaust smell, or a dry black trail around a joint can point toward leakage. The stain may travel away from the actual opening, so inspect the entire circumference.
Do not immediately solve every leak with more torque. Check flange alignment, gasket type, ball-seat position, clamp placement, and system preload first. This guide to black soot around an exhaust flange walks through practical leak checks.
One Side of the Y-Pipe Will Not Reach
Loosen the front and rear joints enough to let the assembly move. Support the pipe. Then compare the collector spacing and angles again.
If one side only reaches when the other is partly disconnected, the geometry is wrong. Possible causes include the wrong mid-pipe, an incorrect vehicle application, shipping damage, a bent hanger, unequal engine mount position, or a joint installed in the wrong orientation.
The Exhaust Hits the Crossmember
Check whether a slip joint is inserted too deeply or not deeply enough. Rotating a connection pipe can also change clearance. Do not hammer a pipe for clearance until the application and installation position have been checked.
The Tailpipes Sit Crooked
A small front-section rotation can move a tailpipe noticeably at the bumper. Reset the system from the front. Equalize slip-joint engagement and remove hanger preload before adjusting the tips.
An Oxygen-Sensor Wire Is Pulled Tight
Do not stretch the harness or route it against a collector. Check the selected component layout and use the correct routing or application-specific solution. A wire that clears a cold pipe can still be damaged once the drivetrain moves under load.
The Real Long-Tube Header Budget
The advertised header price is not always the project price. Be honest with the spreadsheet before the truck is immobilized.
| Cost Item | Why It May Be Needed | Confirmed Before Teardown? |
|---|---|---|
| Headers | Replaces the factory manifold section | □ |
| Y/X/H-pipe or connection pipes | Connects collectors to the rear exhaust | □ |
| Catalyst configuration | Selected exhaust layout may change the front section | □ |
| Reducers, flanges, and clamps | Handles joint and diameter transitions | □ |
| Gaskets and fasteners | Provides correct clamping and sealing | □ |
| Sensor routing components | Addresses changed bung or harness position | □ |
| Fabrication labor | Covers cutting, bending, welding, or new flanges | □ |
| Calibration or diagnostic work | Depends on the vehicle and installed hardware | □ |
Also budget for seized manifold fasteners, broken studs, damaged oxygen sensors, and extra shop time on older vehicles. Those are condition-dependent expenses, but pretending they cannot happen does not make them disappear.
Questions to Ask Before Buying
Send the seller one complete message instead of six vague ones:
I have a [year, make, model, engine, transmission, and drivetrain] with a [stock or brand/part-number] cat-back. Does header part number [part number] connect at the factory cat-back location? Which connection-pipe or mid-pipe part number is required? Please identify the collector diameter, joint style, catalyst configuration, oxygen-sensor locations, and whether cutting or welding is required.
Specific questions produce useful answers. “Will it fit?” is too broad. Fit what—the cylinder head, chassis, Y-pipe, factory cat-back, or all four?
Frequently Asked Questions About Long-Tube Header Mid-Pipes and Y-Pipes
Q1: Do long tube headers need a Y pipe?
A1: A Y-pipe is commonly needed when two header collectors must merge into one downstream exhaust path and the factory Y-pipe does not match the new collector positions. Dual-exhaust vehicles may use an X-pipe, H-pipe, or separate connection pipes instead.
Q2: Why do headers not connect to stock exhaust?
A2: The collector may sit farther rearward, use a different diameter, have different center spacing, or use a different flange. Any one of those differences can prevent a direct connection.
Q3: Can long-tube headers connect to a stock cat-back?
A3: They can when the header system uses connection pipes or an adapter designed to end at the factory cat-back location. Match the header, adapter, and vehicle configuration by part number.
Q4: Can I reuse the factory Y-pipe with long-tube headers?
A4: Only when its inlet locations, joint style, diameter, and installed length match the new collectors. Otherwise, it needs modification or replacement with a matched Y-pipe.
Q5: What long tube header mid pipe should I buy?
A5: Choose the pipe specified for the exact header part number and vehicle configuration. Check where it begins and ends, its collector joints, rear connection, catalyst layout, and oxygen-sensor bungs.
Q6: Is a connection pipe the same as a mid-pipe?
A6: Not always. A connection pipe may cover only the distance between a collector and a Y/X/H section. A mid-pipe may describe a larger assembly running toward the cat-back.
Q7: Do the headers and Y-pipe need to be the same brand?
A7: A matched system usually reduces compatibility risk, but brand alone is not enough. The two components still need compatible part numbers, collector spacing, flange style, and outlet location.
Q8: Will a 3-inch mid-pipe fit a 3-inch collector?
A8: Not automatically. Check actual outside diameter, male or female slip-fit orientation, flange type, center spacing, exit angle, and installed length.
Q9: Can an exhaust shop connect long tubes to my existing cat-back?
A9: A qualified shop can fabricate connection pipes when there is safe space for bends, joints, sensors, and hangers. Get the work assessed before the factory exhaust is removed.
Q10: Do long-tube headers replace the catalytic converters?
A10: The answer depends on the vehicle and selected exhaust layout. Some designs change the front-pipe and catalyst location. Review the configuration and applicable emissions requirements before installation.
Q11: Do long-tube headers require oxygen-sensor extensions?
A11: Some installations change sensor position enough to affect harness reach. Check bung location, sensor angle, connector reach, heat clearance, and the selected installation instructions.
Q12: Will long-tube headers cause a check-engine light?
A12: Diagnostic behavior depends on the vehicle, catalyst configuration, oxygen-sensor placement, exhaust sealing, and calibration. Check the complete installed combination rather than assuming one outcome.
Q13: Do long-tube headers require a tune?
A13: Tune requirements vary by vehicle and installed hardware. Follow the requirements for the exact application and do not treat calibration as a substitute for correct mechanical fitment or emissions compliance.
Q14: Do long-tube headers require welding?
A14: A matched bolt-on system may not require welding. Header-only, universal, mixed-brand, engine-swap, and modified factory-exhaust installations often need fabrication.
Q15: Why does my Y-pipe fit one collector but not the other?
A15: Check collector center spacing, vertical offset, exit angles, engine-mount position, and whether the system was tightened too early. Do not drag the second flange into place with its bolts.
Q16: Can I install the headers now and add the Y-pipe later?
A16: Only when a usable downstream connection is already available. Otherwise, the vehicle may be left without a complete exhaust path. Have every required connection part on hand before teardown.
Final Check Before the Wrenches Come Out
Long tubes are not just two shiny pieces bolted to the engine. They change the front half of an exhaust system, and sometimes more.
Know the replacement boundary. Match the collector geometry. Identify the correct Y-pipe, X-pipe, H-pipe, connection pipes, or adapter. Check the cat-back inlet. Plan the catalyst and oxygen-sensor layout. Then put the truck on the lift.
That order matters.
Because the cheapest time to discover a missing mid-pipe is while the factory exhaust is still attached.

Steven Chen
Automotive Performance Specialist | Engine & Exhaust Systems
Steven focuses on practical engine performance, exhaust fitment, and real-world upgrade paths for classic and modern enthusiast vehicles. He reviews small-block Ford, LS, truck, and street/strip applications with one goal in mind: helping builders choose parts that actually work together. His philosophy: “Good power starts with the right combination, not the biggest part.”











