


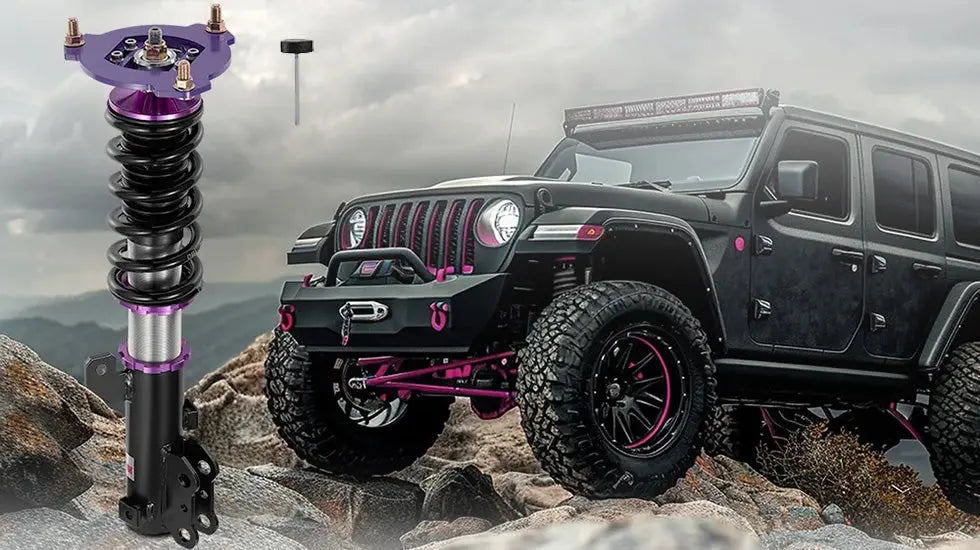
A coilover can feel harsh, floaty, slow to recover, or unsettled over rough pavement when its damping setting does not suit the vehicle and road conditions. The correct adjustment depends on the coilover design, spring rate, available suspension travel, tire condition, vehicle balance, and how the car is being used.
The technical term is damping, although many drivers search for and refer to it as dampening. Both terms are used in this article so owners can recognize the language used in product listings and discussions. The important point is that damping controls the speed of suspension movement; it does not directly change the spring rate.
- Begin with the coilover manufacturer's recommended damping setting whenever one is available.
- Record the starting position before moving an adjuster.
- Change one variable at a time, usually in small one- or two-click steps.
- Test the vehicle on the same route or under comparable track conditions after each change.
- A harder setting is not automatically better. Excessive damping can reduce grip on rough surfaces.
- Keep left and right settings consistent unless the suspension manufacturer or an experienced chassis technician specifies otherwise.
- Do not force an adjuster past its stop, and never work beneath a vehicle supported only by a jack.
Introduction to Coilovers and Damping
A coilover combines a coil spring and damper into one suspension assembly. Many aftermarket coilovers also provide ride-height, spring-preload, or damping adjustments, but those functions are not interchangeable. Changing damping affects how quickly the suspension compresses and extends. It does not make the installed spring physically stiffer.
Not every coilover offers the same adjustment system. A single-adjustable unit may primarily change rebound damping or may change compression and rebound together. A two-way unit normally separates compression and rebound. More advanced dampers can divide compression into high-speed and low-speed circuits, where “speed” refers to damper-shaft speed rather than vehicle speed.
Identify the adjustment system before turning a knob. Two similar-looking coilovers do not necessarily respond to adjustments in the same way.

What Does Dampening Do on Coilovers?
Damping creates resistance as oil moves through the damper's piston and valve system. That resistance controls suspension velocity during compression and rebound. A suitable setting helps the tire follow the road while controlling excessive or repeated body movement.
Damping interacts with the spring, tire, anti-roll bar, suspension geometry, vehicle weight, and available travel. It can influence how quickly the vehicle takes a set during braking or cornering, but it is not a substitute for selecting an appropriate spring rate or correcting insufficient suspension travel.
Compression vs. Rebound Damping
Compression damping, sometimes called bump damping, resists the damper as it shortens. It becomes active when a wheel moves upward over a bump or when vehicle load transfers onto that corner.
Rebound damping resists the damper as it extends after compression. It controls how quickly the spring pushes the wheel and suspension back toward their normal positions.
Too much compression damping can make sharp bumps feel harsh and may prevent the wheel from following a rough surface cleanly. Too little compression control can allow the suspension to move through its travel too quickly, but bottoming can also result from ride height, spring rate, bump-stop engagement, load, or insufficient travel.
Too little rebound damping can allow repeated oscillation after a bump. Too much rebound can hold the suspension down through a series of bumps, a condition often described as packing down. The result may be reduced travel and less consistent tire contact.
How to Adjust Dampening on Coilovers
Before adjusting coilover damping, find the product-specific instructions and identify what each adjuster controls. A knob on top of the strut may control rebound on one design and a combined damping circuit on another. Reservoir-mounted adjusters often control compression, but the exact function and direction depend on the damper.
Step-by-Step Process to Adjust Dampening
- Inspect the vehicle first. Check tire pressures, wheel fasteners, visible leaks, damaged bushings, loose mounts, broken springs, and available suspension travel. A damping adjustment cannot repair a worn or incorrectly installed component.
- Locate and identify each adjuster. Determine whether the coilovers are single-adjustable, rebound-adjustable, compression-adjustable, or independently adjustable.
- Find the recommended baseline. Use the setting specified for the exact coilover model when possible. A universal “middle setting” is not a substitute for the manufacturer's starting point.
- Count and record the existing setting. Turn the adjuster gently toward the specified reference end while counting the clicks, then return it to the starting position. Never force the knob after it reaches its stop.
- Make a small change. One or two clicks is usually easier to evaluate than a large adjustment. Keep the left and right sides of the same axle matched unless a deliberate asymmetric setup has been specified.
- Test under repeatable conditions. Use the same road section or comparable track session. Pay attention to sharp impacts, repeated bounce, steering response, braking stability, traction, and recovery after a bump.
- Write down the result. Record the front and rear settings, tire pressure, road or track conditions, the change made, and what improved or worsened.
- Return to baseline when the result is unclear. A known starting point prevents several changes from turning into an untraceable setup problem.
Soft vs. Hard Coilover Dampening
“Soft” and “hard” describe the amount of damping force selected at the adjuster. They do not directly describe spring rate, and they do not guarantee a particular ride quality. A high spring rate with low damping can still feel harsh, while a softer spring with excessive damping may feel slow and unresponsive over repeated bumps.
| Vehicle Behavior | Possible Damping Condition | What to Check | Conservative Next Step |
|---|---|---|---|
| Repeated bouncing after one bump | Rebound control may be too low | Damper condition, spring seating, tire pressure, and whether the motion is isolated to one corner | Increase the relevant damping circuit slightly and retest |
| Sharp, harsh response over small bumps | Compression or combined damping may be too high | Tire pressure, spring rate, bump-stop contact, damper setting, and suspension binding | Reduce damping slightly and compare the same road section |
| Ride becomes lower or harsher through consecutive bumps | Rebound may be excessive and causing pack-down | Available travel, rebound setting, bump spacing, load, and spring rate | Reduce rebound in small steps and retest |
| Slow or reluctant suspension movement on rough pavement | Overall damping may be too high | Both damping circuits, suspension joints, tire construction, and road surface | Soften one circuit at a time rather than moving every adjuster |
| Excessive pitch, roll, or slow response | Damping may be low, but other chassis variables may dominate | Springs, anti-roll bars, alignment, ride height, tires, load transfer, and available travel | Make a small damping change only after mechanical and setup checks |
| Suspension reaches the bump stop | Compression damping may be one factor, but not necessarily the cause | Ride height, suspension travel, load, spring rate, bump stops, and road input | Correct the travel or mechanical problem instead of relying only on harder damping |
Choosing Dampening Settings for Daily Driving
For street use, begin with the recommended road setting rather than turning every adjuster fully soft. The goal is enough control to prevent repeated movement without making the tire skip across broken pavement.
Use a familiar route containing a mix of smooth road, small sharp bumps, longer undulations, braking zones, and moderate corners. Maintain consistent tire pressures and vehicle load while comparing settings. If the car hits a bump once and settles without a second large movement, the setting may be close. If it continues to oscillate, additional rebound control may help, provided the dampers and other suspension parts are in good condition.
If the ride is harsh, do not assume the damping knob is the only cause. Check tire pressure, wheel and tire size, spring rate, ride height, bump-stop engagement, preload, seized joints, and damper condition.

Coilover Damping for Track Driving
A track setting is not simply the hardest available setting. A smooth circuit, a bumpy circuit, different tires, changing temperatures, added aerodynamic load, and changes in fuel load can all require different suspension behavior.
Begin from the damper manufacturer's recommended track or performance baseline when one is supplied. Adjust one circuit at a time and use consistent driver feedback, tire behavior, and lap conditions. Low-speed damping can influence how quickly the chassis takes a set during braking, corner entry, and direction changes. High-speed damping, when independently adjustable, deals more directly with rapid damper movement caused by curbs and sharp surface inputs.
Excessive damping can reduce mechanical grip, especially when the track is rough. The suspension must still move enough to keep the tire following the surface.
Adjusting for Cornering Stability
Damping can change the rate of weight transfer and the vehicle's transient response. It does not independently determine total steady-state body roll. Springs, anti-roll bars, suspension geometry, tire stiffness, track width, and center-of-gravity height all contribute.
A front-to-rear damping change can also alter balance, but there is no universal “stiff rear” or “soft front” formula. The correct direction depends on the adjustment circuit, drive layout, corner phase, tire behavior, spring rates, alignment, and driver input. When the vehicle develops understeer or oversteer, first identify whether it occurs at entry, mid-corner, or exit before changing the dampers.
Managing Tire Contact on Rough Surfaces
Rebound damping should control spring extension without preventing the suspension from recovering between bumps. If rebound is too high, the damper may remain compressed through repeated surface inputs. If it is too low, the body may continue moving after the tire has passed the bump.
Compression damping should resist unwanted motion while still allowing the wheel to move over the surface. More compression resistance may sharpen some responses, but too much can make the tire deflect or skip instead of allowing the suspension to absorb the input.
Dampening for Drift and Performance Driving
Drift setups place different demands on the suspension depending on vehicle weight, steering geometry, differential behavior, tire construction, power delivery, track surface, and driver technique. Avoid copying a fixed front/rear click combination from a different car.
Start from a known balanced setting. Then identify the behavior that needs attention: initiation response, front grip, rear transition speed, stability at angle, or traction on corner exit. Change one axle or one damping circuit at a time. A change that improves initiation may reduce grip or stability elsewhere in the corner, so evaluate the complete maneuver rather than one sensation.
Common Mistakes When Adjusting Coilover Dampening
1. Changing Too Many Settings at Once
Changing front damping, rear damping, tire pressure, and alignment together makes it difficult to identify what helped. Keep a setup log and change one variable at a time.
2. Assuming Harder Always Means Better Handling
A harder setting can make the steering response feel immediate on a smooth surface, but that does not automatically mean the tire has more grip. Excessive damping can make the vehicle less composed when the road or track becomes uneven.
3. Ignoring the Manufacturer's Adjustment Direction
Clockwise often increases damping, but it is not a universal rule for every adjuster. Some knobs are labeled by clicks from full hard, while others are specified from full soft. Use the instructions for the exact damper.
4. Forcing the Adjustment Knob
An adjuster should be moved gently. Forcing it against its stop can damage the mechanism or make the recorded setting inaccurate.
5. Using Damping to Hide a Mechanical Problem
Leaking dampers, loose mounts, worn bushings, damaged springs, incorrect preload, poor alignment, and insufficient travel require mechanical correction. A knob cannot compensate for a failed component.
6. Confusing Damping with Ride Height or Spring Preload
Ride height, preload, spring rate, and damping affect different parts of suspension behavior. Adjusting one may change how the others feel, but they should not be treated as the same setting.
How Dampening Affects Handling and Ride Comfort
A suitable damping setting helps the vehicle settle after bumps, braking, acceleration, and steering inputs. Too little control may allow repeated body movement. Too much can make the suspension reluctant to move, reducing comfort and potentially reducing grip over uneven surfaces.
Ride comfort is also affected by spring rate, tire sidewall, tire pressure, wheel mass, suspension geometry, bushing stiffness, seat design, and road surface. Changing the damper may improve one type of input while making another more noticeable.
The practical goal is not to make the vehicle as soft or as hard as possible. It is to find a repeatable setting that keeps the tires working while providing the body control required for the vehicle's use.
Keep a Coilover Setup Log
A simple record prevents guesswork. For each test, write down:
- Front-left and front-right damping positions
- Rear-left and rear-right damping positions
- Which end of the adjuster range was used as the reference
- Tire pressures and tire condition
- Vehicle load
- Road or track conditions
- The symptom being addressed
- The adjustment made
- What improved, what worsened, and what stayed the same
This record is especially useful when a car is driven on both the street and track. Store the known road and track settings as separate baselines, but continue to account for changes in tires, load, weather, and surface conditions.
When a Damping Adjustment Is Not Enough
Stop adjusting and inspect the suspension when the vehicle shows any of the following:
- Fluid leaking from a damper
- A bent shaft, damaged body, or damaged adjustment knob
- Clunking or movement at a top mount
- A spring that is loose when the suspension is unloaded
- Persistent contact with the bump stop
- Uneven ride height that cannot be explained by load or surface
- One corner responding differently with matching settings
- Tire contact with the body, spring, or suspension components
- Loose fasteners or damaged bushings
These conditions may require inspection by a qualified suspension technician. Continuing to drive while a suspension component is loose or damaged can affect steering, braking, and tire contact.
Related Coilover Setup Resources
Damping is only one part of a complete suspension setup. Use the following resources when the problem involves another adjustment:
- How to adjust coilover ride height
- How to set coilover spring preload
- How damping relates to suspension bottoming
Drivers comparing vehicle-specific suspension options can also review the Flashark coilover collection. Match any kit to the exact vehicle year, model, drivetrain, suspension configuration, and intended use before ordering.
Conclusion
Coilover damping controls the speed of suspension movement during compression and rebound. A good starting point comes from the instructions for the exact damper, followed by small, recorded adjustments under repeatable conditions.
Do not chase the hardest setting or rely on a universal click count. Keep the left and right sides consistent, distinguish damping from spring and ride-height changes, and return to a known baseline when the result becomes unclear. When a vehicle remains harsh, unstable, or inconsistent despite reasonable adjustments, inspect the mechanical condition and available suspension travel before turning the knob again.
Frequently Asked Questions About Coilover Dampening
Q1: Is it called coilover damping or dampening?
A1: Damping is the correct technical term for controlling suspension movement. Dampening is a common search and shopping term, so owners may see both words used for the same adjustment.
Q2: What does the damping adjustment on coilovers change?
A2: It changes the resistance to damper movement during compression, rebound, or both, depending on the coilover design. It does not directly change the installed spring rate.
Q3: How many clicks should I use for daily driving?
A3: There is no universal click setting. Begin with the recommendation for the exact coilover model, then make small changes based on tire contact, ride quality, body control, road conditions, and vehicle load.
Q4: Does turning a coilover knob clockwise make it stiffer?
A4: Clockwise often increases damping, but the direction and reference point vary by product. Check the labels and instructions for the exact damper, and never force the adjuster past its stop.
Q5: Should front and rear coilovers use the same damping setting?
A5: Not necessarily. Front and rear axle loads, suspension geometry, spring rates, and handling requirements can differ. Keep the left and right sides of each axle matched unless a deliberate asymmetric setup has been specified.
Q6: Will softer damping make coilovers more comfortable?
A6: It may improve compliance when excessive damping is causing harshness, but comfort also depends on spring rate, tire pressure, wheel and tire construction, ride height, bump-stop engagement, suspension travel, and component condition.
Q7: Why does my car keep bouncing after a bump?
A7: Insufficient rebound control can contribute to repeated movement, but worn dampers, unsuitable springs, loose mounts, incorrect tire pressure, or other mechanical problems can produce similar symptoms. Inspect the suspension before relying only on the adjuster.
Q8: Why does my suspension feel harsh over small bumps?
A8: Excessive compression or combined damping may be one cause. High tire pressure, stiff springs, limited travel, bump-stop contact, binding joints, and low-profile tires should also be checked.
Q9: Can harder damping prevent a coilover from bottoming out?
A9: Additional compression resistance may slow suspension movement in some situations, but it does not create more travel. Ride height, load, spring rate, bump stops, damper stroke, and the size of the road input must also be considered.
Q10: Should I use the hardest damping setting on a track?
A10: No. The suspension still needs to follow the surface. A setting that is too hard can reduce grip on bumps and curbs, so begin with a recommended track baseline and adjust in small steps.
Q11: Can I adjust coilover damping while the coilovers are installed?
A11: Many adjusters are accessible with the coilovers installed, but access depends on the vehicle and damper design. Park safely, keep clear of hot or moving components, and support the vehicle correctly if underbody access is required.
Q12: Do I need an alignment after changing coilover damping?
A12: A damping-only adjustment normally does not change alignment geometry. An alignment check is appropriate after changing ride height, replacing suspension parts, loosening alignment-related fasteners, or noticing uneven tire wear or steering changes.

Steven Chen
Automotive Performance Specialist | Engine & Exhaust Systems
Steven focuses on practical engine performance, exhaust fitment, and real-world upgrade paths for classic and modern enthusiast vehicles. He reviews small-block Ford, LS, truck, and street/strip applications with one goal in mind: helping builders choose parts that actually work together. His philosophy: "Good power starts with the right combination, not the biggest part."














