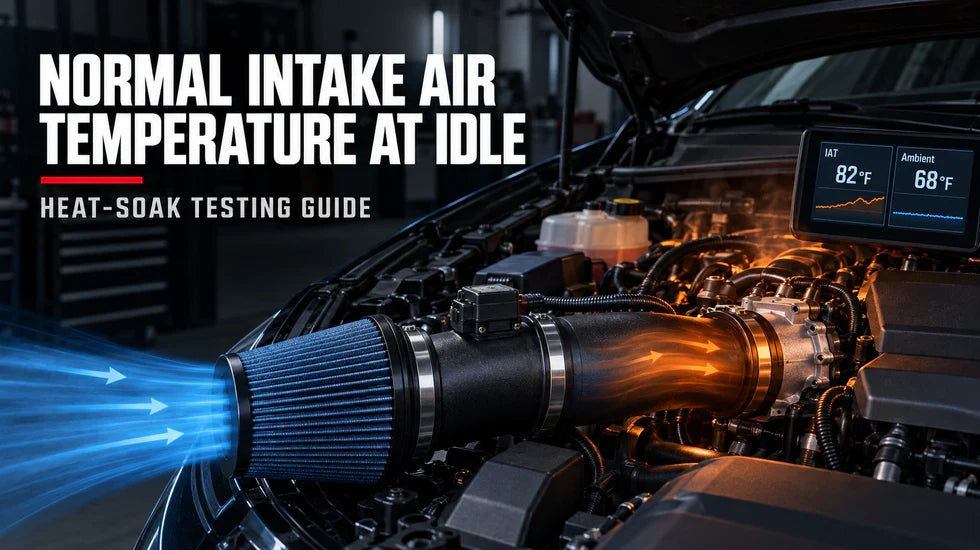
Your scan tool says the intake air is 128°F. The weather app says it is 82°F. Is the engine inhaling oven air, is the intake poorly designed, or is the sensor simply sitting in a hot manifold with almost no airflow moving across it?
Honestly, one number cannot answer that question. Intake air temperature only makes sense when you compare it with the temperature outside the intake, identify where the sensor is mounted, and watch what happens as the vehicle moves from a cold start to hot idle and then steady cruising.
Quick Answer: What Is Normal?
- There is no universal normal intake air temperature at idle. A useful reading is the difference between IAT and the air temperature near the vehicle's intake inlet.
- After an overnight cold soak, IAT should usually begin reasonably close to local ambient temperature. A repeatable difference of more than roughly 10–15°F deserves a closer look at sensor location, sensor accuracy, and the reference temperature.
- A fully warmed engine can show an idle IAT 15–40°F above ambient, sometimes more after traffic or a hot restart. Treat that as a diagnostic starting range, not a pass-or-fail specification.
- If IAT rises while stationary but drops sharply once the vehicle reaches steady road speed, the pattern usually points toward low-airflow heat soak.
- If IAT stays unusually high during steady cruising, begins far from ambient after a true cold soak, freezes, or jumps abruptly, inspect the air path, sensor, connector, and wiring.
- On turbocharged and supercharged engines, note whether the sensor reads air before the compressor, after the compressor, or after the intercooler. Those readings are not interchangeable.
What Intake Air Temperature Actually Measures
The intake air temperature sensor is usually a negative-temperature-coefficient thermistor. As its temperature rises, electrical resistance falls. The engine control module translates that signal into a temperature value and uses it as one input when calculating air density, fuel delivery, ignition strategy, and protective corrections.
Here is the catch: the sensor reports the temperature at its sensing element. It does not know what the weather app says. It does not know whether the plastic airbox lid is missing. And it cannot separate heat carried by incoming air from heat conducted into its body by a hot intake manifold.

IAT Is Not the Same as Outside-Air Temperature
Your dashboard outside-temperature display and your IAT parameter usually come from different sensors in different locations. The outside sensor may sit near the bumper. The IAT sensor may be inside the mass airflow sensor, in the intake tube, or deep in the manifold.
Even the dashboard reading can be misleading when the car is parked over sun-baked asphalt or when hot air from the radiator and A/C condenser reaches the sensor. For a controlled test, use a separate temperature probe placed near the fresh-air inlet—but away from the radiator outlet, exhaust components, and direct sunlight.
Why Intake Air Temperature Sensor Location Changes the Reading
| Sensor Location | What It Mostly Sees | Heat-Soak Sensitivity | Diagnostic Note |
|---|---|---|---|
| Airbox or MAF housing | Air entering the intake tract | Low to moderate | Useful for judging inlet-air sourcing and airbox sealing. |
| Intake tube near throttle body | Air after traveling through the tube | Moderate | Tube material, nearby exhaust heat, and airflow speed matter. |
| Intake manifold or MAP/IAT sensor | Air near the runners or plenum | High at idle | The sensor body can absorb heat from the manifold. |
| After turbo or supercharger | Compressed charge air | Application-dependent | Compression adds heat; do not compare this directly with a pre-compressor sensor. |
| After intercooler | Charge air delivered toward the engine | Affected by intercooler heat soak | Log boost, speed, and throttle position with temperature. |
Technician's Note: Do not compare a friend's MAF-mounted IAT with your manifold-mounted TMAP and declare one intake better. You may be measuring two different sections of the air path—and two very different kinds of heat exposure.
Normal Intake Air Temperature at Idle Depends on Temperature Delta
The cleaner way to judge idle temperature is to calculate the difference between IAT and ambient temperature:
ΔIAT = Intake Air Temperature − Local Ambient Temperature
Suppose the outside air near the intake inlet is 90°F and the scan tool shows 108°F. Your delta is +18°F. Now take another car showing the same 108°F IAT on a 52°F morning. Its delta is +56°F. Same absolute IAT. Completely different diagnostic picture.
That is why asking whether 100°F or 120°F is automatically “too hot” goes nowhere. The temperature delta, operating condition, and recovery behavior tell the story.
A Practical IAT-to-Ambient Interpretation Guide
| Vehicle State | Typical Pattern | What Deserves Attention |
|---|---|---|
| Overnight cold soak, key on | IAT begins reasonably close to local ambient. | A large, repeatable offset before the engine runs. |
| Cold start | IAT starts near ambient, then gradually climbs as underhood heat builds. | An instant jump, implausible value, or frozen reading. |
| Fully warm idle | Delta often grows with idle time because airflow is low. | Fast climbing combined with rough running, timing reduction, or fault codes. |
| Stop-and-go traffic | Higher IAT than steady cruising is common. | Temperature remains elevated after several minutes of clean road airflow. |
| Steady cruise | IAT moves back toward ambient as airflow increases. | A large persistent delta despite stable speed and moderate load. |
| Hot restart | The highest reading may appear shortly after restart. | Poor recovery, signal dropouts, or drivability trouble after heat clears. |
The ranges above are patterns, not universal factory limits. A naturally aspirated car with an IAT inside the MAF may behave very differently from a turbo engine using a manifold TMAP sensor. Listen to the pattern before blaming the part.
How IAT Changes from Cold Start to Highway Cruise

Overnight Cold Soak
This is the cleanest plausibility check you can perform. Let the vehicle sit long enough for the engine, coolant, intake, and surrounding air to settle toward the same temperature. Overnight is ideal.
Turn the ignition on without starting the engine. Read IAT and engine coolant temperature, then compare both with a probe near the intake inlet. A small difference is not automatically a problem. Sensors have tolerances, mounting points cool at different rates, and a garage can be warmer than the air outside.
A large offset that appears every cold morning is different. If the intake reads 104°F before startup while the local air and fully cooled engine are near 65°F, heat soak cannot explain it—the engine has not produced heat yet.
Cold Start and Warm-Up
Start the engine and leave the hood closed. IAT may remain near ambient briefly, then begin to climb. The radiator, cylinder heads, exhaust manifolds, turbo hardware, and coolant hoses are all adding heat to a small space.
The rise should generally look progressive. A reading that instantly flips from 70°F to −40°F, 250°F, or another implausible value points toward a signal problem, not a hot airbox.
Fully Warm Idle
At idle, the engine consumes far less air than it does under load. Air crawls through the intake. Meanwhile, the sensor and surrounding parts are being heated every second. That is the perfect recipe for a rising ΔIAT.
Air-conditioning load matters too. With the A/C operating, the condenser rejects heat in front of the radiator, fans cycle, and hot air moves through the engine bay. Record the A/C and fan state or your comparison will be sloppy.
Hot Shutdown and Restart
Heat does not stop moving when you switch off the ignition. Coolant flow slows or stops, airflow disappears, and heat stored in the heads, turbo, exhaust manifolds, and intake manifold migrates into nearby components.
Restart 10–20 minutes later and you may see an ugly IAT number. Do not panic. Watch how it recovers. A hot restart followed by a rapid temperature drop after driving is a very different situation from a sensor that stays wrong all afternoon.
Steady-Speed Cruise
Road airflow changes everything. Fresh air enters the grille or fender feed, underhood pressure shifts, and the intake moves a much greater volume of air. If heat soak is the main cause, the IAT should begin falling toward ambient.
Do not use a two-second full-throttle pull as your only recovery test. Find a safe road, hold a steady 45–60 mph for several minutes, and watch the curve. Smooth recovery is useful. A single flashing number is not.
How to Perform a Repeatable IAT Heat-Soak Test
Tools You Need
- An OBD2 scanner or logger that can display and record IAT
- A separate temperature probe for air near the intake inlet
- A timer
- A safe, well-ventilated test location
- A simple log sheet or phone note
- Optional parameters: coolant temperature, RPM, vehicle speed, throttle position, boost pressure, ignition timing, and knock correction
Safety Warning: Never run an engine in a closed garage. Exhaust gases can become deadly before you smell or notice a problem. Use an open, ventilated area and keep clear of fans, belts, pulleys, and hot exhaust components.
Step 1: Record the Test Conditions
Write down the details that can move the result:
- Ambient temperature near the intake inlet
- Weather and direct-sun exposure
- Engine coolant temperature
- IAT sensor location
- Intake configuration
- A/C setting and cooling-fan state
- Hood open or closed
- Time since the previous drive
- Vehicle speed, RPM, and boost where applicable
Many new owners skip this part. They compare Tuesday's 68°F evening drive with Saturday's 96°F parking-lot idle test, then decide the new intake “gained” or “lost” 20 degrees. Listen to me: that comparison is junk. Control the conditions.
Step 2: Run a Cold-Soak Plausibility Check
- Let the vehicle sit overnight.
- Place the temperature probe near the fresh-air inlet.
- Turn the ignition on without starting the engine.
- Record ambient temperature, IAT, and coolant temperature.
- Start the engine and watch for smooth, believable sensor movement.
If the cold reading is sensible, move on. If it is far out of line, inspect the sensor and circuit before spending money on heat shields or intake tubing.
Step 3: Build a Warm-Idle Heat-Soak Curve
- Drive until coolant temperature reaches its normal stable operating range.
- Park in the same test location with the hood closed.
- Keep accessories in a recorded, repeatable state.
- Record IAT and ambient temperature at 0, 2, 5, 10, and 15 minutes.
- Calculate ΔIAT for every time point.
From the Shop Floor: The 140°F Reading That Did Not Need a Sensor
A heat-soak complaint I worked through involved a V8 street car whose owner saw roughly 140°F at idle and immediately ordered a replacement IAT sensor. The car had just spent half an hour in traffic on a hot afternoon. Its sensor sat close to the intake manifold, and the open filter was exposed to radiator discharge air.
I left the sensor alone. First, I logged it.
At a standstill, the temperature continued creeping upward. Once the car reached a steady 50 mph, IAT dropped by more than 25°F over the next few minutes and the signal remained smooth. The cold-soak reading the following morning was also close to local ambient. That was the giveaway: the sensor could read cold correctly, respond predictably, and recover when airflow returned.
We improved the filter's isolation and fresh-air path instead of throwing an electrical part at a thermal problem. That is the lesson. Test the pattern before replacing the sensor.
Step 4: Run the Road-Recovery Test
After the 10- or 15-minute idle period, drive the vehicle normally and log:
- IAT at the moment the vehicle starts moving
- IAT after 30 seconds
- IAT after two minutes of steady speed
- IAT after five minutes of steady speed
- The lowest stable IAT-to-ambient delta
- How quickly IAT rises again when the vehicle stops
A fast drop followed by a stable cruise value supports the low-airflow heat-soak explanation. If the reading barely moves, confirm that the PID is correct and then inspect the inlet location, airbox seals, ducting, and sensor response.
Step 5: Compare Intake Configurations Fairly
If you are comparing stock and aftermarket parts, test them at similar ambient temperature, coolant temperature, speed, idle time, A/C load, and heat-soak state. Run more than one pass. A single result can be skewed by traffic, wind, fan cycling, or a hotter starting condition.

| Design Factor | Stock Sealed Airbox | Open Short-Ram Intake | Shielded or Remote-Feed Intake |
|---|---|---|---|
| Idle heat exposure | Often controlled well when seals and snorkel are intact | Can be high if the filter is exposed to engine-bay air | Depends on shield sealing and fresh-air access |
| Airflow path | Usually quiet, filtered, and vehicle-specific | Short path with fewer bends | Can combine a smoother path with a cooler air source |
| Intake sound | Quietest | Usually loudest near the engine bay | More audible than stock, design-dependent |
| Water exposure | Usually well managed by factory routing | Often low if the filter remains high | Depends on filter height and inlet routing |
| Sensor sensitivity | Factory MAF geometry is preserved | Tube diameter and sensor placement require care | Correct vehicle-specific geometry remains essential |
| Best test | Baseline idle and cruise log | Idle rise plus road recovery | Matched-condition idle, cruise, and load test |
If your logs show that the factory path is restrictive or that an exposed filter repeatedly pulls hot engine-bay air, compare the filter location, shielding, MAF provision, and duct routing among vehicle-specific Flashark cold air intake kits. Match the system to your vehicle year, engine, drivetrain, sensor configuration, and available underhood clearance before ordering.
Want the basic design differences first? Read what a cold air intake does and how it compares with stock and short-ram layouts.
Normal Heat Soak or a Fault? Follow the Pattern

High at Idle, Then Drops Quickly While Driving
This is the classic heat-soak pattern. Look at:
- An open filter near the radiator outlet
- Missing or poorly fitted heat shielding
- A damaged airbox seal
- A disconnected factory fresh-air snorkel
- An IAT sensor mounted in a heat-soaked manifold
- Extended idling with the A/C operating
Do not expect an intake pipe to remain cool to the touch after sitting over a hot engine. What matters is whether the system supplies cooler air and sheds stored heat once airflow returns.
High at Idle and Still High During Steady Cruise
Now the intake path deserves closer inspection. Check whether the fresh-air opening is blocked, whether the filter is sealed into a hot pocket, and whether radiator air can recirculate toward the inlet. On boosted engines, inspect intercooler airflow and log post-intercooler temperature under consistent boost.
Also question the ambient reference. A phone weather reading from an airport 15 miles away is not the same as the air above a black parking lot.
Wrong Before the Engine Starts
A fully cold engine cannot heat-soak a sensor by 40°F before it runs. Check that you are reading the correct parameter and temperature unit. Then inspect the IAT or combined MAF/MAP connector for bent pins, corrosion, loose terminals, damaged insulation, or rodent damage.
The Reading Freezes, Jumps, or Hits an Extreme
That behavior smells electrical. Depending on the vehicle and failure mode, an open or shorted circuit may force the displayed temperature toward an extreme end of the range. Do not diagnose the circuit from the temperature label alone.
Read stored codes, inspect the connector, perform a wiggle test while watching live data, and follow the resistance or voltage checks in the service procedure for your engine. Never pierce insulation randomly or bridge sensor wires to “see what happens.” That shortcut can create a second fault.
High IAT Comes with Rough Idle After an Intake Install
Start with the parts you touched. Check every coupler, clamp, breather hose, vacuum connection, MAF connector, and sensor-flow arrow. A leak after the MAF can cause rough running without being the reason IAT itself is high.
If the problem started immediately after the intake swap, use this seven-point rough-idle checklist for cold air intake installations before buying more parts.
High IAT Comes with Timing Reduction or Lost Power
This is where the temperature becomes more than an interesting gauge number. Log IAT beside throttle position, RPM, load, ignition timing, knock correction, boost, and commanded torque. A hotter charge can reduce detonation margin, but the control strategy varies by engine and calibration.
Do not promise yourself a fixed horsepower gain from lowering idle IAT. The useful question is whether cooler, repeatable charge temperatures reduce protective corrections under the same load and conditions. Dyno numbers only mean something when the vehicle, correction method, gear, tire setup, coolant temperature, inlet temperature, and calibration are controlled.
How to Reduce Excessive Intake Heat Soak

Restore the Factory Fresh-Air Path
Before buying shiny parts, inspect the boring plastic pieces. Seriously. The factory snorkel, lid seal, rubber edge trim, and lower airbox mounts often do more thermal work than people realize.
A loose lid or missing duct can turn a sealed intake into an engine-bay air collector. Repair that first and repeat the same test.
Separate the Filter from Radiator and Exhaust Heat
A heat shield should create a meaningful boundary, not just sit three inches from the filter for decoration. Look for gaps where fan discharge air can curl around the shield. Check how the shield meets the hood or bodywork and whether a fresh-air opening feeds the enclosed area.
Use a Real Fresh-Air Feed
Route incoming air from a cooler exterior area without creating a water trap or crushing the duct cross-section. Avoid sharp reductions, collapsed flexible hose, and an inlet placed directly behind a radiator outlet.
A low-mounted filter can find cooler air, but it also needs sensible protection from standing water. Do not drive through deep water and assume engine vacuum will politely ignore a submerged filter.
Apply Thermal Protection Where It Makes Sense
Reflective barriers, insulating sleeves, manifold spacers, and sealed airbox panels can help in the right location. They are not magic bandages. A reflective wrap cannot fix a filter that inhales fan discharge air, and wrapping every component can trap heat where it needs to escape.
Keep the Filter and Sensor Area Clean
A neglected filter adds restriction. An over-oiled filter can contaminate some sensing elements. Use the cleaning method specified for the filter media, let a washable filter dry completely, and never spray general-purpose cleaner onto a MAF sensing element.
For maintenance steps, see how to clean a cold air intake filter without damaging the media.
Do Not Guess About Tuning
Changing the MAF housing diameter, sensor position, or airflow profile can alter the signal the ECU receives. Tune needs vary by vehicle and installed hardware. If fuel trims move sharply, the engine hesitates, or a lean condition appears after installation, stop treating the problem as simple heat soak.
Inspect the installation first. Then discuss the logs and hardware combination with a qualified calibrator.
Do Not “Fix” IAT with a Resistor
Some old garage tricks involve adding resistance so the ECU sees a colder temperature. Do not do it. You are not cooling the air—you are feeding the controller false information. That can distort temperature-based fuel, ignition, fan, boost, or protection strategies.
Does Lower Idle IAT Add Horsepower?
Not automatically.
Cooler air is denser, but an engine's delivered torque depends on far more than one temperature parameter. Air mass measurement, throttle control, fuel quality, spark timing, knock activity, boost control, exhaust flow, and calibration all join the argument.
An intake that shows a lower temperature at idle may still be restrictive at high airflow. Another system may feel warm while parked yet recover quickly and flow well under load. That is why I look at three separate questions:
- Thermal control: How large is ΔIAT under matched conditions?
- Recovery: How quickly does temperature fall after airflow returns?
- Loaded operation: What happens to airflow, fuel trims, timing, boost, and repeatability under the same load?
Real power claims need repeatable testing. If somebody promises an exact wheel-horsepower gain from an idle-temperature screenshot, keep your wallet closed.
FAQ: Intake Air Temperature and Heat Soak
Q1: What is a normal intake air temperature at idle?
A1: There is no single normal value for every vehicle. Compare IAT with local ambient temperature, then consider idle time, coolant temperature, sensor location, intake design, and whether the reading falls once the car begins moving.
Q2: How much hotter than ambient should intake air temperature be?
A2: A warmed engine at idle may run roughly 15–40°F above ambient, and some layouts can exceed that after traffic or a hot restart. Use that only as a starting range. A manifold-mounted sensor can read much hotter than one inside the airbox.
Q3: Is 100°F intake air temperature normal?
A3: It can be. At 92°F ambient, 100°F is only an 8°F delta. At 50°F ambient, it is a 50°F delta. The same IAT value can represent two completely different conditions.
Q4: Is 120°F IAT too high at idle?
A4: Not necessarily. Long idling, hot pavement, stop-and-go traffic, A/C operation, and a recent hot shutdown can push IAT above 120°F. Watch whether the temperature returns toward ambient during steady cruising.
Q5: Why does IAT rise while my car is idling?
A5: Intake airflow is low while radiant and conducted heat continue warming the airbox, pipe, manifold, and sensor. Radiator-fan discharge can add more hot air around an exposed filter.
Q6: Why does intake air temperature drop when I start driving?
A6: Road speed increases fresh-air supply and underhood ventilation. The sensor also sees greater airflow, which reduces the influence of heat stored in its body and mounting point.
Q7: Should IAT equal ambient temperature on a cold start?
A7: After a genuine overnight cold soak, IAT should usually be reasonably close to air temperature near the inlet. It does not have to match exactly. A large repeatable difference deserves a sensor, connector, and reference-temperature check.
Q8: Where is the intake air temperature sensor located?
A8: It may be in the airbox, intake tube, MAF housing, MAP sensor, TMAP sensor, or intake manifold. Consult information specific to your year, engine, and induction system before testing or replacing it.
Q9: Is the IAT sensor the same as the MAF sensor?
A9: They perform different measurements, but many vehicles integrate the IAT element into the MAF assembly. Other vehicles use a separate IAT or combine it with a MAP/TMAP sensor.
Q10: Is the ambient temperature sensor the same as the IAT sensor?
A10: No. The outside-temperature sensor normally supports the instrument display, climate control, or related functions. IAT measures temperature at a specific point in the engine's intake path.
Q11: Can a cold air intake lower IAT at idle?
A11: It can if the filter is isolated from engine heat and receives a real fresh-air feed. An exposed short-ram filter may show higher idle temperature even if its short tube flows well at higher engine speed.
Q12: Does high intake air temperature reduce horsepower?
A12: Hotter air is less dense and may reduce detonation margin. Some control systems also reduce spark, boost, or requested torque as charge temperature rises. The actual power change depends on load, calibration, fuel, airflow, and engine design.
Q13: What IAT is too high for a turbo engine?
A13: There is no universal cutoff. Determine whether the sensor is before or after the compressor and intercooler, then log temperature with boost, throttle, RPM, timing, and knock correction. Use limits appropriate to the engine and calibration.
Q14: How do I test an IAT sensor with an OBD2 scanner?
A14: Begin with an overnight cold-soak comparison. Then record the warm-idle rise and road-speed recovery. Look for believable, smooth movement. A frozen, jumping, or implausible value calls for circuit testing.
Q15: Can heat soak make the sensor read hotter than the moving air?
A15: Yes. Heat can travel through the sensor body and mounting point, especially in a hot metal manifold with little airflow. Once airflow increases, the reading often drops quickly.
Q16: Does P0113 mean the intake air is too hot?
A16: No. P0113 describes an IAT circuit-high condition. Inspect the connector, wiring, sensor, and shared MAF or MAP assembly as applicable instead of assuming the incoming air is physically overheating.
Q17: Should I replace the IAT sensor because the idle reading is high?
A17: Not from that clue alone. Check its cold-soak value, signal stability, response to airflow, connector condition, and any stored codes. A smooth reading that starts near ambient and recovers on the road may be functioning normally.
Q18: Is idle IAT enough to compare two cold air intakes?
A18: No. Idle testing measures heat-soak behavior. A fair comparison also needs matched cruise recovery, consistent loaded runs, sensor placement, fuel trims, and airflow behavior.
The Bottom Line: Measure the Delta and Watch the Recovery
The right question is not simply, “How hot is my intake?” Ask how far the reading sits above local ambient, where the sensor lives, how long the vehicle has been stationary, and what the value does when clean airflow returns.
For most drivers diagnosing normal intake air temperature at idle, the most useful pattern is simple:
- Starts near ambient when fully cold
- Rises gradually as the engine bay warms
- Climbs faster during extended idle or traffic
- Drops toward ambient during steady road airflow
If your log follows that pattern, you are probably looking at heat soak rather than a failed sensor. If it begins wrong when cold, jumps, freezes, or refuses to recover, stop guessing and inspect the system properly.
Build a Better Fresh-Air Path
Compare intake layout, heat shielding, filter position, sensor provisions, and vehicle fitment before choosing your next upgrade.

Steven Chen
Automotive Performance Specialist | Engine & Exhaust Systems
Steven focuses on practical engine performance, exhaust fitment, and real-world upgrade paths for classic and modern enthusiast vehicles. He reviews small-block Ford, LS, truck, and street/strip applications with one goal in mind: helping builders choose parts that actually work together. His philosophy: "Good power starts with the right combination, not the biggest part."