


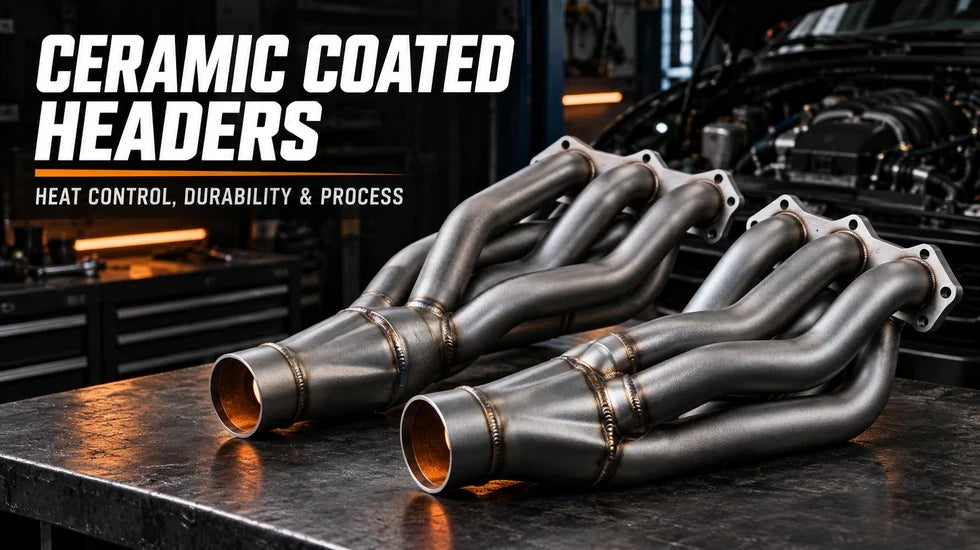
A set of shiny headers can look perfect on the workbench and still turn the engine bay into an oven once the throttle stays open. Spark-plug boots harden. Starter solenoids soak up heat. Wiring looms get brittle. Then somebody says, “Just ceramic-coat the headers.”
That advice is not wrong. It is simply incomplete.
Ceramic coated headers can reduce radiant heat, protect the tube surface, and survive longer than ordinary high-temperature paint when the coating system is matched to the exhaust temperature and applied correctly. They do not make hot pipes safe to touch. They do not fix bad header geometry, a lean cylinder, retarded ignition timing, or a plug wire lying directly against a primary tube.
Listen, the coating matters. The metal preparation underneath it matters more.
What Are Ceramic Coated Headers?
A header coating is a thin, heat-resistant layer bonded to the metal tube. Its job is to slow heat transfer, isolate the substrate from moisture and corrosive residue, and provide a surface that handles repeated thermal cycling better than ordinary paint.
That is different from the “ceramic coating” wiped onto body paint. It is also different from a can of generic high-heat paint with the word ceramic printed on the label. Exhaust parts live through sharp temperature swings, vibration, road debris, condensation, and contamination from fuel, oil, and coolant. The coating has to be designed for that environment.
If you are still sorting out what the tubes themselves change, start with this practical explanation of how exhaust headers improve cylinder-to-cylinder exhaust flow. Coating does not redesign the primary tubes or collector. It changes how heat moves through and away from them.
Ceramic Coating vs. Ceramic Paint
Professional exhaust coatings are normally sprayed over a controlled abrasive-blasted profile. Depending on the product, they may cure at room temperature, in an oven, or through a specified combination of drying and heat cycles. Film thickness is controlled in thousandths of an inch.
High-temperature aerosol paint is easier to apply and cheaper to replace. It can be useful for a budget refresh, but it should not automatically be presented as equivalent to an industrial coating system. The chemistry, surface preparation, curing method, internal coverage, and tested temperature ceiling may all be different.
Which Header Materials Can Be Coated?
- Mild steel: Gains the most obvious corrosion protection because bare carbon steel readily oxidizes when moisture and road salt reach it.
- Stainless steel: Can still benefit from reduced radiant heat and a protected external finish. Coating will not correct thin tubing, poor weld penetration, or warped flanges.
- Cast iron: Can be coated, although used castings often need careful cleaning and heat-assisted outgassing before spraying.
- Previously coated tubing: Usually needs the failing finish removed completely. A sound top layer cannot rescue a loose layer underneath it.
How Ceramic Coating Controls Header Heat
Exhaust gas leaves the combustion chamber extremely hot. Heat passes into the primary tube by convection, travels through the metal by conduction, and then escapes into the engine bay through radiation and air movement.
A thermal-barrier coating slows that trip. More energy stays on the gas side for longer, while less reaches nearby components during the same operating condition. It does not destroy heat. That energy still travels downstream and eventually has to leave through the rest of the exhaust system.

Does Keeping Exhaust Heat in the Tubes Add Power?
Potentially—but do not buy coating as if it were an eight-horsepower sticker.
Hot exhaust is less dense, and preserving pulse energy can support gas velocity through the primary tubes and collector. That may help scavenging during valve overlap. The size of the result depends on primary diameter, tube length, collector design, cam timing, engine speed, downstream restriction, inlet-air temperature, and calibration.
On a stock engine, switching from a restrictive cast manifold to a well-sized tubular header can produce a measurable gain. The coating itself is only one variable in that change. If somebody advertises a coating-only wheel-horsepower number without showing the same vehicle, same header design, same correction factor, same dyno, and comparable test temperatures, keep your wallet closed.
Inside vs. Outside Ceramic Coating for Headers
External coating gets most of the attention because that is the part you can see. Internal coating can matter just as much, particularly on mild-steel tubing.

What External Ceramic Coating Does
- Reduces heat radiated from the tube toward nearby parts.
- Creates a barrier between the metal and moisture, road salt, and workshop chemicals.
- Provides an easier-to-inspect surface than wrapped tubing.
- Offers a consistent finish when the substrate and cure are correct.
What Internal Ceramic Coating Does
An internal coating places the thermal barrier closer to the hot gas. It can reduce how quickly the parent metal absorbs heat while shielding the inside surface from condensation and corrosive exhaust residue.
Here is the catch: “coated inside” does not always mean every square inch has identical coverage. A short, relatively straight primary is easier to reach. A long-tube header with tight bends, merged collectors, and hidden weld transitions is a different animal. Spray wands have physical limits.
Ask the applicator how far the coating equipment reaches, how internal coverage is handled, and whether the claimed service includes the full collector area. A straight answer is worth more than a vague “inside and out” label.
Is Inside-and-Outside Coating Always Necessary?
No. It is a strong choice for thin mild-steel headers, hot engine bays, and vehicles exposed to moisture or road salt. External-only treatment may still be useful on stainless headers when the main goal is controlling radiant heat around the starter, firewall, steering shaft, or plug wires.
Budget matters too. Spend money on correct fitment, sound welds, flat flanges, appropriate primary size, and a collector that actually connects to the rest of the exhaust before paying extra for a premium finish. A beautiful coating on the wrong header is still the wrong header.
Factory Manifold vs. Bare Headers vs. Coated Headers
| Feature | Factory Cast Manifold | Bare Stainless Header | Ceramic-Coated Header |
|---|---|---|---|
| Typical construction | Thick cast iron | Thin-wall stainless tubing | Steel or stainless tubing with a thermal coating |
| Exhaust routing | Compact shared passages | Separate primaries feeding a collector | Same routing as the underlying header |
| Radiant heat behavior | High thermal mass; slower warm-up and cool-down | Can radiate intense heat from exposed tubes | Reduced outward heat transfer when correctly applied |
| Corrosion protection | Material is thick but can rust | Depends on stainless grade, environment, and fabrication | Strong while the coating remains continuous |
| Flow potential | Limited by compact passages | Depends on tube and collector design | Depends on the same tube and collector design—not the finish alone |
| Best reason to choose it | Factory packaging and low installation disruption | Flow, durability, and clean appearance | Header flow with additional heat and surface control |
Builders who have not selected a layout yet can compare vehicle-specific exhaust headers for street and performance builds. If the combination needs longer primaries and stronger mid-to-upper-rpm scavenging, browse long-tube headers organized by vehicle and engine. Match the system to the year, engine, drivetrain, steering layout, emissions equipment, and downstream connection before ordering.
Surface Preparation Determines Whether the Coating Lives or Dies
Most coating failures begin before the spray gun is pulled. Oil in a weld seam, polishing compound on stainless steel, old paint hiding in a bend, or a surface that is too smooth can ruin adhesion.
Many beginners watch one short video, scuff a polished header with a pad, wipe it with solvent, and start spraying. Six heat cycles later, the collector looks like sunburned skin. Do not do that.

Inspect and Test-Fit the Headers First
Before ceramic coating headers, bolt the bare parts into the vehicle and check:
- Head-flange alignment and bolt access
- Spark-plug and plug-wire clearance
- Starter, steering-shaft, frame, crossmember, and transmission clearance
- Collector angle and connection to the mid-pipe, Y-pipe, or X-pipe
- Oxygen-sensor bung position and harness reach
- Engine movement under torque
- Access for service items such as filters, drains, and transmission lines
Do every required weld, cut, dent, bung relocation, and flange correction before coating. Grinding a freshly coated primary tube is a painful way to learn this lesson.
A Workshop Lesson I Still Remember
A long-tube V8 car once came into the shop with a gorgeous fresh coating and a steering shaft that touched the driver-side primary. It cleared while the engine sat still. Under load, the engine rolled just enough for the shaft to kiss the tube.
The owner had coated the headers before the first complete test-fit. We had two ugly choices: clearance the tube and repair the finish, or change the mount and shaft relationship. Either way, that expensive surface was no longer untouched.
Since then, my rule has been simple: install the headers bare, check them cold, check engine movement, connect the downstream exhaust, then remove them for coating. The prettiest finish in the world does not create clearance.
Degreasing and Outgassing
New headers can carry cutting oil, drawing lubricant, fingerprints, polish, and silicone residue. Used headers add carbon, oil vapor, penetrating fluid, coolant stains, and road grime.
Clean the part with the system-approved method. Used or porous components may need an outgassing cycle to drive contamination out of seams and pores. After final cleaning, wear clean gloves. One oily thumbprint can become the exact spot where adhesion fails.
Why Abrasive Blasting Matters
Blasting performs two jobs: it removes rust and old finishes, and it creates a uniform profile that gives the new coating something to grip. Glass beads can leave some metals smoother than the coating supplier wants. Aluminum oxide or another specified sharp media is often used when a stronger profile is required.
Use the media size, pressure, nozzle distance, and cleanliness standard listed for the selected product. More pressure is not automatically better. Thin tubing can be damaged, and aggressive blasting can alter gasket surfaces if they are not protected.
Mask the Surfaces That Must Still Fit
Threads, oxygen-sensor seats, slip joints, ball-and-socket sealing areas, electrical grounding points, and tight-tolerance mating surfaces may need masking. Coating buildup in the wrong place can cause false torque readings, poor sealing, sensor problems, or a joint that simply will not slide together.
How to Ceramic Coat Exhaust Headers
The exact mixing ratio, film thickness, flash time, and cure schedule belong to the coating manufacturer. Still, the working sequence is consistent enough to explain.
- Remove and inspect the headers. Repair cracks, pinholes, warped flanges, and damaged bungs before surface work.
- Complete a full test-fit. Connect the downstream exhaust and confirm moving-component clearance.
- Strip the old finish. Remove rust, paint, plating, and loose coating rather than burying them.
- Degrease the metal. Pay special attention to collectors, weld seams, and overlapping joints.
- Outgas when required. Let trapped oil or solvent leave the substrate before final blasting.
- Abrasive-blast the surface. Create a clean, even anchor profile using the specified media.
- Mask critical areas. Protect threads, sensor seats, sealing surfaces, and slip joints.
- Mix and filter the coating. Keep settled solids from producing inconsistent film thickness.
- Spray thin, even passes. Overlap each pass and avoid heavy buildup around bends and collectors.
- Coat accessible internal surfaces. Use equipment suited to the tube length and bend radius.
- Air-cure or oven-cure as directed. Time and temperature are chemistry-specific.
- Install without scraping the finish. Protect tight areas and never pull a header into alignment with bolts.
- Complete the specified heat cycles. Allow full cooling between stages when the coating procedure calls for it.
Why Thin Coats Beat One Heavy Coat
A thermal coating works at a controlled film thickness. Heavy buildup can trap solvent, bridge over rough areas, cure unevenly, and crack when the tube expands. Runs around a collector also look bad and create inconsistent thermal behavior.
In other words, stop painting when the specified film is there. A thicker layer does not automatically mean twice the insulation.
Air-Cure vs. Oven-Cure Coatings
Air-cure systems are more accessible to home builders because they do not require a large controlled oven. That convenience does not eliminate preparation, ventilation, drying time, or handling rules.
Oven-cure systems offer controlled cross-linking but require equipment large enough to heat the entire header evenly. A local hot spot from a torch is not the same thing. Uneven heating can leave one area cured and another vulnerable.
Temperature Ratings and Real-World Durability
Do not choose a coating because the sample chip looks good under showroom lights. Choose it for the exhaust environment.
A street-driven naturally aspirated engine, a supercharged road car, and a turbocharged track vehicle can expose headers to very different temperature patterns. Even within one engine, a weak injector, vacuum leak, ignition fault, leaking exhaust valve, or cylinder-to-cylinder fuel imbalance can create a localized hot primary.
Continuous Temperature vs. Short-Term Peak
A product may list both a continuous service temperature and a higher intermittent limit. Those numbers are not interchangeable. A coating that survives a short spike may not tolerate sustained track laps, towing on a long grade, or repeated anti-lag events at that same temperature.
Match the coating to how the vehicle is actually driven. Be honest. A “street car” that spends every weekend on a road course is not living a street-only thermal cycle.
What Causes Early Failure?
- Oil, silicone, polish, or rust left under the coating
- An insufficient or inconsistent blast profile
- Excessive film thickness
- Incorrect flash time or cure temperature
- Fingerprints after final preparation
- Scraping the tubes during installation
- A primary tube touching the frame or steering shaft
- Exhaust leaks that create focused hot jets
- Misfire, delayed ignition, or an unhealthy fuel mixture
- Operating above the coating’s continuous temperature range
Is Color Change a Failure?
Not always. Silver can become duller. Black may flatten. A light finish can pick up stains from oil or coolant during the first heat cycle. Cosmetic change and structural failure are not the same thing.
Look closer if the surface becomes powdery, flakes in sheets, exposes rust, blisters around a weld, or shows one sharply discolored primary while the others look normal. That last pattern can point toward an engine or exhaust problem rather than a finish problem.
Ceramic Coating vs. Header Wrap vs. Bare Stainless
| Treatment | Heat Control | Moisture Behavior | Inspection | Main Trade-Off |
|---|---|---|---|---|
| Ceramic coating | Reduces outward heat transfer | Non-absorbent when the surface is intact | Easy to inspect | Preparation and curing quality control |
| Header wrap | Strong local insulation | Can retain water, oil, and grime | Hides the tube underneath | Moisture, abrasion, and trapped-damage concerns |
| Bare stainless | No added thermal barrier | Better corrosion resistance than mild steel | Very easy to inspect | Greater exposed radiant heat |
| High-temperature paint | Limited, product-dependent | Protects only while adhesion remains sound | Easy to inspect and touch up | Usually shorter service life |
Should You Wrap Ceramic Coated Headers?
Usually, I would not stack the two without written approval from both manufacturers. Wrap can abrade an external finish as the engine vibrates. It can also retain contamination and change how much heat the parent tube absorbs.
If one plug wire or starter cable remains too close, fix that local problem with routing, a stand-off, a boot, or a purpose-built shield. Covering the entire header should not be the first reaction to one bad clearance point.
DIY vs. Professional Ceramic Coating
When DIY Makes Sense
A home-applied exhaust-grade coating can make sense when the headers are inexpensive, the tubes are accessible, you have proper blasting and spray equipment, and you accept that the finish may need future repair.
DIY is also easier on simple shorty headers than on a tightly merged long-tube assembly. Getting even coverage deep inside four curved primaries is not a rattle-can trick.
When a Professional Applicator Earns the Money
- The headers are costly or difficult to remove.
- You want internal as well as external coverage.
- The vehicle sees track sessions, towing, crawling, or sustained boost.
- The parts are used and need aggressive cleaning or outgassing.
- You need controlled film thickness and an oven cure.
- You want a written process and clear service limits.
The Cheap Spray Job That Wasn’t Cheap
I have watched new builders spend a weekend spraying headers in the garage, only to install them before the coating had finished curing. The first startup filled the bay with smoke. Fingerprints baked into the finish. A thick patch near the collector bubbled, and one tube peeled where polishing compound had been left behind.
The coating was blamed. The process was the real problem.
By the time the headers were removed, stripped, blasted, and sprayed again, the “cheap” job had consumed two gasket sets and twice the labor. If you cannot control the surface preparation, you are not controlling the coating job.
Questions to Ask the Coating Shop
- What coating system will be used on this exhaust application?
- What are its continuous and intermittent temperature limits?
- Does the service include internal coating?
- How much of a curved long-tube assembly can be reached internally?
- Are stripping, blasting, outgassing, masking, and curing included?
- How are used headers handled differently from new parts?
- Which appearance changes are considered normal?
- What installation damage or engine conditions are excluded from coverage?
When Ceramic Coating Is Not the Right Move
Coating is a finishing process. It should come after the mechanical decisions, not before them.
The Headers Still Need Modification
Do not coat headers that may still need welding, oxygen-sensor bung changes, collector work, flange surfacing, or clearance adjustments. Test-fit first. Always.
The Tubes Are Cracked or Badly Corroded
A coating cannot restore lost wall thickness. It cannot stabilize a cracked collector or fix a porous weld. Repair or replace the metal before worrying about its color.
The Engine Has an Unresolved Heat Problem
A glowing primary, repeated misfire, fuel-control fault, damaged injector, excessive ignition delay, or leaking exhaust valve needs diagnosis. A thermal barrier may hide the visual warning while the engine keeps producing destructive heat.
The Engine Is About to Go Through Initial Break-In
A fresh engine may need extended operation at a fixed speed, and an incomplete tune can create abnormal exhaust temperature. If the coating procedure or applicator places limits on first-run conditions, use a suitable break-in manifold or follow the specified commissioning sequence.
A Local Heat Shield Solves the Problem Better
If the only concern is one starter motor, one brake line, or a section of wiring near the collector, a rigid shield with an air gap may deliver more focused protection. Sometimes rerouting a harness by one inch does more useful work than treating eight feet of tubing.
Choosing the Right Header Before Choosing the Coating
Coating cannot compensate for an oversized primary, a collector in the wrong location, or poor chassis clearance. Choose the actual header around displacement, airflow, rpm range, camshaft, transmission, gearing, vehicle weight, and how the car is driven.
For a mild street V8, jumping from a 1-3/4-inch primary to a 1-7/8-inch tube may sacrifice clearance and gas velocity without delivering a useful gain at the rpm the car normally sees. This guide to choosing 1-3/4-inch vs. 1-7/8-inch header primaries explains why the biggest tube is not automatically the fastest choice.
Flashark offers stainless shorty and long-tube options for multiple enthusiast platforms. The sensible approach is to select the layout and vehicle application first, perform a complete bare-metal trial installation, and then decide whether professional ceramic treatment suits the heat load and budget.
Tacoma owners weighing finish and material choices can also review this Tacoma ceramic-coated vs. stainless-steel header comparison. Keep every performance figure tied to the engine, header design, dyno method, ambient conditions, and tune used in that test.
Installation and Maintenance After Coating
Protect the Finish During Installation
Cover vulnerable tubes with clean, soft material while feeding the assembly through the chassis. Do not use the coating as a sliding surface against the frame. If the header needs a pry bar or its bolts must pull it sideways into place, stop and find the interference.
For the full mechanical sequence, use this exhaust-header installation and maintenance guide alongside the instructions for the selected vehicle and header configuration.
Clean the Surface Before First Startup
Remove fingerprints, penetrating oil, coolant, and grease with a cleaner approved for the finish. Fluid left on a hot tube can stain the coating during the first heat cycle.
Inspect After the First Heat Cycles
- Listen for ticking at the head flange and collector.
- Look for soot tracks, blistering, or one unusually discolored primary.
- Check plug-wire and oxygen-sensor harness clearance.
- Inspect the steering shaft and frame for contact marks.
- Recheck accessible fasteners using the specified torque procedure.
- Confirm the downstream exhaust is not preloading the collectors.
A narrow black trail around a joint often points back toward an exhaust leak. If that shows up after installation, use these exhaust-flange soot and leak tests before blindly tightening every bolt in reach.
How to Clean Ceramic Coated Headers
Let the tubes cool fully. Use a soft cloth and a cleaner approved for the specific finish. Avoid steel wool, aggressive metal polish, wire brushes, and harsh acids. Matte black, polished silver, and colored coatings can require different care.
If road debris chips one small spot, ask the applicator about repair. Do not cover the entire header with unknown paint and expect the two materials to expand, cure, and age together.
Frequently Asked Questions About Ceramic Coated Headers
Q1: Are ceramic coated headers worth it?
A1: They are often worthwhile in a tight engine bay, on mild-steel headers, or in a vehicle that sees sustained load. The strongest reasons are reduced radiant heat and surface protection. They are harder to justify when the header still needs fabrication or the vehicle has no meaningful heat-management problem.
Q2: Do ceramic coated headers reduce underhood temperature?
A2: A suitable coating can reduce heat radiated from the tube under comparable operating conditions. The result varies with exhaust temperature, internal and external coverage, film thickness, airflow, header layout, and measurement method.
Q3: Do ceramic coated headers increase horsepower?
A3: Do not expect a universal coating-only gain. Heat retention can support exhaust pulse energy and reduce intake heat soak, but wheel horsepower depends much more heavily on header geometry, engine airflow, downstream exhaust, ambient conditions, and calibration.
Q4: Should headers be coated inside and outside?
A4: Inside-and-out treatment offers the most complete thermal and corrosion barrier, especially for mild steel. External-only coating can still help with engine-bay heat. Ask how much of a curved long-tube assembly can actually be reached internally.
Q5: How long does ceramic coating last on headers?
A5: Service life depends on preparation, coating chemistry, film thickness, cure quality, exhaust temperature, road exposure, and installation damage. A correctly applied coating can last for years, while contaminated or poorly cured material can fail after only a few heat cycles.
Q6: Can stainless-steel headers be ceramic coated?
A6: Yes. Stainless headers can be coated for lower outward heat transfer, surface protection, and appearance. The stainless still needs the correct abrasive profile and cleaning procedure for the chosen coating.
Q7: Can used or rusty headers be ceramic coated?
A7: Lightly rusted headers can often be stripped, inspected, blasted, and coated. Deep pitting, thin tube walls, cracks, and oil trapped in porous metal can make replacement more sensible than refinishing.
Q8: Can I ceramic coat headers at home?
A8: Yes, if the product is exhaust-rated and you have proper blasting, spray, ventilation, respiratory protection, drying space, and temperature control. Internal coverage and consistent film thickness remain difficult on complex long-tube headers.
Q9: Is ceramic header paint the same as professional coating?
A9: Not necessarily. Aerosol paint and professional coating systems can differ in solids, film thickness, temperature capability, surface preparation, curing, and internal application. Compare the technical requirements, not just the word “ceramic.”
Q10: Do coated headers still need heat shields?
A10: They can. A coated tube remains hot enough to damage a wire or hose touching it. Tight clearances around the starter, steering, brake lines, composite panels, or plug boots may still call for a shield and an air gap.
Q11: Can you wrap ceramic coated headers?
A11: Avoid combining them unless both manufacturers approve it. Wrap can rub the finish, trap contaminants, hide cracks, and change tube temperature. Fix local heat problems with routing or shielding when possible.
Q12: Why did my coated headers turn gray or dull?
A12: Some cosmetic change can occur through heat cycling. Powdering, blistering, sheet-like peeling, exposed corrosion, or one isolated hot primary deserves inspection for coating failure, contamination, leakage, or an engine fault.
Q13: Why is the coating peeling from my headers?
A13: Common causes include poor degreasing, inadequate blasting, excessive film thickness, incorrect curing, installation scratches, exhaust leaks, and operation above the coating’s temperature range.
Q14: Can ceramic coating stop headers from rusting?
A14: It can greatly improve corrosion resistance while the barrier remains intact. Scratches, uncoated internal areas, pinholes, and exposed sealing surfaces can still become corrosion starting points.
Q15: Can coated headers cause oxygen-sensor problems?
A15: Coating alone should not create a sensor fault, but overspray on the sensor seat, damaged wiring, poor harness routing, an exhaust leak, or changes to sensor location can. Keep coating out of critical interfaces and inspect the complete circuit.
Q16: Should new headers be test-fitted before coating?
A16: Yes. Confirm head-flange alignment, bolt access, chassis clearance, collector position, oxygen-sensor routing, engine movement, and downstream exhaust connection while the headers are still bare.
Final Verdict
Ceramic coating for headers is useful when it solves a real heat or corrosion problem. It is not a substitute for correct tube size, clean fabrication, adequate clearance, a leak-free installation, and a healthy engine.
For a mild-steel long-tube header in a crowded engine bay, professional inside-and-out coating is a serious upgrade. For a stainless street header with plenty of air space, external coating may be optional. For a cracked, poorly fitting header—or an engine running hot because of a mechanical fault—save the coating money and repair the real problem first.
That is the garage answer. Pick the right part. Test-fit it bare. Prepare the metal properly. Follow the coating system rather than improvising a cure schedule. Then keep wires and hoses off the tubes, because physics does not care how expensive the finish was.
Build the Header System Before Choosing the Finish
Match the header to your vehicle, engine, drivetrain, exhaust connection, and intended rpm range. If you need help identifying the right configuration, contact Flashark before taking the vehicle apart.

Steven Chen
Automotive Performance Specialist | Engine & Exhaust Systems
Steven focuses on practical engine performance, exhaust fitment, and real-world upgrade paths for classic and modern enthusiast vehicles. He reviews small-block Ford, LS, truck, and street/strip applications with one goal in mind: helping builders choose parts that actually work together. His philosophy: "Good power starts with the right combination, not the biggest part."














