


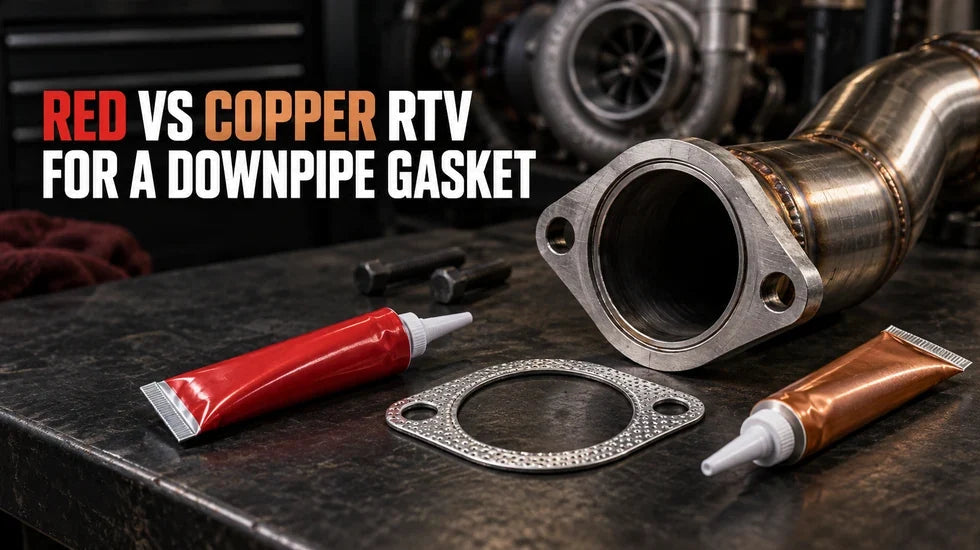
You install a fresh downpipe gasket, tighten the hardware, lower the car, and start the engine. Then you hear it: tick-tick-tick from the flange. Maybe the noise fades when the exhaust gets hot. Maybe it comes back under boost. You crawl underneath and find a thin black soot trail beside the gasket.
At that point, somebody usually reaches for a tube of red or copper RTV.
Sometimes that works. Sometimes it holds for three heat cycles and blows out. And sometimes it hides a warped flange just long enough to make you remove the downpipe twice.
If you searched “what is red or copper RTV downpipe gasket,” here is the first thing to clear up: RTV and a downpipe gasket are not the same part. RTV is a silicone-based gasket maker or sealant. A downpipe gasket is the physical sealing component clamped between two exhaust connections.
What Is Red or Copper RTV Downpipe Gasket?
RTV and a Downpipe Gasket Do Different Jobs
RTV stands for room-temperature vulcanizing. It comes out of the tube as a paste, reacts with moisture in the air, and cures into a flexible silicone rubber. Automotive versions are used around valve covers, oil pans, water pumps, differentials, turbo hardware, and certain exhaust connections.
A downpipe gasket is different. It is a formed part—usually metal, multilayer steel, graphite composite, or a crush-style ring—designed to carry clamping load between two mating surfaces.
The gasket handles the joint. RTV, when permitted, only helps with tiny surface irregularities. It should not become a soft spacer holding two crooked flanges apart.
Why Installers Add RTV to an Exhaust Gasket
Downpipe flanges live a rough life. They see vibration, road splash, corrosion, rapid heat cycles, and movement between the engine and the rest of the exhaust. A machined flange can also collect small scratches during removal and cleaning.
A thin coating of the correct RTV can fill microscopic paths that hot gas might otherwise follow. That is the sensible use case. We are talking about a thin film, not a bead thick enough to decorate a bathroom sink.
“Copper RTV” Is Not a Copper Gasket
This trips up a lot of first-time installers. Copper RTV is generally a high-temperature silicone formulation with a copper-colored appearance. It is not a sheet of copper, and it does not behave like a solid copper exhaust gasket.
Color is also not a universal temperature code. One manufacturer may sell a copper RTV rated for a higher intermittent temperature than its standard red formula. Another may offer a premium red formula with a higher rating than its copper product. Read the tube and technical instructions. The color on the shelf is only the beginning of the decision.
Should You Use RTV With a Downpipe Gasket?
My default answer is simple: start with the gasket manufacturer’s installation method. If the instructions call for a dry installation, install it dry. If they specify a certain sealant, use that type and follow its application and curing procedure.
Technician’s Note
Listen to me on this one: RTV should help a sound joint seal. It should not be the thing creating the joint. If you can see daylight between the flanges before tightening, put the tube down and find out why the pipes do not meet.
When a Thin Film of RTV May Help
High-temperature RTV can be reasonable when all of the following are true:
- The downpipe, turbo, or gasket instructions allow sealant.
- The two flanges meet squarely without being dragged together by the bolts.
- A straightedge shows that the sealing faces are substantially flat.
- The gasket has the correct bore, bolt pattern, thickness, and orientation.
- The surfaces have only minor scratches, shallow pitting, or machining marks.
- The RTV is rated for the heat at that location.
- The product is clearly labeled sensor-safe for an oxygen-sensor-equipped vehicle.
- You can give the material the required assembly and curing time.
When You Should Not Use RTV
Do not use RTV as the main repair when you find:
- A flange that rocks against a straightedge.
- A visible gap around the sealing ring.
- Bolt ears pulled upward from overtightening.
- A cracked flange, collector weld, flex section, or oxygen-sensor bung.
- A gasket whose opening hangs into the exhaust stream.
- An incompatible flat gasket installed in a ball-and-socket connection.
- A downpipe being pulled sideways by the mid-pipe, bracket, or hangers.
- Stripped threads, stretched studs, bottomed-out bolts, or damaged locking nuts.
- A V-band connection that is not concentric and fully seated.
And no, doubling the gasket is not the smart shortcut. Two unstable sealing layers do not turn a bent flange into a flat one.
Downpipe Gasket Types and How They Seal
Multi-Layer Steel and Embossed Metal Gaskets
These gaskets use formed ridges or sealing beads that concentrate clamping force around the exhaust opening. Once compressed, the raised sections conform to the mating surfaces.
They need clean faces and even clamp load. A heavy layer of RTV can interfere with that controlled compression, especially if the sealant skins over before the flange is seated.
Composite and Graphite Gaskets
Composite gaskets can conform to modest surface texture better than a thin, rigid metal gasket. They also have limits. Uneven tightening can crush one side while leaving the other side loose, and an exposed inner edge can erode under hot exhaust pulses.
If a composite gasket comes out with one side flattened and the other barely marked, suspect alignment or flange distortion before blaming the material.
Crush Rings and Donut Gaskets
A donut gasket seals through controlled deformation between shaped mating surfaces. Some ball-and-socket joints also need a small amount of movement as the exhaust expands.
Randomly coating these parts with RTV can work against the intended geometry. Install the correct ring in the specified orientation and use sealant only if the component instructions call for it.
Solid Copper Gaskets
A solid copper gasket is an actual metal sealing part. Its reuse, surface preparation, annealing, and torque requirements depend on the gasket design. Do not assume that advice for Copper RTV applies to a solid copper gasket—or the other way around.
V-Bands and Slip Joints
V-band connections rely on matching male and female flange profiles plus clamp force. A flat downpipe gasket normally does not belong between them. Slip joints may use a band clamp, lap-joint clamp, or a purpose-made exhaust assembly compound.
Same exhaust system, different sealing methods. Treat each connection according to its design.
Factory-Style vs Aftermarket Downpipe Connections
| Parameter | Factory-Style Connection | Common Aftermarket Downpipe Connection | What to Check |
|---|---|---|---|
| Flange design | Designed around the original turbo outlet and downstream exhaust | May use a larger flat flange, transition, adapter, or V-band | Match shape, bolt count, bolt spacing, and sealing profile |
| Pipe diameter | Sized for the original exhaust package | Often larger, depending on the application and system | Make sure the gasket bore does not obstruct the passage or miss the sealing land |
| Gasket type | Specified around the original joint geometry | May require a supplied gasket, reusable ring, or adapter-specific seal | Do not choose by outer shape alone; compare bore and sealing ring position |
| Alignment tolerance | Supported by original brackets and hanger locations | Can change with pipe routing, flex section, adapter, and downstream hardware | The connection should rest together without using bolts as a winch |
| Tightening value | Usually defined by the vehicle service procedure | May depend on supplied studs, bolts, nuts, and flange thickness | Use the value and sequence specified for the installed hardware |
| Sealant use | Often dry when fitted with the specified new gasket | Varies by downpipe, gasket, turbo outlet, and connection style | Follow the component instructions instead of assuming every flange needs RTV |
If the original downpipe is damaged, restricted, or no longer matches the rest of the build, compare vehicle-specific performance downpipes by turbo outlet, pipe connection, oxygen-sensor location, drivetrain, and emissions configuration. A performance part still needs the correct gasket and a stress-free installation; a larger pipe cannot compensate for a crooked joint.
Red vs Copper RTV for a Downpipe Gasket

Heat Rating: Continuous and Intermittent Are Not the Same
This is where product labels get misread. A sealant may advertise a high peak number on the front of the package, while the technical information defines that number as an intermittent limit. That does not mean the material should live at the same temperature for hours.
As a product-specific example, Permatex Ultra Copper lists a range reaching 700°F (371°C) intermittently and identifies the material for high-temperature exhaust and turbocharger applications. Permatex also markets an Optimum Red formula with a listed peak rating of 750°F (399°C). That one comparison kills the myth that copper-colored RTV is automatically hotter than every red RTV.
Check the exact tube in your hand. Formula beats color.
| Selection Point | Red RTV | Copper RTV |
|---|---|---|
| Typical positioning | High heat and repeated thermal cycling | High-heat exhaust and turbo-adjacent joints |
| Universal temperature? | No; the rating changes by manufacturer and formula | No; the rating changes by manufacturer and formula |
| Sensor safety | Must be stated on the exact product | Must be stated on the exact product |
| Best reason to choose it | The instructions approve that formula for the joint and temperature | The instructions approve that formula for the joint and temperature |
| Bad reason to choose it | “Red always means exhaust-safe” | “Copper always survives more heat” |
Exhaust Gas Temperature Is Not Flange Temperature
The gas inside a turbo downpipe can be extremely hot under load, but the outer flange does not automatically sit at the same temperature. Heat is moving into the turbo housing, pipe, fasteners, and surrounding air. Vehicle speed, load, fuel mixture, turbine location, catalyst position, pipe material, and heat shielding all affect the temperature at the joint.
That does not give RTV a free pass. The inner edge of an oversized bead can sit directly in the exhaust stream. If it is exposed, poorly cured, or beyond its working range, it can harden, erode, or blow out.
Oxygen-Sensor Compatibility Matters
Modern exhaust systems use oxygen sensors to monitor exhaust oxygen content and support fuel control or catalyst monitoring. Use only an RTV that clearly states it is sensor-safe, non-corrosive, or suitable for oxygen-sensor-equipped vehicles.
Keep the application controlled. Excess material squeezed into the pipe is not useful sealing material; it is contamination waiting to happen. Also route the oxygen-sensor wiring away from the downpipe and confirm that the connector is fully seated before startup.
Why RTV Fails on a Downpipe Flange
A Warped Flange Keeps Changing the Clamp Load
Picture a two-bolt flange shaped like a shallow potato chip. The bolt ears touch first. You tighten both bolts, the ears bend inward, and the center still does not apply even pressure to the gasket.
RTV may fill that center gap in the garage. Then the pipe gets hot, expands, twists against the hangers, and cools again. The silicone is being asked to bridge movement that should have been controlled by the metal joint. Eventually, hot gas finds the weakest edge.
The Wrong Gasket Leaves No Sealing Land
A gasket can have the right bolt spacing and still be wrong. The bore may be too large, leaving only a narrow strip between the exhaust opening and the outside edge. Or it may be too small and project into the gas path.
Before installation, lay the gasket on each flange separately. Look all the way around the opening. The sealing ring needs solid, continuous support on both sides.
Pipe Preload Pulls the Joint Open
Here is a mistake I see all the time: the rear exhaust is already locked down, the downpipe sits a quarter-inch away from the turbo flange, and the installer uses the bolts to drag it into place.
It seals while cold. Then the engine rolls on its mounts, the exhaust heats up, and that stored tension works on the gasket. The leak appears at the flange, but the cause may be a bracket or hanger several feet behind it.
Too Much RTV Can Make the Seal Worse
A thick bead creates three problems:
- It can hold the gasket away from the metal before full compression occurs.
- It cures slowly in thick, enclosed sections.
- It can squeeze inward and expose a soft edge to hot exhaust flow.
More sealant does not mean more sealing. On a downpipe flange, control matters.
Overtightening Can Bend the Hardware or Flange
“Tight enough” is not a calibrated unit. Leaning harder on a long wrench may stretch a stud, strip a thread, crush the gasket unevenly, or pull the bolt ears out of plane.
Thread lubricant matters too. Anti-seize changes friction, which can change the clamp load produced by a given torque. If the procedure calls for dry threads, do not coat them and blindly reuse the same number.
How to Check a Downpipe Flange Before Reassembly
Read the Leak Before Removing the Parts
A leak often leaves a narrow black carbon line that starts at the gasket edge and fans outward. Clean the cold joint, photograph it, and inspect it again after one or two cold starts. For a closer look at the difference between residue and active blow-by, use this guide to diagnose black soot around an exhaust flange.
Also listen to the pattern:
- A sharp tick that is strongest when cold can point toward a small flange gap.
- A hiss or puff under load can indicate a joint that opens as pressure and movement increase.
- A metallic rattle may come from a heat shield rather than the gasket.
- An exhaust smell inside the cabin needs prompt attention, even when the leak sounds small.
Clean the Sealing Faces Without Digging Holes
Remove the old gasket and cured RTV from a completely cold system. Use tools that will not gouge the flange. A powered abrasive disc can remove material much faster than people expect, leaving a shiny but uneven surface.
The finished face should be dry and free of loose rust, oil, old silicone, raised weld spatter, and gasket fragments.
Use a Straightedge, Not Hope
Lay a known-flat straightedge across the flange vertically, horizontally, and diagonally. Try a feeler gauge beneath any visible gap. Check around the exhaust opening and across the bolt ears.

There is no honest universal warpage limit for every downpipe flange. A thick graphite gasket, an embossed steel gasket, and a V-band do not tolerate the same geometry. Use the limit given for the connection, or have a machine shop assess a visibly distorted flange.
Inspect the Parts Around the Gasket
- Check studs for stretched or damaged threads.
- Make sure bolts are not bottoming in blind holes.
- Inspect locking nuts that have lost their locking action.
- Look for cracks around the flange weld and oxygen-sensor bung.
- Check brackets, flex sections, and hangers for preload.
- Confirm that heat shields cannot become trapped between mating surfaces.
How to Install a Downpipe Gasket Without Creating a Leak
If you need the complete removal and installation sequence around the vehicle, follow this step-by-step downpipe replacement guide. For the gasket joint itself, slow down and use this order.
Step 1: Match the Gasket to Both Flanges
- Confirm the bolt pattern and spacing.
- Compare the gasket bore with both pipe openings.
- Identify any raised ring, directional face, or locating tab.
- Make sure the gasket does not cover an exhaust passage.
- Replace a previously crushed, burned, split, or distorted gasket unless it is explicitly reusable.
Step 2: Dry-Fit the Entire Connection
Support the downpipe and leave nearby brackets or downstream joints loose enough to move. Bring the flanges together without the gasket first. They should approach squarely and sit naturally against each other.
If the pipe springs away when you release it, fix the alignment. Do not ask two small bolts to hold the entire exhaust in a stressed position.
Step 3: Apply RTV Only When the Joint Allows It
If sealant is approved, apply a thin, even film around the sealing land. Keep it away from the inside edge of the exhaust opening. Do not use it to fill a visible flange gap.

Follow the product’s instructions for:
- Surface cleaning;
- Application thickness;
- Open or skin time;
- Assembly window;
- Initial tightening procedure;
- Time before startup;
- Full cure.
Step 4: Start Every Fastener by Hand
Thread each nut or bolt several turns before applying final load. If one fastener will not start by hand, the connection is probably misaligned or the threads are damaged. Forcing it with a wrench only buries the problem.
Step 5: Tighten Evenly in Stages
Draw the flange together gradually. On a two-bolt connection, alternate sides in small steps. On a multi-bolt flange, follow the specified cross-pattern. Watch the flange gap as you work; it should close evenly.
Use the tightening value provided for that vehicle, turbo, downpipe, gasket, and hardware combination. A torque number copied from another car can be worse than no number at all.
Step 6: Secure Brackets, Hangers, and Sensors
Once the primary connection is seated, align the remaining exhaust and tighten its supports in the specified order. Make sure the flex section is not stretched or sharply angled. Confirm clearance around the transmission, subframe, firewall, steering shaft, driveshaft, heat shields, wiring, and hoses.
Step 7: Respect the Cure Time
RTV becoming tack-free does not mean it is fully cured. Starting the engine too early can expose a weak inner edge to pressure and heat before the sealant has developed its intended properties.
Wait for the product’s stated return-to-service time. Weather matters: cold, dry air can change how quickly a moisture-curing silicone sets.
A Shop Case That Explains the Whole Problem
I remember dealing with a turbo car that had already eaten two new downpipe gaskets. The owner had followed the usual internet advice: clean it, add Copper RTV to both sides, and pull the bolts tighter. Each repair became quiet for a few drives. Then the cold-start tick returned.
When I separated the joint, the clue was sitting right on the gasket. One side had a deep, clean crush mark. The opposite side was barely touched, with a narrow carbon trail running to the outer edge.
I put a straightedge across the flange. Both bolt ears were high, and the area beside the pipe opening sat low. The downstream exhaust also moved sideways nearly half an inch when the flange bolts came loose. That pipe had been fighting the joint every mile.
We corrected the flange face, released the downstream preload, replaced the gasket, and tightened the connection evenly. No heroic bead of silicone. No breaker-bar finale. The leak stayed gone because the gasket finally had a fair chance to work.
That is the lesson: if RTV keeps failing in the same spot, read the old gasket. It will often show you where the clamp load disappeared.
How to Retest for a Downpipe Gasket Leak
Start With a Cold Engine
Cold metal often makes a small leak easier to hear. Start the engine outdoors or in a properly ventilated work area. Listen from a safe distance and keep hands, clothing, and tools away from belts, fans, hot pipes, and the turbocharger.
A repeating tick that follows engine speed deserves attention. Do not confuse injector noise or a loose heat shield with exhaust blow-by; locate the loudest area before taking parts apart again.
Look for a Fresh Soot Track
Clean the flange after installation so you have a clear baseline. After the first complete heat cycles, inspect the full circumference of the joint. A new black line beginning at the sealing edge is more useful than old grime spread across the pipe.
Use a Low-Pressure Smoke Test
A low-pressure automotive smoke test can locate a small opening without relying on sound. Introduce smoke through an appropriate exhaust opening with the engine off and cold. Keep test pressure within the equipment and vehicle procedure.

Smoke coming from the gasket edge confirms the location. Smoke appearing at a weld, flex section, or sensor bung means another gasket will not solve the problem.
Treat Cabin Fumes as a Safety Problem
If you smell exhaust inside the vehicle, do not keep driving while waiting for a louder symptom. Check the turbo outlet, downpipe connections, flex section, firewall openings, and HVAC intake area. This exhaust-fume leak-finding guide explains how connection leaks and poor system alignment can bring fumes toward the cabin.
Recheck Hardware Without Automatically Adding Torque
Some gasket and hardware combinations call for inspection or retightening after heat cycles; others do not. Check the specified procedure. “Recheck” does not mean leaning on every fastener until it moves.
If a nut repeatedly loses clamp load, investigate the stud, locking feature, flange movement, bracket support, and heat-cycle behavior.
Red or Copper RTV Downpipe Gasket Troubleshooting
| Symptom | Likely Area to Inspect | Better Next Step |
|---|---|---|
| Leaks immediately after assembly | Gasket position, orientation, flange alignment, tightening sequence | Disassemble before heat damages the new gasket; inspect the crush pattern |
| Leaks only under boost or heavy load | Small flange gap, cracked weld, weak hardware, exhaust preload | Run a cold smoke test and inspect for a narrow soot path |
| Leak returns after several heat cycles | Flange movement, lost clamp load, unsuitable gasket, damaged fastener | Check flatness and support instead of adding another RTV layer |
| RTV burns or blows out at the inner edge | Excess application, poor cure, exposed bead, excessive joint movement | Remove the material and restore the correct mechanical seal |
| One side of the gasket is heavily crushed | Uneven tightening, warped flange, pipe approaching at an angle | Correct alignment and flange geometry before fitting another gasket |
| No soot at the gasket, but noise remains | Heat shield, flex section, V-band, sensor bung, manifold, valvetrain | Locate the sound and smoke-test the complete exhaust path |
Choosing the Right Downpipe and Sealing Parts
If you are replacing more than the gasket, start with the connection—not the advertised pipe diameter. Match the component to the vehicle year, engine, drivetrain, turbocharger outlet, oxygen-sensor layout, catalytic-converter configuration, and downstream exhaust.
If you are still learning where the part sits and why the joint sees so much heat and movement, read how a turbo downpipe works before ordering hardware.
Flashark downpipe options can be part of a full repair or performance build when the selected configuration matches the vehicle and the rest of the exhaust. Before installation:
- Review the selected configuration and package contents.
- Match every flange and sensor position to the vehicle.
- Compare the supplied gasket with both sealing faces.
- Inspect the new flange for shipping damage or raised weld material.
- Dry-fit the assembly before applying sealant.
- Review local emissions and road-use requirements before modifying emissions-related equipment.
- Determine whether the installed hardware or vehicle configuration requires calibration changes.
The Final Call
So, what is red or copper RTV downpipe gasket really asking? Usually this: “Can I put high-temperature silicone on my exhaust gasket to stop a leak?”
The honest answer is conditional. A thin film of the correct RTV can assist an approved gasket installation when the flanges are flat, aligned, clean, and properly clamped. It cannot permanently straighten bent metal, repair a cracked weld, correct an undersized gasket, or hold a stressed exhaust system in place.
Fix the joint first. Let the gasket seal it. Use RTV only when the connection actually calls for help.
Frequently Asked Questions About RTV and Downpipe Gaskets
Q1: What is red or copper RTV downpipe gasket?
A1: The phrase usually refers to using red or copper-colored high-temperature RTV silicone with a physical downpipe gasket. RTV is a sealant or gasket maker; it is not the same part as the metal, graphite, composite, or crush-style gasket between the flanges.
Q2: Should I put RTV on a downpipe gasket?
A2: Only when the gasket, downpipe, turbo, or vehicle instructions permit it. A clean, flat, correctly aligned joint with the specified gasket often installs dry. If sealant is approved, use a thin film rather than a thick bead.
Q3: Is red or copper RTV better for an exhaust gasket?
A3: Neither color is automatically better. Compare the exact formula’s continuous and intermittent temperature ratings, sensor-safe labeling, cure process, and listed applications. A premium red product can have a higher peak rating than another manufacturer’s copper formula.
Q4: Can Copper RTV replace a downpipe gasket?
A4: Usually not. If the joint is designed around a formed gasket, install that gasket. RTV alone should be used as the primary gasket only when the component instructions specifically call for a formed-in-place seal.
Q5: Is high-temperature RTV safe for oxygen sensors?
A5: Use a product clearly labeled sensor-safe, non-corrosive, or suitable for oxygen-sensor-equipped vehicles. Even with the right product, avoid squeezing excess uncured material into the exhaust passage.
Q6: How hot does a downpipe flange get?
A6: Temperature changes with engine load, turbo position, fueling, catalyst location, pipe material, shielding, and airflow. Exhaust gas temperature is not identical to the outside flange temperature, but the inner sealing edge can still experience severe heat.
Q7: How much RTV should I use on an exhaust flange?
A7: When permitted, use a paper-thin, even film over the intended sealing land. Do not use a thick bead to bridge a visible gap. Follow the application thickness and curing instructions for the exact product.
Q8: Should RTV go on one side or both sides of the gasket?
A8: Follow the gasket and sealant instructions. Some approved applications use a thin coating on both sealing faces; others call for one side or a completely dry installation. There is no universal two-side rule.
Q9: How long should RTV cure before starting the engine?
A9: Use the return-to-service time printed for the exact formula. Skin time and full cure are different. Temperature, humidity, bead thickness, and whether the sealant is trapped between flanges can all affect curing.
Q10: Why does my new downpipe gasket still leak?
A10: Common causes include an off-center or incorrect gasket, warped flange, uneven tightening, damaged hardware, pipe preload, a cracked weld, or a nearby leak mistaken for gasket failure. Read the gasket’s crush pattern before throwing it away.
Q11: Can I stack two downpipe gaskets to stop a leak?
A11: Stacking gaskets can create a less stable joint and does not repair a warped flange. Correct the sealing surfaces and alignment, then install the specified gasket arrangement.
Q12: Can overtightening cause a downpipe gasket leak?
A12: Yes. Excessive or uneven tightening can crush the gasket, stretch studs, damage threads, or bend thin flange ears. Use the specified hardware condition, sequence, and tightening value.
Q13: Do downpipe bolts need to be retightened after heat cycling?
A13: It depends on the gasket and hardware design. Some installations call for a heat-cycle inspection or retightening procedure, while others do not. Follow the instructions for the installed connection rather than adding torque automatically.
Q14: How can I tell if a downpipe flange is warped?
A14: Clean the flange and check it in several directions with a known-flat straightedge. Use a feeler gauge to measure visible gaps. Also inspect for raised bolt ears, weld distortion, deep corrosion, and uneven marks on the removed gasket.
Q15: Can a downpipe leak cause a check-engine light?
A15: A leak near an oxygen sensor can affect the gas sample reaching that sensor and may contribute to abnormal readings or diagnostic codes. The result depends on leak location, sensor placement, vehicle strategy, and other engine conditions.
Q16: Can a leaking downpipe gasket reduce power?
A16: A leak before the turbine can reduce the exhaust energy available to drive a turbocharger. A leak near an upstream oxygen sensor can also interfere with fuel-control readings. The effect depends on the leak’s size and location.
Q17: Is it safe to drive with a leaking downpipe gasket?
A17: Do not judge safety by sound alone. Stop driving and inspect the vehicle if exhaust enters the cabin, hot gas blows toward wiring or hoses, the pipe is loose, a fastener is broken, or the leak is rapidly getting worse.
Q18: Why did the RTV seal work for a week and then fail?
A18: The joint may be moving through heat cycles, the flange may be warped, the pipe may be under tension, the product may have been under-cured, or the inner bead may have been exposed to exhaust flow. Remove the sealant and inspect the mechanical joint.

Steven Chen
Automotive Performance Specialist | Engine & Exhaust Systems
Steven focuses on practical engine performance, exhaust fitment, and real-world upgrade paths for classic and modern enthusiast vehicles. He reviews small-block Ford, LS, truck, and street/strip applications with one goal in mind: helping builders choose parts that actually work together. His philosophy: "Good power starts with the right combination, not the biggest part."














