A fresh header hits the steering shaft by a hair. The hammer is already on the bench. Before you swing it, find out why the tube is touching. A small clearance dent may leave power nearly unchanged, yet the wrong dent can crack a weld, hide a mounting problem, or leave a hot tube rubbing against a critical part.
Quick Answer: How Much Dent Is Too Much?
- A shallow, smooth dent in a straight section is usually less concerning than a sharp crease near a weld, bend, sensor bung, or collector.
- No universal dent-depth limit works across different tube diameters, wall thicknesses, engines, and operating conditions.
- Check engine mounts, flange seating, exhaust alignment, and moving parts before changing the tube.
- Stop and repair the problem if the header still touches, shows a crack, leaks, or puts heat against wiring, hoses, or the steering system.
The Short Answer: How Much Dent Is Too Much?
Denting headers for clearance is a fitment decision, not a horsepower trick. A modest, rounded dimple that frees a tube from a nearby component presents a different problem from a deep, sharp fold that nearly closes a primary. Treat those as different jobs.
Start with three questions. What touches the header? Why does it touch? Will the parts stay separated when the engine moves and the exhaust heats up? A dent that looks harmless on a parked car can become a contact point during a hard turn or acceleration.
Do not use a dyno result as a safety limit. An Engine Masters header-dent test used a 400-cubic-inch small-block Chevrolet and 1¾-inch primary tubes. Its power results challenged the idea that every clearance dimple costs a noticeable amount of horsepower. That test did not establish a safe dent size for every header, nor did it test years of vibration against a steering shaft.
A Decision Rule Before the First Hammer Strike
When I see a tube touching a chassis part, I mark the exact contact point and loosen nothing until I understand the load path. A collector pulled sideways by the downstream exhaust can make a primary appear too wide. Denting that primary would leave the original alignment problem in place.
Use this order: locate the contact, check the mounting system, inspect the tube, then decide whether a controlled dimple is appropriate. If the contact sits on a weld, requires a sharp crease, or involves a moving safety component, stop and reconsider the part combination.
What a Dyno Test Can Tell You
A dyno measures the engine under its test conditions. It does not measure whether your header clears an air-conditioning line after a heat cycle. Engine output also depends on primary diameter, collector design, camshaft, exhaust system, and calibration. A small dent may have little measurable effect on one combination and still deserve repair because its shape or location threatens durability.
Garage rule: Judge power, clearance, and tube integrity separately. A car can pull cleanly and still have a header slowly wearing through against the chassis.
Why Headers Hit the Chassis in the First Place
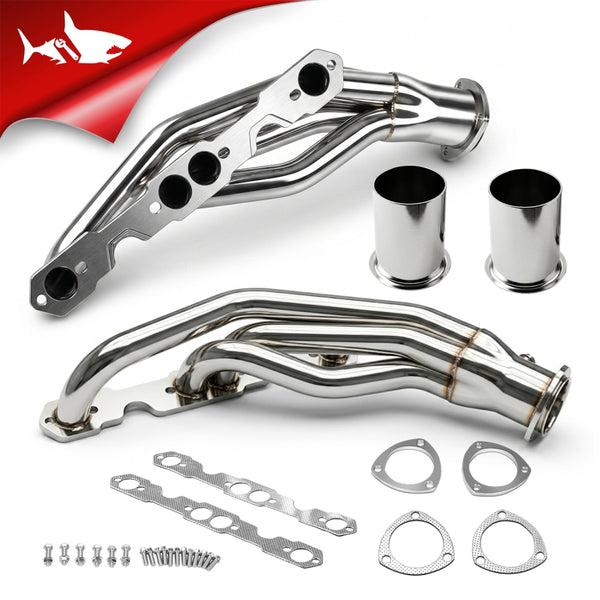
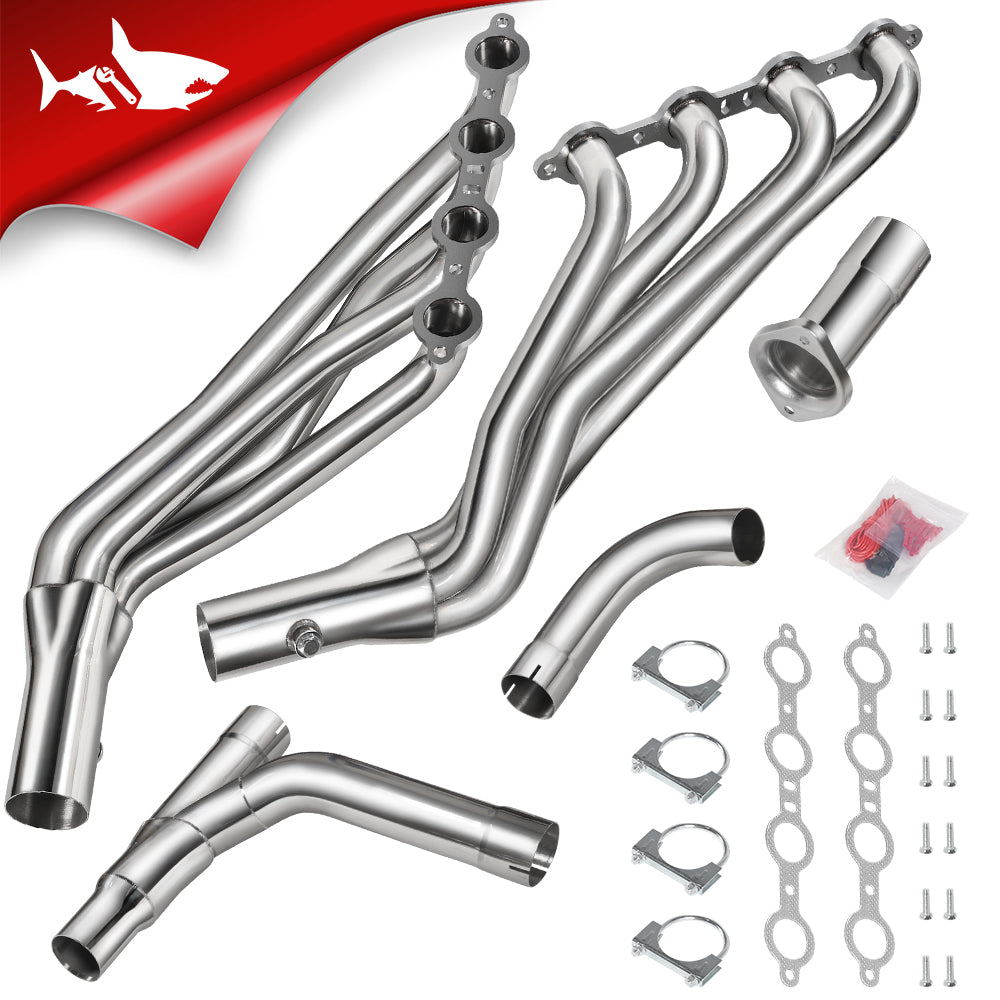
Header clearance is rarely a single measurement. A long-tube layout places more tubing near the steering shaft, starter, frame, and lower body. A shorty layout usually occupies less space below the engine, but its collector and downstream connection still have to match the vehicle. Compare the actual installation path, not just the product photo.
On an LS-swapped older chassis, for example, the engine mount plates, steering shaft, and transmission position work as a system. Moving the engine a small amount to clear one bank can reduce clearance on the other. A late-model vehicle has its own tight spots, including oxygen-sensor wiring and heat-sensitive lines.

Check Engine Mounts and Position
I start at the mounts when a header that should fit suddenly kisses the frame. A collapsed rubber mount can lower one side of the engine. A swap plate installed in the wrong position can move the whole engine toward the steering system. Neither problem improves when you hit the tube harder.
Look for torn rubber, separated mount material, loose hardware, and obvious engine tilt. If the vehicle uses aftermarket mounts or spacers, match their position to the intended header and chassis combination. Inspect both banks after any adjustment; gaining room on one side can cost room on the other.
Inspect Flanges, Gaskets, and Exhaust Alignment
A header flange should sit squarely against the cylinder head without the collector forcing it into place. Start fasteners by hand and follow the header maker’s tightening sequence and torque instructions. Check that the gasket stays aligned and that the downstream exhaust hangs without pulling the collector sideways.
Here is the mistake I watch for: someone tightens the rear exhaust connection first, then uses the header bolts to drag the assembly into position. The tube ends up close to the frame, while the flange carries stress it should never see. Loosen the system, support it properly, and establish a neutral fit before deciding that the primary needs reshaping.
Separate Ground Clearance From Engine-Bay Clearance
A primary touching a steering shaft is an engine-bay fitment problem. A collector striking a speed bump is a ground-clearance problem. Lowered ride height, suspension compression, and the lowest point of the exhaust all matter in the second case. A small dent in a primary will not fix a collector that hangs too low.
Compare the two layouts below as a starting point; the exact result depends on the vehicle and header design.
| Feature | Factory exhaust manifold | Aftermarket shorty header | Aftermarket long-tube header |
|---|---|---|---|
| Typical tube path | Compact, close to the cylinder head | Individual runners with a relatively compact layout | Longer runners extending farther toward the underbody |
| Common clearance checks | Heat shields, service access, outlet connection | Steering, starter, wiring, outlet connection | Steering, frame, transmission area, collector, ground |
| Fitment priority | Correct factory configuration | Vehicle-specific flange and exhaust connection | Full path from head flange through collector |
Flashark’s guide to exhaust header designs and how they work explains the basic layouts. Use those differences to narrow your options, then match the selected part to your vehicle year, engine, drivetrain, emissions equipment, and exhaust connection.
Dent Location, Shape, and Remaining Flow Area
People often ask whether a dent is “a quarter-inch deep.” That number alone tells you little. A quarter-inch indentation in a small primary takes up a different share of the passage than the same indentation in a larger tube. A narrow mark, a broad flattened section, and a sharp crease also change the internal shape differently.
Denting headers for clearance deserves a close look at the tube’s remaining open area, not just its outside appearance. Exhaust pulses accelerate through a restriction. A smooth local change generally creates less abrupt disturbance than a folded edge. That does not give you a universal acceptable percentage; it gives you a better way to inspect the actual part.

A Shallow Dimple Versus a Sharp Crease
Run your eyes along the tube’s original curve. A shallow dimple changes the profile gradually. A crease creates a distinct line where the metal has folded or stretched. Look closely at that line under bright light, particularly if the tube has already been heated and cooled many times.
Do not chase a guessed horsepower number by making the dent prettier from the outside. If the tube shows a crack, a pinhole, or a heavily flattened section, repair or replace it. A smooth-looking exterior does not prove the inside remains round.

High-Risk Spots: Welds, Bends, Sensors, and Collectors
Keep a hammer away from a weld seam, an oxygen-sensor bung, and a tight bend unless a qualified exhaust fabricator has assessed the work. Those areas already contain changes in shape, material thickness, or stress. The collector also combines flow from several primaries; a deformation there affects more than one runner.
Heat-sensitive neighbors matter just as much. Check the distance to brake lines, fuel lines, wiring, hoses, and air-conditioning plumbing. A header that no longer rattles against a line may still radiate enough heat to damage it. Restore proper routing and shielding where the vehicle or header design calls for them.
Why Peak Horsepower Is Only One Measure
Peak horsepower is one point on a curve. A street car spends most of its life elsewhere. Exhaust leaks can change sound, upset sensor readings when they occur in the wrong location, and make diagnosis harder. A tube that cracks after repeated contact fails regardless of its best dyno pull.
For a performance build, compare the full torque curve under controlled conditions if you have access to a dyno. For a daily-driven car, prioritize a sound tube, a sealed flange, and stable clearance through normal engine and suspension movement.
A Fitment-First Installation Checklist
Denting headers for clearance should come after a careful trial fit. Let the header hang on its fasteners without forcing the collector into the rest of the exhaust. Check the entire path while you can still see and reach it. Flashark’s exhaust header installation and maintenance guide provides a useful companion for the broader installation sequence.
Find the Exact Contact Point
Work on a cool exhaust with the vehicle securely supported. Look for fresh polished marks, scraped coating, crushed insulation, or matching marks on the nearby component. Mark the contact on the header. Then check steering travel and the accessible movement of surrounding parts without placing hands near a running engine.
I use the mark as a map. If the scuff sits at the collector while the noise seems to come from the firewall, I inspect the full exhaust before touching a primary. Sound travels through metal; the loudest spot is not always the contact spot.
Correct the Installation Before Reshaping a Tube
- Confirm the selected header matches the vehicle year, engine, drivetrain, and exhaust connection.
- Inspect engine and transmission mounts for damage or incorrect positioning.
- Seat the head flange and gasket without using bolts to pull the system sideways.
- Support the downstream exhaust and check hangers, collector angle, and joint alignment.
- Recheck the contact point on both sides of the engine before considering a dimple.
When I retrace a difficult fit, I often find the useful measurement at the collector, not at the dent someone planned to make. A downstream pipe held under tension changes the header’s resting position. Relieving that tension can recover clearance without removing any tube area.
Recheck After Heat Cycles and a Road Test
Finish the installation with the manufacturer’s fastener and gasket instructions. After the system heats and cools, inspect for new witness marks, loose joints, and changes in clearance. Listen for a tick at cold start and a rattle under the conditions that first exposed the problem.
Do not use header wrap, a hose clamp, or a zip tie as a cure for hard contact. Those items do not correct the metal-to-metal geometry. A moving steering component must remain clear throughout its travel.
Practical tip: Photograph the contact mark before disassembly and the final gap after reassembly. Matching angles make a later inspection much easier.
When to Repair, Replace, or Start Over
Stop reshaping when the tube develops a sharp fold, the contact remains after the change, or the required dent approaches a major flattening of the primary. Stop immediately if you see a crack or pinhole. A replacement header or a corrected mounting combination may cost less than repeated removal and repair.
Inspect for Cracks and Exhaust Leaks
With the exhaust cool, inspect the dent edges, nearby welds, flange, sensor bung, and collector. Look for dark soot tracks and listen for a sharp tick during a cold start. A shop can use appropriate leak-testing equipment when the source remains unclear. Keep hands and clothing away from hot tubes and moving parts.
A leak near the front of the exhaust can complicate oxygen-sensor feedback and fuel-trim diagnosis. Do not assume a check-engine light proves the dent caused the fault. Read the diagnostic trouble code; inspect the gasket, sensors, wiring, and exhaust joints in the affected area.

Choose Between Reworking and Replacing the Header
A professional fabricator may repair a localized defect if the tube material and surrounding structure remain suitable. Replacement makes more sense when the tube is cracked across a crease, the collector sits in the wrong place, or the header is incompatible with the vehicle’s mounting layout.
When shopping for an alternative, compare the complete route. Flashark’s vehicle-specific exhaust header collection lets you review different header layouts. Match the chosen configuration to your engine, drivetrain, exhaust connection, and emissions equipment before ordering; a brand name alone does not guarantee clearance.
Finish With a Go/No-Go Inspection
Before driving, confirm five things: the header does not touch surrounding parts, the steering operates freely, the exhaust hangs without forced alignment, the tube and joints do not leak, and heat-sensitive components remain properly routed. Check again after a heat cycle.
Denting headers for clearance can be a sensible local fitment correction when the mount geometry is right and the finished tube remains sound. If the installation needs a deep crease or still rubs, fix the fitment problem instead of giving the hammer another swing.
Frequently Asked Questions
Q1: Can a small dent in a header reduce horsepower?
A1: Any change to a primary tube can affect flow, but a small, smooth dent does not automatically cause a noticeable power loss. Engine output depends on the full exhaust and engine combination. Inspect the dent’s shape and location before treating a dyno example as a rule for your car.
Q2: Does dent location matter more than dent depth?
A2: Both matter. A shallow mark near a weld or sensor bung may deserve more attention than a similar mark in a straight section. Tube diameter, dent width, and the remaining open passage also affect the result.
Q3: Should I return new headers that need clearance dents?
A3: First confirm the part number, vehicle configuration, mounts, and exhaust alignment. If the correctly installed header still needs substantial reshaping, review the seller’s return terms and speak with the manufacturer before modifying it.
Q4: Are shorty headers better when long tubes hit the chassis?
A4: A shorty design may improve clearance in some areas because its runners take a different route. Its outlet still has to match the vehicle’s exhaust. Compare the complete fitment path and intended use before changing designs.
Q5: When should I replace a header instead of repairing it?
A5: Replace or seek professional assessment when a tube has a crack, pinhole, severe fold, persistent contact, or a collector position that forces the system out of alignment. Repeatedly deepening a dent does not correct an incompatible layout.
Q6: What should I check before denting headers for clearance?
A6: Check the exact contact point, engine and transmission mounts, flange seating, gasket position, collector angle, exhaust hangers, steering travel, and nearby wiring or hoses. Correct those issues before changing the tube.
Q7: How can I tell whether the steering shaft still touches a header?
A7: Inspect for matching witness marks on both parts and check steering movement with the vehicle safely supported. Reinspect after a careful road test and heat cycle. Stop using the vehicle if contact affects steering operation.
Q8: Does a clearance dent require an ECU tune?
A8: A local dent alone does not establish a tuning requirement. Tune needs depend on the vehicle and the complete installed hardware. If the car develops a fault code or drivability problem, diagnose the code and the installation rather than assuming a tune will hide the cause.
Q9: Can I move an oxygen sensor or catalytic converter to gain clearance?
A9: Do not relocate or remove emissions equipment as an improvised clearance fix. Preserve the vehicle’s required emissions configuration and check applicable road-use rules before changing emissions-related hardware.
Q10: Is a cheaper header worth keeping if it needs major fitment work?
A10: Add the full cost of removal, fabrication, gaskets, and repeat installation to the purchase price. A header that needs major changes may cost more than a better-matched alternative, especially if the collector or flange starts in the wrong position.

Steven Chen
Automotive Performance Specialist | Engine & Exhaust Systems
Steven focuses on practical engine performance, exhaust fitment, and real-world upgrade paths for classic and modern enthusiast vehicles. He reviews small-block Ford, LS, truck, and street/strip applications with one goal in mind: helping builders choose parts that actually work together. His philosophy: "Good power starts with the right combination, not the biggest part."