


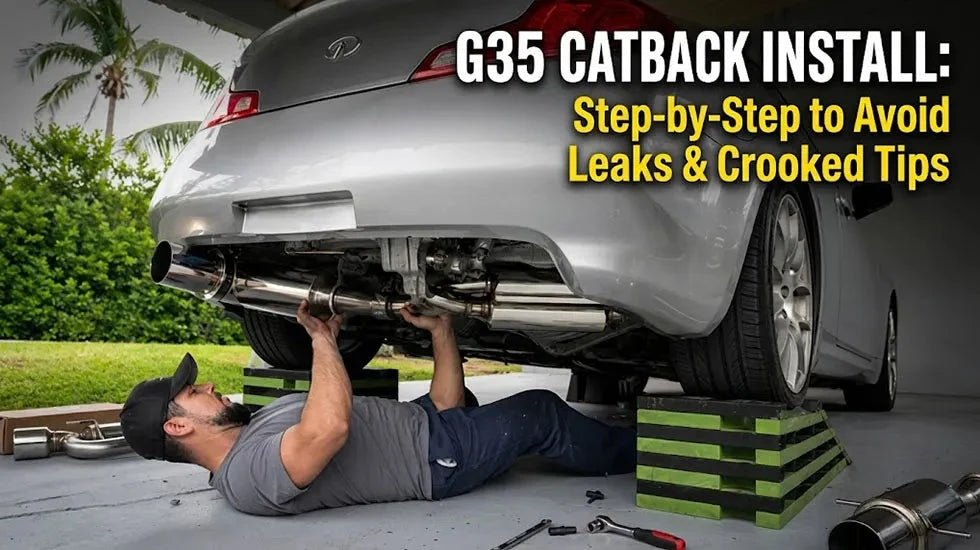
A G35 catback looks like a simple Saturday job. A few flange bolts, several rubber hangers, one polished exhaust tip, and you are done. At least, that is how it looks while the parts are still laid out on the garage floor.
Then the system goes under the car. The front flange bolts up, but the first hanger sits two inches behind the rubber isolator. You pull the muffler forward, the tip disappears under the bumper, and the gasket starts leaking as soon as the VQ35DE fires. Now that “easy” G35 catback exhaust install has turned into three hours of loosening, twisting, and blaming the wrong part.
Here is the truth: installing the pipes is not the hard part. Getting the extension pipe, hangers, flanges, gaskets, and exhaust tip to sit together without fighting each other is what separates a clean installation from a crooked, rattling mess.
Mechanic's note: A properly fitted catback should hang naturally before the flange bolts are fully tightened. If you need a pry bar, ratchet strap, or heroic amount of bolt torque to make the parts meet, stop. Something is installed backward, the extension length is wrong, or the system does not match the body style.
Quick answer: How should a G35 catback be installed?
- Confirm the exact year and body style before removing the stock exhaust. A G35 Coupe and G35 Sedan do not use the same rear-exhaust dimensions.
- Verify whether your system requires an extension pipe. The extension must correct the overall length without pulling the rubber hangers out of position.
- Install every section loosely. Let the hangers carry the exhaust before tightening any flange.
- Center each gasket and make sure the flange faces meet evenly. Do not use bolt torque to close a large angled gap.
- Set the muffler angle and exhaust tip depth while all connections can still move.
- Tighten the system progressively from the front toward the rear, checking tip alignment after every connection.
- Perform a cold-start leak check, a warm rattle check, and another inspection after the first complete heat cycle.
Confirm the G35 Body Style Before You Touch a Wrench
The badge on the trunk is not enough. Before starting a G35 cat back install, confirm the year, Coupe or Sedan body style, engine, drivetrain, and the exhaust parts already under the car.
The 350Z and G35 Coupe share plenty of VQ-platform DNA, but that does not make every rear exhaust system identical. The wheelbase, body length, rear bumper position, and hanger locations determine where the muffler and tip need to sit. A flange can bolt together while the rest of the exhaust is still several inches out of position.
The G35 Sedan is another story. Do not buy a Coupe-oriented system and assume a universal extension will solve everything. The pipe length and hanger relationship can be different enough that the job moves beyond ordinary bolt-on installation.
Fitment warning: The Flashark single-exit system discussed in this guide is listed for 2003–2008 G35 Coupe applications when the required extension pipe is used. It is not listed as a direct-fit system for the G35 Sedan. Confirm the current product fitment before ordering.
Check the Existing Exhaust Layout
Get under the car with a light before ordering parts. You need to know whether the vehicle still has:
- The factory catalytic converters
- The factory or an aftermarket Y-pipe
- The original mid-pipe and rear muffler
- Stock flange locations
- Unmodified exhaust hangers
- Previous welded repairs or added slip joints

An aftermarket Y-pipe can move the rear connection point forward, backward, or slightly sideways. Even a half-inch difference at the front can turn into a visibly crooked tip by the time the pipe reaches the rear bumper.
Owners who are unsure where a catback begins should first review what a 350Z catback actually replaces. The G35 and 350Z layouts are not identical in every detail, but the breakdown makes it much easier to distinguish the cats, Y-pipe, mid-pipe, muffler, and rear outlet.
Make Sure the Extension Pipe Is Actually in Your Garage
An extension pipe is not a decorative spacer. It corrects the distance between the front exhaust connection and the rear muffler position. On a G35 Coupe using a 350Z-based catback layout, that extra length may be what puts the hangers and tip where they belong.

Do not assume that “extension required” means the extension is automatically included. Read the product option, packing list, and fitment notes. If the extension is sold separately, order it before taking the factory exhaust off the car.
Also, do not grab a random eight-inch or ten-inch pipe because somebody used one in a forum post. The required length depends on the catback design, Y-pipe, flange thickness, slip-joint engagement, and hanger placement.
Factory G35 Exhaust vs. a 3-Inch Single-Exit Catback
A catback is mainly a sound, flow, and appearance upgrade. It is not a substitute for repairing damaged catalytic converters, a cracked Y-pipe, or leaking front flanges.
| Feature | Factory G35 Coupe Exhaust | Flashark Single-Exit Catback | What It Means During Installation |
|---|---|---|---|
| Rear layout | Factory-style rear muffler with dual outlets | Single muffler and single rear outlet | The single tip makes small alignment errors easier to see. |
| Pipe design | Factory-sized sections designed around low noise | 3-inch piping | Larger piping leaves less room around braces and heat shields. |
| Tip configuration | Two factory outlets | One 4.5-inch flat tip | Tip depth, height, and bumper clearance must be set before final tightening. |
| Sound | Quiet and controlled | Deeper and noticeably louder | A flange leak can add rasp or ticking that is not part of the intended tone. |
| G35 Coupe installation | No conversion extension | Extension pipe required for the listed G35 Coupe fitment | Overall length must be correct before judging the hanger or tip position. |
| Power expectation | Factory baseline | Approximately 5–10 hp may be possible on many stock or lightly modified cars | Results depend on the full setup, engine condition, tuning, and leak-free installation. |

Do not buy a catback based on a horsepower number alone. On a mostly stock G35, the immediate differences will be the exhaust note, the single-exit appearance, and the way the engine sounds under load. No honest installer can promise a specific wheel-horsepower gain without testing the same car, on the same dyno, before and after.
For this particular layout, the Flashark 3-inch single-exit G35 catback exhaust uses a 4.5-inch flat tip, stainless steel construction, included gaskets and hardware, and a removable double-layer silencer. The important G35 detail is still the extension pipe. Do not skip it.

Flashark 350Z & G35 Coupe Single-Exit Catback
Stainless steel catback with 3-inch piping, a 4.5-inch flat single tip, removable silencer, gaskets, bolts, and nuts. A correctly sized extension pipe is required for the listed G35 Coupe applications.
$189.99 $299.99
Price shown at the time of publication. Verify current pricing and exact fitment on the product page.
Check Fitment & Current PriceTools and Supplies for a G35 Catback Exhaust Install
You do not need a professional exhaust rack, but you do need safe access under the car and enough leverage for hardware that has spent roughly two decades going through rain, road salt, and heat cycles.
Basic Hand Tools
- Metric six-point socket set
- Metric combination wrenches
- Long-handled ratchet or breaker bar
- Socket extensions and a universal joint
- Torque wrench covering the required fastener range
- Rubber mallet
- Small wire brush
- Work light
Use six-point sockets on rusty exhaust hardware. A twelve-point socket has less contact area and is much more likely to round a corroded nut.
Hanger and Rust-Control Tools
- Exhaust hanger removal pliers
- Silicone spray or a mild soap-and-water mixture for rubber hangers
- Penetrating oil for flange bolts
- Replacement flange bolts, nuts, and washers
- Thread chaser or suitable tap and die set
- A second floor jack or an extra pair of hands
Do not soak the rubber isolators in aggressive petroleum-based chemicals. A little silicone spray is usually enough to help the metal hanger rod slide through without tearing the rubber.
Safety Equipment
- Quality jack stands rated for the vehicle
- Wheel chocks
- Safety glasses
- Work gloves
- A level concrete surface
Do not work under a car supported only by a hydraulic jack. Put the vehicle on properly positioned jack stands, shake it firmly before crawling underneath, and keep the floor jack lightly touching a suitable support point as a backup where practical.
Prepare the Car Before Removing the Factory Catback

Let the Exhaust Cool Down
A VQ exhaust can remain hot long after the engine is shut off. Let the car sit until the catalytic converter area, Y-pipe, and rear flanges are cool enough to touch safely.
Raise the Car High Enough to Remove the Muffler
You need more room than your shoulders require. The stock rear muffler is bulky, and the pipe may need to rotate downward before it can be moved out from under the bumper. Low jack stands can leave you with every bolt removed and no usable exit angle.
Chock the front wheels, set the parking brake, raise the rear, and support the chassis at approved points. On a low car, lifting the front slightly may provide better access to the front catback flange.
Soak the Factory Flange Hardware
Wire-brush the exposed threads and apply penetrating oil. Give it time to work. Ten minutes is better than nothing; several applications over an hour are better when the hardware is heavily scaled.
Old exhaust bolts do not care that a clean installation video finished in 45 minutes. Build extra time into the job.
Record the Stock Exhaust Position
Before removing anything, take several photos:
- Front flange orientation
- Each rubber hanger
- Pipe clearance around braces and the differential
- Factory muffler height
- Tip position relative to the bumper
These pictures become useful when the new system sits too low and you are trying to decide whether the issue is a bent hanger, a rotated pipe, or simply your memory.
Remove the Factory G35 Catback Without Bending the Hangers
Support the Rear Muffler First
Place a padded floor jack or exhaust stand under the muffler. Do not let the full weight hang from the front flange while you remove the rubber isolators.
Loosen the Front Flange
Break the flange hardware loose, but leave one fastener loosely installed. This keeps the pipe from dropping while the rear hangers are being removed.
If a nut starts rounding, stop. Hammer on a tighter six-point extraction socket, apply heat only if you understand the nearby fuel, brake, and underbody components, or cut the fastener and replace it. Repeatedly slipping a socket over the same nut only makes the next attempt worse.
Release the Rubber Hangers
- Support the exhaust section so the rubber isolator is not carrying full weight.
- Apply silicone spray to the metal hanger rod.
- Push the rubber slightly forward and backward to break the dry bond.
- Use hanger pliers to press the rod through the rubber.
- Inspect the isolator for cracks, tearing, and permanent stretch.
If the rubber has sagged enough to let the factory muffler sit low, replace it now. A new catback cannot hold a clean tip position with worn-out isolators.
Lower the Exhaust in a Controlled Manner
Remove the final flange fastener and slowly lower the system. Keep an eye on the bumper, brake lines, EVAP lines, and heat shields. Rotate the stock muffler and pipe only as much as necessary to clear the chassis.
Clean the Flanges and Inspect the Gaskets
A shiny new catback will still leak if it is bolted to a crusty, uneven flange.
Remove the Old Gasket Completely
Old gasket material often stays bonded to one flange. Scrape it off carefully and clean the mating surface with a wire brush. The surface does not need to look polished, but it must be free of large rust flakes, old gasket chunks, and raised burrs.
Check the Flange Faces
Hold a straight edge across the flange where possible. Look for:
- A visibly bent ear around one bolt hole
- A flange face pulled into a cone shape
- Deep corrosion pits crossing the sealing surface
- Cracked welds around the pipe
- Black soot tracks showing the path of a previous leak
Minor pitting may seal with a quality replacement gasket. A badly warped flange may need machining, replacement, or professional welding.
Use the Correct New Gasket
If the system includes new gaskets, use them unless the manufacturer specifically calls for a reusable factory-style sealing ring. Do not stack two flat gaskets to fill a gap. That usually creates two sealing surfaces that can move instead of fixing the flange angle.
Test-Fit the G35 Extension Pipe Before the Muffler Goes Up
This is the step people rush. It is also where many G35 installations go sideways.
Confirm the Extension Pipe Direction
Set the extension next to the front section of the catback. Compare both flange ends. One end may have a different bolt-hole angle, pipe offset, or flange orientation.
Hold the pipe under the car before installing the gasket. The pipe should point toward the catback route without being forced against a brace, heat shield, or tunnel.
Center the Gasket
Put the gasket between clean flange faces. Install the bolts by hand. The gasket opening should remain centered over the exhaust passage, not hanging from one bolt or sticking into the gas path.
Tighten the nuts only enough to keep the extension in place. You should still be able to rotate the pipe slightly.
Check the First Hanger Position
Raise the next catback section into place and compare the metal hanger rod with the rubber isolator. They do not need to be perfectly aligned while everything is loose, but they should be reasonably close.
If the hanger is two inches away and the pipe must be pulled hard to reach it, do not blame the rubber. Check the following first:
- Is the extension pipe facing the correct direction?
- Is the correct extension being used?
- Is the mid-pipe rotated incorrectly?
- Was the system designed for a 350Z rather than a G35 Coupe?
- Is an aftermarket Y-pipe changing the connection position?
- Was one flange already tightened and locked at the wrong angle?
First-person fitment case
I reviewed a G35 Coupe single-exit installation where the owner had already bolted the front flange tight. The rear hanger sat well behind its rubber isolator, so he pulled the muffler forward with a ratchet strap. The hanger finally went in, but the tip disappeared under the bumper and the front gasket leaked immediately.
We went back to the first connection. The extension pipe had been installed in the wrong orientation, and tightening the front flange first had locked the entire system at an angle. Once the pipe was turned, every joint was left loose, and the hangers were allowed to carry the weight, the muffler moved into place without the strap. That is the lesson: do not force a hanger to compensate for an extension-pipe problem.
Hang the Complete Catback Before Tightening the Flanges

Install the Mid-Pipe Loosely
Connect the mid-pipe or resonated section to the extension pipe. Start all hardware by hand. Do not use an impact gun to pull the flanges together.
At this point, the pipe should be supported by its hangers and loose fasteners. The front flange should not be carrying the entire exhaust.
Install the Muffler Section
Lift the rear muffler into place with a jack or helper. Slide the hanger rods into the rubber isolators, then connect the rear flange or slip joint.
Leave enough movement to rotate the muffler. On a single-exit system, a few degrees of rotation can move the tip substantially at the bumper.
Inspect Hanger Preload
Step back and look at each rubber isolator. A healthy installation generally has:
- Hangers sitting close to their natural position
- No rubber isolator stretched tightly forward or backward
- No metal rod pressing against the edge of the rubber hole
- Enough flexibility for the exhaust to move as the engine and chassis move
A hanger that leans slightly is not automatically wrong. A hanger pulled almost horizontal is.
Do not bend the metal hangers yet. First confirm the extension length, pipe direction, flange orientation, and rubber-isolator condition. Hanger bending is a final fine adjustment, not the first response to a two-inch fitment error.
Align the G35 Exhaust Tip Before Final Tightening
Tip alignment is not cosmetic busywork. A tip positioned too close to the bumper can melt or discolor the plastic. A muffler sitting too high may strike the body when the exhaust expands. One sitting too low looks unfinished and loses ground clearance.

Set the Tip Depth
Look at the car from the side. Decide how far the tip should extend beyond the bumper. A practical street setup keeps the outlet visible without leaving a long section exposed where it can be bumped or catch a shin.
For a 4.5-inch single tip, even a one-inch depth error is obvious. Adjust the extension pipe and pipe overlap first. Do not pull the rubber hangers forward just to make the tip stick out farther.
Center the Tip in the Bumper Opening
Stand several feet behind the car, not directly underneath it. Check:
- Horizontal position in the opening
- Tip angle relative to the bumper
- Vertical clearance above and below the tip
- Muffler clearance behind the bumper
- Whether the polished face sits level
If the tip leans to one side, rotate the muffler or mid-pipe slightly. If it is too far inward or outward, adjust the extension and flange positions. Make one change at a time.
Check Clearance Along the Entire System
Do not stop after the tip looks good. Follow the pipe from the rear toward the front and inspect clearance around:
- The rear subframe
- The differential
- Sway bars and braces
- Heat shields
- Suspension arms
- The driveshaft tunnel
- Brake, fuel, and EVAP lines
Move the exhaust by hand. It should have room to swing slightly without making hard contact. Remember, stainless steel pipe grows as it heats. A cold gap that looks barely acceptable may disappear after 15 minutes on the highway.
Tighten the Flanges Without Creating an Exhaust Leak
Start With the System in Its Natural Position
Before tightening anything, confirm that:
- Every hanger is installed
- Every gasket is present
- Every bolt is started by hand
- The tip is correctly positioned
- No pipe is touching the chassis
Now the fasteners can hold the alignment that already exists. They should not be used to create alignment by force.
Tighten the Front Connection Evenly
Begin at the fixed front connection and tighten both sides gradually. Alternate between the nuts so the flange faces remain close to parallel.
Watch the gasket. If one side starts squeezing outward, loosen the connection and recenter it. Once a flat gasket folds or partially blows out, tightening harder rarely saves it.
Work Toward the Rear
Move to the next connection and repeat the same process. After every flange:
- Check the hanger position.
- Check pipe-to-chassis clearance.
- Check the rear tip depth.
- Check that the tip has not rotated.
This feels slower than running down every bolt with an impact. It is faster than loosening the entire system because the tip moved three inches to the left.
Use the Correct Torque for the Actual Hardware
There is no honest universal torque specification for every aftermarket G35 catback. The correct value depends on the bolt diameter, thread pitch, flange design, gasket type, material, and whether the connection uses standard bolts or factory spring hardware.
Use the vehicle service information or the exhaust manufacturer's instructions. If neither provides a value, identify the hardware specification before selecting a torque. Do not assume a number from an unrelated forum installation applies to your bolts.
Stop tightening if a large flange gap remains. A bolt can bend a flange before it pulls an incorrectly angled pipe into position. Loosen the system, correct the pipe angle, and let the flange faces meet naturally.
Check the G35 Catback for Leaks Before Lowering the Car
Perform a Cold Start
Start the engine while the exhaust is still cold. Do not rev it immediately. Listen from the front catback flange toward the rear.
A leaking connection may produce:
- A sharp ticking sound that speeds up with engine rpm
- A soft hiss
- A rhythmic puffing sound
- Visible condensation escaping from the flange
- A raw exhaust smell under the vehicle
Keep hands, loose clothing, and tools away from moving or rapidly heating components.
Look for Soot Around the Flange
A fresh leak may not show soot immediately, but an existing leak often leaves a black trail across the flange face. That trail usually points directly away from the gap.
Use Low-Pressure Smoke When the Leak Is Hard to Find
A smoke machine is safer and more precise than blasting the exhaust with high-pressure compressed air. Introduce low-pressure smoke into the cold system and inspect each connection.
Do not use excessive pressure. Exhaust components and gaskets are designed for flowing gas, not shop-air pressure.
Separate a Leak From a Rattle
| Symptom | Likely Flange Leak | Likely Metal Contact or Rattle |
|---|---|---|
| Sound | Tick, hiss, or puff | Buzz, clank, or metallic vibration |
| When it happens | Often strongest during cold start and acceleration | Often appears within a narrow rpm range |
| Visual evidence | Soot or condensation at a joint | Fresh shiny contact mark on pipe, brace, or heat shield |
| Typical correction | Recenter gasket, clean flange, correct alignment, retighten evenly | Reposition pipe, correct hanger preload, increase clearance |
Run a Heat Cycle and Inspect Everything Again
A cold installation is not finished just because it sounds clean at idle.
- Lower the car and take a controlled 10–15 minute drive.
- Use light and moderate throttle rather than immediately making high-rpm pulls.
- Listen for rattles during takeoff, engine braking, and approximately 1,500–3,000 rpm.
- Park the car and let the exhaust cool completely.
- Raise it safely and inspect the flanges, hangers, and tip again.
Check for new soot, shifted gaskets, loose hardware, stretched rubber isolators, and fresh contact marks. Stainless steel systems can settle slightly after their first heating and cooling cycle.
What the Single-Exit G35 Installation Reveals About Sound
The G35 single-exit installation reviewed for this guide reinforces something experienced VQ owners already know: the biggest immediate change is not a dramatic shove in the seat. It is sound.
A 3-inch single-exit catback generally gives the VQ35DE a deeper idle and a more aggressive tone as rpm rises. Keep the catalytic converters and a properly functioning resonator, and the sound can remain relatively controlled. Add test pipes, a non-resonated Y-pipe, or headers, and the same rear exhaust may become much louder and sharper.
Before combining several exhaust parts, read the comparison of G35 headers vs. test pipes vs. cat-backs. Each component changes a different section of the system, and installing all of them at once makes it harder to identify where rasp, drone, or a leak began.
Would an Additional Resonator Help?
It can, depending on the rest of the system. A quality resonator targets certain high-frequency pulses and can reduce rasp or an irritating cruising frequency. It does not repair:
- A leaking gasket
- A warped flange
- A pipe touching a heat shield
- An extension pipe with the wrong length
- A muffler installed under excessive hanger tension
Fix the mechanical installation first. Judge the sound after the leaks and rattles are gone.
If the car also has test pipes—or the owner is considering them—understand what G35 test pipes replace before changing the rear exhaust again. Catback parts sit behind the catalytic-converter section; test pipes change the front half of the sound equation and carry separate emissions considerations.
Common G35 Cat Back Install Problems
| Problem | Most Likely Causes | What to Do |
|---|---|---|
| Tip sits too far under the bumper | Missing or short extension, incorrect pipe direction, pipe not fully seated | Measure overall length, verify extension orientation, and loosen all joints before repositioning. |
| Tip sticks out too far | Extension too long, wrong body-style system, incomplete slip-joint engagement | Confirm application and pipe overlap. Do not pull the hangers rearward to hide the problem. |
| Hanger will not reach | Extension installed backward, wrong extension, flange tightened too early, rotated mid-pipe | Loosen the full system, verify pipe direction, and let every joint move before trying the hanger again. |
| Flange leaks despite tight bolts | Off-center gasket, warped flange, rust scale, uneven tightening | Remove the joint, clean and inspect both faces, replace the gasket, and tighten progressively. |
| Rattle near 2,000 rpm | Pipe touching a brace or heat shield, worn isolator, excessive hanger preload | Look for shiny contact marks and adjust the system while all flanges are loose. |
| Tip moves after driving | Thermal expansion, loose hardware, stretched isolator, locked-in pipe tension | Let the exhaust cool, release the tension, realign, and complete another heat-cycle check. |
| New exhaust sounds thin or raspy | Small flange leak, test pipes, non-resonated front section, loose silencer | Rule out leaks and loose hardware before adding another muffler or resonator. |
How Long Does a G35 Catback Installation Take?
Ignore any promise that every driveway installation takes one hour. Vehicle condition matters more than the number of pipes in the box.
| Vehicle Condition | Reasonable Working Range | What Adds Time |
|---|---|---|
| Clean car, direct-fit parts, lift access | About 1.5–3 hours | Careful tip alignment and leak inspection |
| Driveway installation with jack stands | About 2–4 hours | Limited leverage and reduced clearance |
| Rusted hardware or damaged hangers | About 3–6 hours or longer | Cutting bolts, cleaning flanges, replacing isolators |
| Wrong extension or custom exhaust parts | No reliable bolt-on estimate | Measuring, fabrication, hanger relocation, or welding |
Take the car to an exhaust shop if the flanges do not meet naturally, a hanger is several inches away after all pipes are verified, or cutting and welding are required. There is no shame in using a lift and a fabricator. There is shame in melting the bumper because the tip was forced into place.
Final G35 Exhaust Installation Checklist
- Correct G35 year and body style confirmed
- Catback application confirmed for Coupe or Sedan
- Correct extension pipe available and installed in the proper direction
- Factory Y-pipe flange inspected
- Old gasket material completely removed
- New gaskets centered in every flange
- All exhaust sections loosely assembled before tightening
- Every metal hanger inserted into a healthy rubber isolator
- No isolator stretched excessively forward or backward
- Tip centered with safe bumper clearance
- Pipes clear the subframe, differential, braces, and heat shields
- Flanges tightened evenly and progressively
- No hiss, tick, or puff during cold start
- No rattle during a light rpm sweep
- Hardware, hangers, and tip rechecked after a complete heat cycle
Owners still comparing layouts can browse broader performance catback exhaust systems by pipe design and rear-exit style. For vehicle-focused options, the Nissan catback exhaust systems collection helps separate the available Nissan and related VQ-platform applications.
A Good G35 Catback Install Should Sit Naturally
Listen, this is the test that matters: before final tightening, the exhaust should already look like it belongs under the car.
The extension pipe should put the muffler in the correct neighborhood. The hangers should carry the weight without being stretched like rubber bands. The flange faces should meet without the bolts bending them together. The gasket should stay centered. The tip should sit where you want it, with room to move when hot.
That is a proper G35 catback exhaust install. Not the loudest startup clip. Not the fastest driveway time. A system that seals, clears the chassis, survives a heat cycle, and still sits straight the next morning.
G35 Catback Exhaust Install FAQ
Q1: Can I install a G35 catback exhaust at home?
A1: Yes, many owners can complete the job with jack stands, basic metric tools, hanger pliers, and safe working space. Rusted flange hardware, damaged hangers, or non-stock exhaust parts can turn it into a shop-level job.
Q2: Do I need an extension pipe for a G35 catback exhaust?
A2: It depends on the catback design and body style. A system originally dimensioned around a 350Z may require an extension for a G35 Coupe. Follow the exact product fitment instructions instead of choosing a universal length.
Q3: Does the Flashark single-exit catback require a G35 extension pipe?
A3: The current fitment information lists an extension pipe as required for 2003–2008 Infiniti G35 Coupe applications. Confirm whether the extension is included or sold separately before beginning installation.
Q4: Will a 350Z catback fit a G35 Coupe?
A4: Some 350Z-based systems can be installed on a G35 Coupe with the correct extension and compatible hanger layout. A matching front flange alone does not prove full fitment.
Q5: Will a G35 Coupe catback fit a G35 Sedan?
A5: Do not assume it will. The Sedan uses different body dimensions and may have different pipe lengths and hanger positions. Buy a system specifically confirmed for the Sedan unless professional fabrication is planned.
Q6: What size extension pipe does a G35 Coupe need?
A6: There is no universal extension length for every catback. Measure according to the specific system, Y-pipe connection, flange position, hanger location, and desired tip depth. Use the manufacturer's specified extension whenever available.
Q7: Can I reuse the factory exhaust gasket?
A7: Reuse is possible only when the original sealing component is designed to be reusable and remains undamaged. A crushed, cracked, burned, or corroded flat gasket should be replaced. Use the new matching gasket included with the catback when specified.
Q8: Why does my G35 exhaust flange leak after installation?
A8: Common causes include an off-center gasket, rust scale on the flange, warped flange faces, uneven bolt tightening, or pipes locked at the wrong angle. Remove and inspect the connection instead of simply adding more torque.
Q9: How do I find a leak in a G35 catback?
A9: Listen for ticking, hissing, or puffing during a cold start. Inspect the flanges for condensation and black soot. A low-pressure automotive smoke test can locate small leaks that are difficult to hear.
Q10: Why will my G35 exhaust hangers not line up?
A10: The extension may be the wrong length or facing backward, the mid-pipe may be rotated, a flange may have been tightened too early, or the system may not match the vehicle body style. Loosen every connection before trying to force the hanger into place.
Q11: Why is my G35 exhaust tip crooked?
A11: A crooked tip is usually caused by muffler rotation, uneven hanger tension, incorrect extension length, or final tightening before the rear section was aligned. Loosen the system, set the tip, and retighten progressively.
Q12: Should I tighten the front or rear exhaust flange first?
A12: First install and align the complete system loosely. Once the hangers support the exhaust and the tip is positioned, tighten progressively from the fixed front connection toward the rear while checking alignment after each joint.
Q13: How tight should G35 catback flange bolts be?
A13: Use the torque specification for the actual bolt size, flange design, and gasket. There is no single value that safely applies to every factory and aftermarket exhaust connection.
Q14: Does a G35 need a tune after a catback install?
A14: A basic catback normally does not require tuning because it does not remove the catalytic converters or relocate oxygen sensors. Tuning may be useful when the catback is combined with headers, test pipes, intake changes, or other airflow modifications.
Q15: Can a catback exhaust cause a check engine light on a G35?
A15: A correctly installed catback usually does not cause a check-engine light because the oxygen sensors and catalytic converters remain in their original section. Existing sensor faults, damaged wiring, or other exhaust modifications may still trigger a code.
Q16: Why does my G35 catback rattle at certain rpm?
A16: The pipe or muffler may be contacting a heat shield, brace, subframe, or bumper only when the engine moves. Look for fresh shiny contact marks and inspect whether the hangers are holding the system under tension.
Q17: Should I add a resonator to a G35 single-exit exhaust?
A17: A resonator can reduce certain rasp or drone frequencies, especially when the car also has test pipes or a less-restricted Y-pipe. It will not repair a leaking flange, poor tip alignment, or metal-to-metal contact.
Q18: How long should a G35 catback installation take?
A18: A clean bolt-on installation may take roughly 1.5–3 hours with good access. A driveway job often takes 2–4 hours, while rusted hardware, damaged flanges, or incorrect extension parts can push the job beyond six hours.

Steven Chen
Automotive Performance Specialist | Engine & Exhaust Systems
Steven focuses on practical engine performance, exhaust fitment, and real-world upgrade paths for classic and modern enthusiast vehicles. He reviews small-block Ford, LS, truck, and street/strip applications with one goal in mind: helping builders choose parts that actually work together. His philosophy: "Good power starts with the right combination, not the biggest part."











