


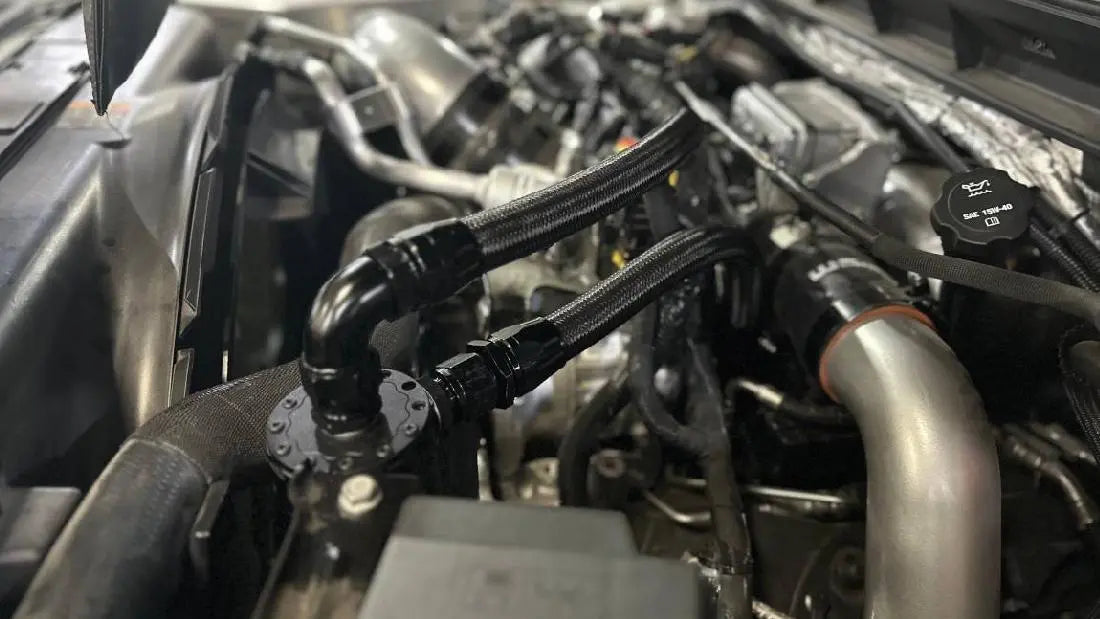
An L5P emissions-system modification is not a single-part job. The result depends on the truck, the hardware being changed, the remaining exhaust and emissions components, the sensor layout, and the calibration strategy. Mechanical fitment is only one part of the decision; road-use rules, diagnostic behavior, warranty effects, and safe installation also matter.
This guide is intended for owners researching the 6.6L L5P Duramax used in Chevrolet Silverado HD and GMC Sierra HD applications. It explains the systems commonly discussed under the broad term L5P delete kit, how those parts differ, what to check before ordering, and why a generic set of removal instructions should never replace a vehicle-specific service manual.
- An L5P delete kit is a broad shopping term, not a precise description of one fixed group of parts.
- DPF, DOC, SCR/DEF, EGR, CCV, downpipe, up-pipe, and calibration changes perform different functions and are not automatically interchangeable.
- Match every part to the vehicle year, engine, model, cab and chassis configuration, emissions equipment, sensor layout, and exhaust connection before ordering.
- Hardware changes can affect warning lights, diagnostic readiness, engine operation, and calibration requirements.
- Mechanical installation does not establish road legality. Review federal, state, local, and inspection requirements before modifying emissions-related equipment.
- Use a vehicle-specific service manual and product instructions. Do not rely on a universal removal sequence or generic torque values.
Understanding L5P Delete Kits
The L5P is a turbocharged 6.6L Duramax diesel engine. Trucks equipped with this engine use several systems to manage exhaust emissions, crankcase gases, engine operation, and onboard diagnostics. Owners often group modifications to these systems under one phrase—“L5P delete”—even when they are discussing different parts.
That distinction matters. An EGR-related part does not perform the same function as a DPF replacement pipe. A CCV reroute is not a DEF or SCR modification. A downpipe is part of the exhaust path near the turbocharger, while a DPF-related pipe concerns a different section of the aftertreatment system. Two products can look related in a search result and still require different installation work, supporting hardware, or electronic considerations.

What the Common L5P System Terms Mean
| Term | Primary Function or Location | Why the Distinction Matters | What to Check |
|---|---|---|---|
| EGR | Routes a controlled amount of exhaust gas into the intake path under specified operating conditions. | EGR hardware involves engine-bay plumbing, coolant routing, valves, and electronic monitoring. It is not the same as replacing the exhaust aftertreatment section. | Vehicle application, coolant connections, brackets, wiring, calibration implications, and package contents. |
| DOC | The diesel oxidation catalyst is part of the exhaust aftertreatment system. | DOC and DPF are separate components even when they are packaged close together in an exhaust assembly. | Exact exhaust layout, sensor positions, flange or clamp connections, and local emissions requirements. |
| DPF | Captures particulate matter and operates with a regeneration strategy. | A “DPF delete pipe” is not automatically a complete solution for the other aftertreatment or electronic systems. | Pipe routing, diameter, wheelbase or body configuration, sensor provisions, downstream connection, and calibration. |
| SCR and DEF | The SCR system uses diesel exhaust fluid to reduce NOx emissions. | DEF is the fluid; SCR is the emissions-control process and hardware. The terms should not be used as if they describe the same physical part. | Aftertreatment configuration, fluid-system hardware, sensors, electronic monitoring, and applicable regulations. |
| CCV | Manages crankcase vapors and pressure. | A CCV reroute addresses crankcase ventilation, not the DPF, EGR, or SCR system. | Hose routing, drainage, sealing, intake connection, cold-weather operation, and vehicle-specific fitment. |
| Downpipe and up-pipe | These pipes are located around the turbocharger and connect different portions of the exhaust path. | They should not be treated as generic substitutes for a DPF-related pipe or a complete exhaust system. | Turbo connection, flange style, sensor locations, heat shielding, chassis clearance, and downstream compatibility. |
| Calibration or tuning | Controls how the ECM and related modules operate and monitor the engine and emissions systems. | Clearing a fault code is not the same as correcting the hardware, wiring, sensor, or calibration condition that caused it. | Vehicle support, installed hardware, software licensing, module compatibility, diagnostic readiness, and legal use. |
Removing or disabling emissions-control equipment can violate federal, state, provincial, or local law and may affect inspection eligibility, registration, resale, warranty coverage, and insurance. Mechanical fitment does not establish legal use. Review the rules that apply to the vehicle and its intended use before making any emissions-related modification.
What Can Change After an L5P Emissions-System Modification?
Exhaust restriction, turbocharger operation, exhaust temperature, sensor feedback, fueling, diagnostic logic, and calibration are connected. Changing one part of that system can affect the others. That is why a hardware-only explanation is incomplete.
Exhaust Flow and Backpressure
Removing a restrictive or damaged component can reduce pressure loss in that section of the exhaust. The actual engine response depends on the complete flow path, including the turbocharger connections, pipe transitions, bends, catalysts, filters, mufflers, and any exhaust leaks. A larger pipe is not automatically the right pipe. Connection design, routing, sealing, and vehicle clearance matter just as much as nominal diameter.
Power and Torque
No fixed horsepower or torque result applies to every L5P Duramax. Engine condition, fuel quality, calibration, turbocharger control, intake restriction, downstream exhaust, transmission strategy, ambient conditions, and the test method all affect the result. Sound changes or faster perceived response should not be treated as proof of a measured power increase.
Fuel Consumption
Fuel economy may change when exhaust restriction, regeneration behavior, engine load, tire size, gearing, calibration, driving style, payload, or idle time changes. A modification alone does not guarantee better mileage. Compare hand-calculated fuel use over similar routes and operating conditions if fuel consumption is part of the decision.
Reliability and Maintenance
Removing one maintenance concern can introduce different service requirements. Exhaust leaks, loose clamps, heat damage, wiring contact, poor coolant sealing, crankcase-pressure issues, or an unsuitable calibration can create new problems. Long-term reliability depends on the complete combination and the quality of the work—not simply on whether a component was removed.
How to Choose an L5P Delete Kit or Related Component
Start with the truck, not the product name. “L5P delete kit” can refer to substantially different configurations, so the shopping title alone is not enough to establish compatibility.
| Check | Why It Matters | Useful Information to Gather |
|---|---|---|
| Vehicle identity | Similar trucks can use different frames, exhaust routing, wheelbases, body layouts, or emissions configurations. | Model year, Chevrolet or GMC model, VIN details, 6.6L L5P engine, cab, bed, and chassis configuration. |
| System being changed | An EGR component, exhaust pipe, CCV reroute, and calibration tool solve different problems. | The exact component being serviced, replaced, rerouted, or retained. |
| Connection points | A pipe can have the right general shape but the wrong flange, clamp, length, or sensor provision. | Photos, flange type, clamp style, sensor bungs, pipe routing, and downstream exhaust connection. |
| Package contents | Product configurations can differ even when their titles are similar. | Selected SKU, hardware list, gaskets, clamps, hoses, brackets, instructions, and separately required parts. |
| Electronic requirements | Sensors and module diagnostics can react to hardware changes. | ECM and TCM support, sensor handling, diagnostic readiness, software terms, and intended use. |
| Legal use | A part that can be installed mechanically may still be prohibited for the vehicle or intended use. | Federal, state, provincial, local, inspection, registration, and competition-use requirements. |
Flashark offers a 6.6L L5P Duramax EGR-related kit for selected Chevrolet and GMC applications. Treat it as an EGR-system product, not as a universal substitute for every part described as an L5P delete kit. Match the selected configuration to the truck and review the package contents before ordering.
Owners comparing a wider range of configurations can also review the Flashark EGR delete kit collection. Product listings with similar names may cover different engines, years, chassis, or included components, so compare the complete listing instead of relying on the collection image or title alone.

How to Approach an L5P Delete Installation Safely
An L5P installation can involve hot exhaust hardware, coolant connections, electrical connectors, sensors, heavy underbody components, and difficult-to-reach fasteners. The exact process changes with the installed product and vehicle configuration. Use the service information and instructions written for that combination.
Step 1: Identify the Truck and Installed System
Record the model year, make, model, engine, cab, bed, and chassis configuration. Inspect the complete intake, engine-bay, turbocharger, aftertreatment, and downstream exhaust path. Do not assume that two trucks with the same engine code use every connection in the same position.
Step 2: Compare the Part to the Vehicle
Lay out the parts before disassembly. Compare flanges, clamps, hose connections, brackets, sensor provisions, pipe length, bends, and mounting points. Package contents vary by selected configuration, so identify any separately required hardware before the truck is taken apart.
Step 3: Review the Service Procedure
Use the vehicle service manual and product instructions to establish the correct disassembly sequence, lifting points, fluid-handling procedure, torque specifications, and electronic precautions. Generic torque figures should not be substituted for the values assigned to the actual fastener and joint.
Step 4: Prepare a Safe Work Area
Let the engine and exhaust cool completely. Work on a level surface with suitable lighting and ventilation. If the vehicle must be raised, use equipment rated for its weight and support it at the specified lifting points. Never work beneath a vehicle supported only by a jack.
Step 5: Protect Electrical and Fluid Systems
Follow the service procedure for battery isolation. Battery disconnection helps reduce the risk of an electrical short or unintended cranking, but it does not make the entire job safe by itself. Cap or position open fluid connections as directed, and keep wiring away from sharp edges and hot exhaust surfaces.
Step 6: Support Components Before Releasing Them
Exhaust and aftertreatment assemblies can be heavy and awkward. Support a component before loosening the fasteners that hold it in place. Avoid loading a turbo connection, flex section, sensor harness, coolant line, or adjacent bracket with the weight of a hanging assembly.
Step 7: Align the Complete System Before Final Tightening
Here is the part that matters: do not fully tighten every connection as soon as it is installed. Assemble the system loosely enough to check routing, clamp position, hanger alignment, driveshaft clearance, frame clearance, body clearance, wiring, hoses, and heat shielding.
A system installed under tension can shift as it heats and cools. Take a minute before tightening that clamp. Check the complete exhaust path, then apply the specified torque in the required sequence.
Step 8: Inspect Sensors, Wiring, Hoses, and Heat Protection
Make sure connectors are locked, harnesses are supported, hoses are not twisted, and no wiring can contact the exhaust. Retain or position heat shields as required by the product and service procedure. Similar-looking connectors should not be treated as interchangeable.
Step 9: Perform Static Checks Before Operation
Check fluid levels, fastener engagement, clamp placement, tool removal, underbody clearance, and electrical connections. If the work involves coolant plumbing, follow the specified filling and air-bleeding process. Do not start the engine merely to clear or ignore a fault condition.
Step 10: Diagnose the System as a Whole
After any authorized modification or repair, monitor for fluid leaks, exhaust leaks, abnormal temperature, contact between parts, warning lights, unusual noises, reduced-power operation, or changing fluid levels. A stored diagnostic code should be diagnosed rather than repeatedly erased. If the truck does not behave as expected, stop and inspect the mechanical, electrical, and calibration sides of the system.

Tuning, Warning Lights, and Diagnostic Behavior
Tune requirements vary by vehicle and installed hardware. Sensor location, exhaust leaks, damaged wiring, retained emissions equipment, module software, and calibration can all affect warning-light behavior. A truck should be evaluated as one system: engine hardware, intake, turbocharger, exhaust, emissions equipment, sensors, ECM, TCM, and calibration.
Do not assume that purchasing a programmer guarantees compatibility, prevents a check-engine light, or creates a legally compliant configuration. HP Tuners states that its products are intended for diagnostics, scanning, logging, data acquisition, and emissions-compliant or exempted calibration work. Its tools are not to be used as defeat devices. Review the HP Tuners emissions compliance statement before considering that platform.
Legal, Inspection, and Warranty Considerations
In the United States, the Clean Air Act prohibits tampering with required emissions controls and prohibits the manufacture, sale, or installation of defeat devices. EPA guidance specifically identifies products that remove aftertreatment components or alter onboard diagnostics as potential defeat devices. State and local rules may add inspection, registration, smoke, or road-use requirements.
Review the EPA Tampering Policy and the rules for the jurisdiction where the vehicle is registered and operated. A label such as “off-road” or “race use” does not by itself determine whether a modification is lawful.
Emissions-system changes may also affect powertrain or emissions warranty coverage. Obtain the applicable warranty terms in writing and keep the original service records, product instructions, and invoices associated with the truck.
Frequently Asked Questions About L5P Delete Kits
Q1: What is an L5P delete kit?
A1: “L5P delete kit” is a broad shopping term for hardware or electronic changes involving one or more emissions-related systems on a 6.6L L5P Duramax. It does not describe one standard package. EGR, DPF, DOC, SCR/DEF, CCV, turbo-area piping, and calibration products perform different functions.
Q2: What do I need to check before ordering an L5P delete kit?
A2: Match the part to the truck’s model year, Chevrolet or GMC model, 6.6L L5P engine, cab, bed, chassis configuration, emissions hardware, sensor layout, and exhaust connections. Review the selected SKU and package contents rather than relying on the product title alone.
Q3: How do you delete an L5P Duramax?
A3: There is no safe universal procedure. The work depends on the system being changed, the truck configuration, the selected hardware, the sensor layout, and the electronic strategy. Use vehicle-specific service information and product instructions, and review the legal requirements before changing emissions equipment.
Q4: Is an EGR delete kit the same as a DPF delete kit?
A4: No. The EGR system routes exhaust gas through engine-bay hardware and can involve coolant plumbing. The DPF is part of the exhaust aftertreatment system. The parts, connections, installation work, and diagnostic effects are different.
Q5: Does an L5P delete kit require tuning?
A5: Tune requirements vary by the vehicle and installed hardware. Changing monitored emissions equipment can affect module diagnostics and engine operation, but no single tuning requirement applies to every configuration. Check vehicle support, hardware compatibility, software terms, and applicable law.
Q6: Will an L5P delete kit cause a check-engine light?
A6: Warning-light behavior depends on the hardware, sensors, wiring, exhaust sealing, retained emissions components, and calibration. No-CEL operation should not be assumed. Diagnose the cause of a warning light instead of treating code clearing as a repair.
Q7: How much horsepower does an L5P delete add?
A7: There is no universal horsepower figure. Results depend on engine condition, calibration, fuel, turbocharger control, intake and exhaust configuration, transmission strategy, and the test method. A louder exhaust or different throttle feel is not a substitute for a controlled dyno comparison.
Q8: Can an L5P delete improve fuel economy?
A8: Fuel use can change with exhaust restriction, regeneration behavior, calibration, payload, gearing, tire size, idle time, route, weather, and driving style. A modification does not guarantee an improvement. Use hand-calculated fuel consumption over comparable operating conditions when evaluating mileage.
Q9: Is an L5P delete legal for street use?
A9: Mechanical installation does not establish legal use. In the United States, federal law restricts tampering with required emissions controls and the sale or installation of defeat devices. State, provincial, local, registration, and inspection rules may also apply.
Q10: Can HP Tuners be used to delete an L5P?
A10: HP Tuners does not authorize its tools to be used as defeat devices or to violate emissions requirements. Its products are intended for diagnostics, logging, data acquisition, and emissions-compliant or exempted calibration work. Review its compliance policy and applicable law before using any calibration platform.
Q11: Is a 2012 6.6L Duramax covered by L5P information?
A11: Do not use the model year or engine displacement alone to identify the engine platform. A 2012 6.6L Duramax should not be assumed to use the L5P configuration. Identify the engine and vehicle application through the VIN, emissions label, and service information before selecting parts.
Q12: What should I inspect after installation work?
A12: Check for coolant or exhaust leaks, loose fasteners, misaligned clamps, heat-shield interference, wiring contact, hose tension, abnormal temperature, unusual noise, warning lights, reduced-power operation, and changing fluid levels. Stop and diagnose any abnormal condition before continued operation.

Steven Chen
Automotive Performance Specialist | Engine & Exhaust Systems
Steven focuses on practical engine performance, exhaust fitment, and real-world upgrade paths for classic and modern enthusiast vehicles. He reviews small-block Ford, LS, truck, and street/strip applications with one goal in mind: helping builders choose parts that actually work together. His philosophy: "Good power starts with the right combination, not the biggest part."














2 comments
Mario
Estoy interesado en el kit para eliminar el sistema DPF en un GMC SAVAHANA 2012 MOTOR 6.6
Jimmy Ducharme
Anything for 24 LP5 yet im looking for a full delete downpipe and exhaust