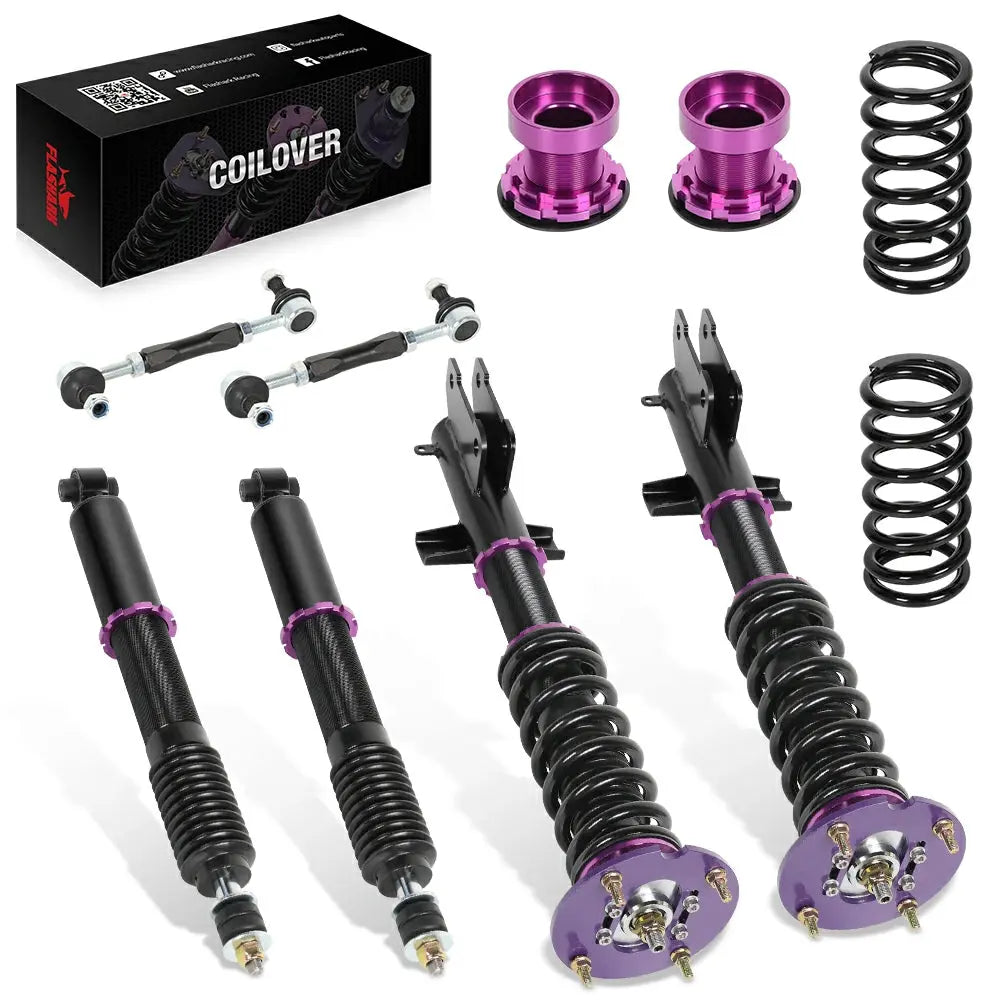

Installing coilovers on your Subaru WRX is one of the most effective ways to enhance ride performance, lower the vehicle’s stance, and prepare for spirited driving or track use. Whether you're driving a 2002–2007 Subaru WRX, a 2008–2014 Subaru WRX, or a 2015–2021 Subaru WRX, this guide walks you through each key step.
Why Install Coilovers on Your Subaru WRX?
Coilovers aren't just about looks—they provide key performance benefits for your WRX:
-
Improved Handling: Adjustable damping allows you to fine-tune ride comfort and cornering stability, enhancing overall performance.
-
Customizable Ride Height: You can lower your WRX for a more aggressive stance and adjust each corner for a level, balanced ride.
-
Better Road Feel: Coilovers offer increased responsiveness, providing a more connected, precise driving experience.
-
Versatile Performance: Whether you're on the street or the track, coilovers adapt to your needs with easy adjustments for ride quality and performance.
In short, coilovers improve both the look and handling of your WRX, making them a popular choice for performance enthusiasts.
Required Tools & Preparation
Before lifting your WRX or touching any suspension bolts, make sure you're fully equipped for a smoother, safer install.
You’ll need:
-
Floor Jack – To safely lift the car.
-
Jack Stands – For securely supporting the car once it's lifted.
-
Torque Wrench – To ensure bolts are tightened to the proper torque.
-
Socket Set (including deep sockets) – Required for suspension bolts, especially in tight spaces.
-
Breaker Bar – To help loosen stubborn bolts.
-
PB Blaster or Penetrating Oil – To loosen any rusted or stuck bolts.
-
Spring Preload Adjustment Tools – For adjusting the coilover spring preload (if applicable).
-
Gloves – To protect your hands while working.
-
Eye Protection – To protect your eyes from debris or other hazards.
Pre-installation:
-
Measure your current ride height from the fender to the wheel center and take notes on all four corners. This will help you set the coilover height later.
-
If your coilovers come pre-assembled, double-check that all locking collars are tight before proceeding.
Safely Lifting the Car
Raising the vehicle correctly is critical for your safety. Use a level surface and engage the parking brake.
Position the jack at the designated pinch weld or front/rear subframe, depending on your WRX generation. Once raised, place jack stands beneath the pinch welds. Always double-check stability before crawling underneath the car.
Front Coilover Removal & Installation
Replacing the front struts is the most involved part of the coilover install. Most of the hardware is easily accessible, but there are key details to watch for.

Removing the Front Suspension
Remove the front wheels. Unclip the brake lines and ABS sensor from the strut body. Use PB Blaster on the lower strut bolts.
Loosen and remove the two lower bolts connecting the strut to the steering knuckle. Then remove the three top nuts holding the strut mount inside the engine bay. Carefully remove the entire strut assembly.
Installing the New Coilover
Install the new coilover into the top mount first. Thread the nuts by hand without tightening. Then align the lower mount with the steering knuckle.
Insert and torque the lower bolts. Refer to the WRX factory service manual torque specs—typically 129 ft-lbs for the bottom bolts and 21 ft-lbs for the top nuts.
Torque Specifications
-
Lower strut bolts: 129 ft-lbs
-
Top strut mount nuts: 21 ft-lbs
-
End link bolts (if removed): 45 ft-lbs
Always torque bolts with the suspension loaded or follow manufacturer-specific guidelines.
Rear Coilover Removal & Installation
The rear suspension is slightly more accessible but still requires patience. Each WRX generation has unique trunk access and rear seat removal methods.

Accessing Rear Top Mounts
In 2008–2014 Subaru WRX models, you may need to remove trunk liner or rear seat cushions to access the strut towers. For 2015–2021 Subaru WRX, trunk access is often sufficient.
Spray the top nuts with lubricant ahead of time for easier removal.
Removing the Rear Strut Assembly
Support the lower control arm with a jack. Then, remove the lower bolt connecting the strut to the arm. Carefully lower the control arm to free the strut.
Inside the trunk or cabin, remove the two or three upper strut mount nuts. Slide out the rear strut.
Installing Rear Coilovers
Install the new coilover in reverse order. Secure the top mount first, then align the bottom mount and hand-tighten bolts.
Torque the lower strut bolt to 89 ft-lbs (check your WRX service manual for model-specific specs).
Initial Setup After Installation
Once installed, your coilovers need proper setup to avoid drivability issues and uneven tire wear.
Measuring and Adjusting Ride Height
Use your earlier measurements to adjust each coilover’s height. Aim for level corner-to-corner height unless you’re intentionally corner-balancing for performance.
Adjust the lower collar to raise or lower the perch. Avoid maxing out the threads on either end.
Setting Damping and Preload
Start with a neutral damper setting—usually the middle of the adjustment range. You can fine-tune later based on comfort or performance preferences.
Preload should be just enough to keep the spring snug, but not compressed beyond factory spec. Over-preloading can damage the damper rod or affect ride quality.
Locking Adjustments
Once height and preload are set, use spanner wrenches to fully tighten locking collars. A loose coilover collar can create dangerous suspension slop.
Final Checks & Post-Install Steps
Your install isn't finished until you complete these crucial final checks.
Bolt Recheck and Safety
Double-check every torque point—especially lower bolts and top mounts. Some installers also mark bolts with paint to monitor movement over time.
Suspension Settling
Drive the car gently around the block or perform a few “bounce tests” to settle the suspension. Re-measure ride height and verify it hasn't dropped too far.
Wheel Alignment
Book a professional alignment as soon as possible. Incorrect camber or toe settings can ruin tires quickly and affect steering response.
Real-World Tips From the Community
Community members from WRX forums consistently recommend installing front and rear coilovers at the same time. This prevents stress from uneven ride height or sway bar preload.
Many also suggest using a floor jack under the control arm to help align lower mounts. On older 2002–2007 Subaru WRX models, be prepared to replace rusty bolts or end links.
Lastly, always check torque settings again after 100–200 miles of driving.

Conclusion
Installing coilovers on a WRX is a rewarding upgrade, but it requires care, the right tools, and attention to detail. Whether you drive a classic GD, GR, or VA chassis, following these steps helps ensure a safe and optimized suspension setup.
With your WRX properly lowered and dampers dialed in, you'll enjoy sharper handling and a more aggressive stance—on the street or the track.